
OpenID Connect Authentication Configuration Guide with Microsoft Entra ID
Introduction
To configure authentication via your OpenID Connect provider, follow the instructions provided in this documentation.
Configuration with Microsoft Entra ID
Step 1: Access the Azure Portal
- Log in to the Azure portal.
- Navigate to the App registrations section.

Step 2: Create a New Application
- Click on New registration.
- Fill in the required fields:
Name: Give a name to the application.
Redirect URI: Use the URL provided by your Wikit contact, which must be in the following format. The redirection must be for a web application type
https://auth.wikit.ai/realms/wikit-prod/broker/{slug-organisation}/endpointCheck Access tokens (used for implicit flows);
Check ID tokens (used for implicit and hybrid flows);
Check Accounts in this organizational directory only.

- Click Register.

Step 3: Collect Necessary Information
On the newly created application page, note the following information:
- Application (client) ID: ✏️
- Directory (tenant) ID: ✏️

Step 4: Generate a Client Secret
- Go to the Certificates & secrets section.
- Click on New client secret.
- Follow the instructions to generate a secret.
- Note the value of the generated secret: ✏️

Step 5: Add optional claims
To allow Wikit to retrieve the information required for automatic user creation, you must add certain claims to your Microsoft Entra ID application.
- In your Azure application, open the Token configuration section.
- Click Add optional claim.
- Select the token type used by your configuration.
- Add at least the claim that allows the user's email to be retrieved.
- Approve the Microsoft Graph permission request if Azure prompts you to do so.
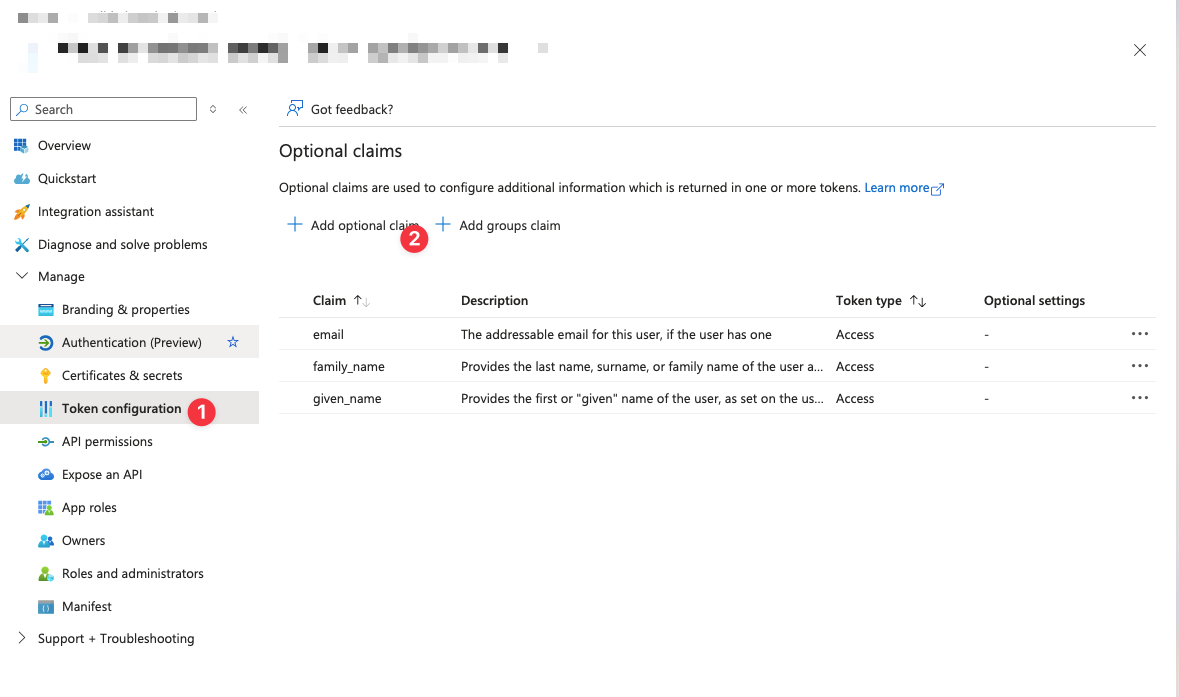
After this step, the user information required by Wikit can be transmitted during authentication.

Step 6
Return the following information to us:
- Application (client) ID: ✏️
- Directory (tenant) ID: ✏️
- Secret ✏️
- UPN or email