
IAM Console Documentation
User Management
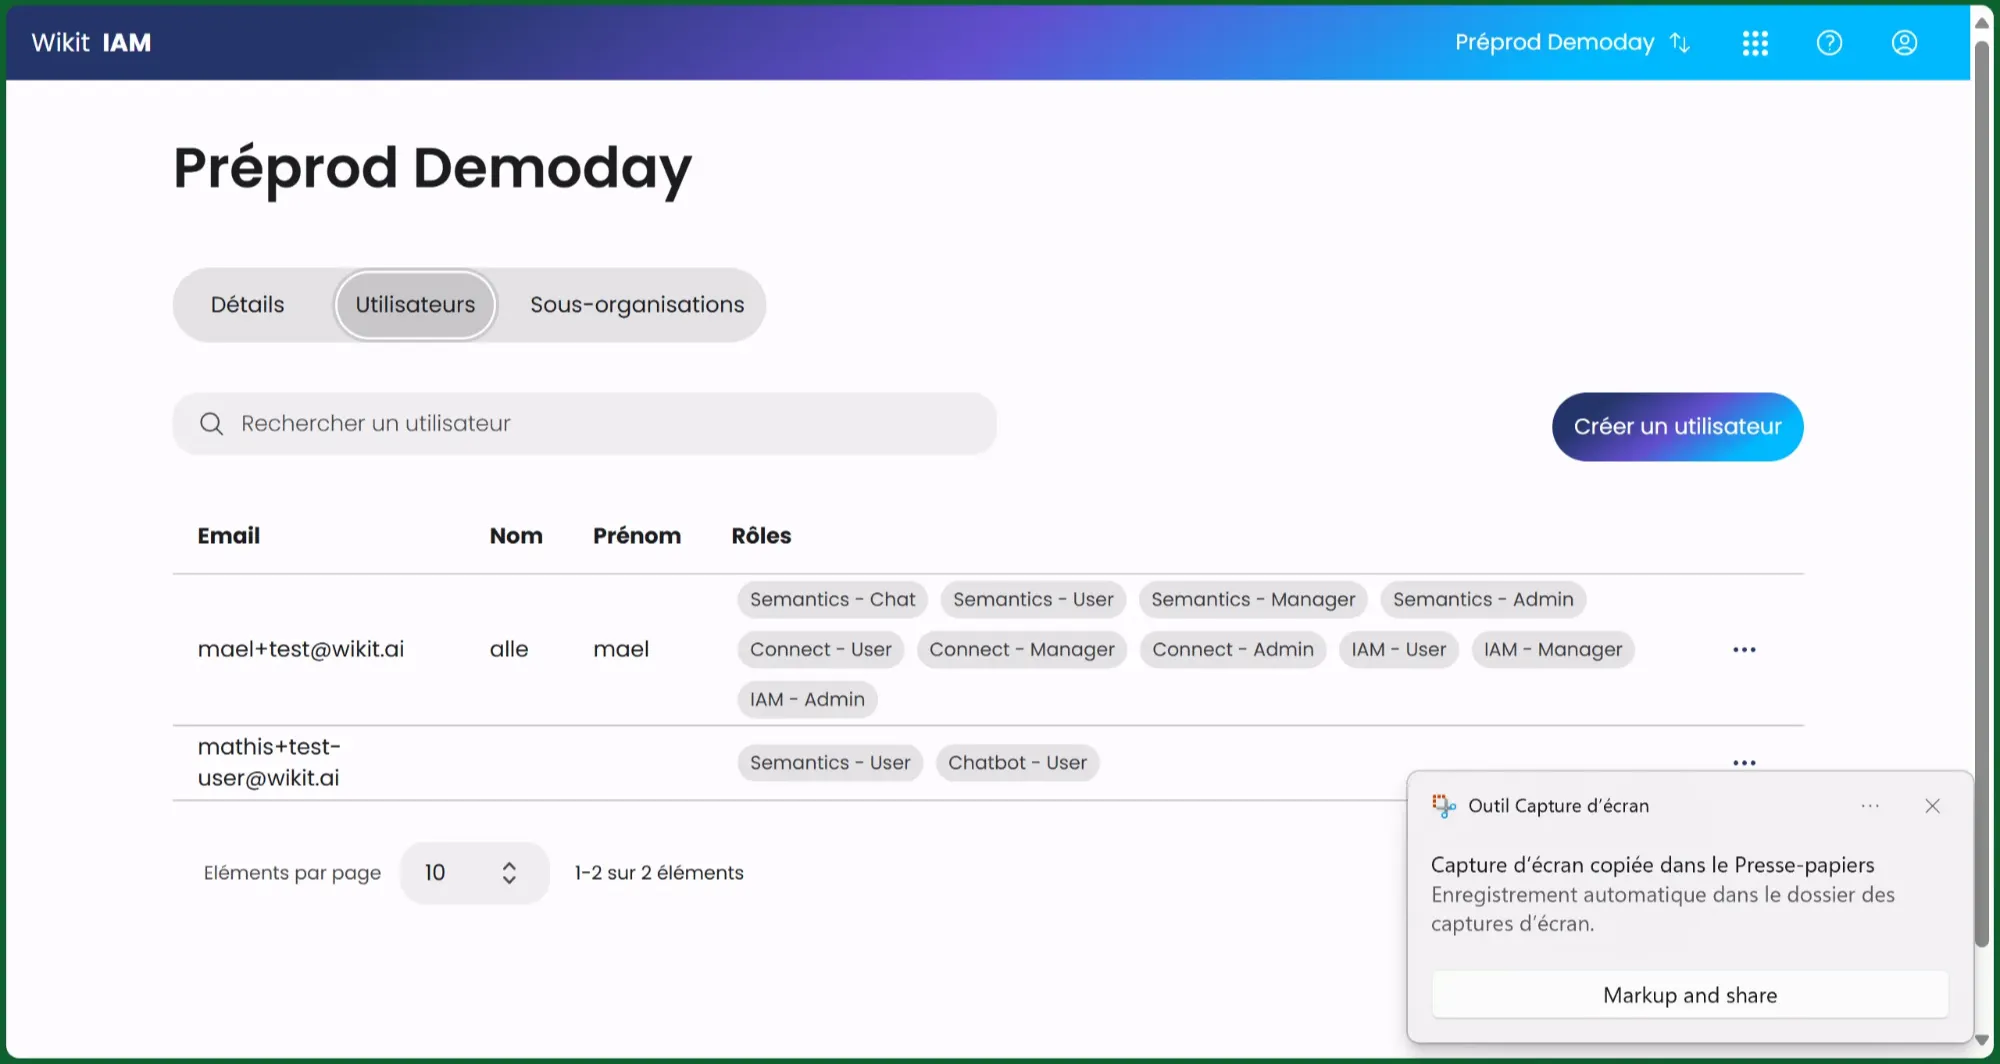
The Users tab allows you to manage access and permissions for members of your organization. This centralized interface enables you to view, create, and modify user accounts.
Navigation
The page is organized with three main tabs:
- Details: General organization information
- Users: Member management
- Sub-organizations: Organizational structure
Main Interface
Search bar
- A search field at the top of the page allows for quick filtering of users
- The search is performed on the email, last name, or first name
"Create user" button
- Located at the top right of the page
- Allows adding a new user to the organization
User list
The table presents essential information for each user:
- Email: User's professional email address
- Last Name: Last name
- First Name: First name
- Roles: Badges indicating the different roles assigned
- Actions menu: "..." button providing access to available actions
Pagination
At the bottom of the page, you will find:
- A selector to choose the number of items displayed per page (default: 10)
- An indication of the total number of users
- Controls to navigate between pages
Note: Any modification of access rights takes effect immediately for the concerned users.
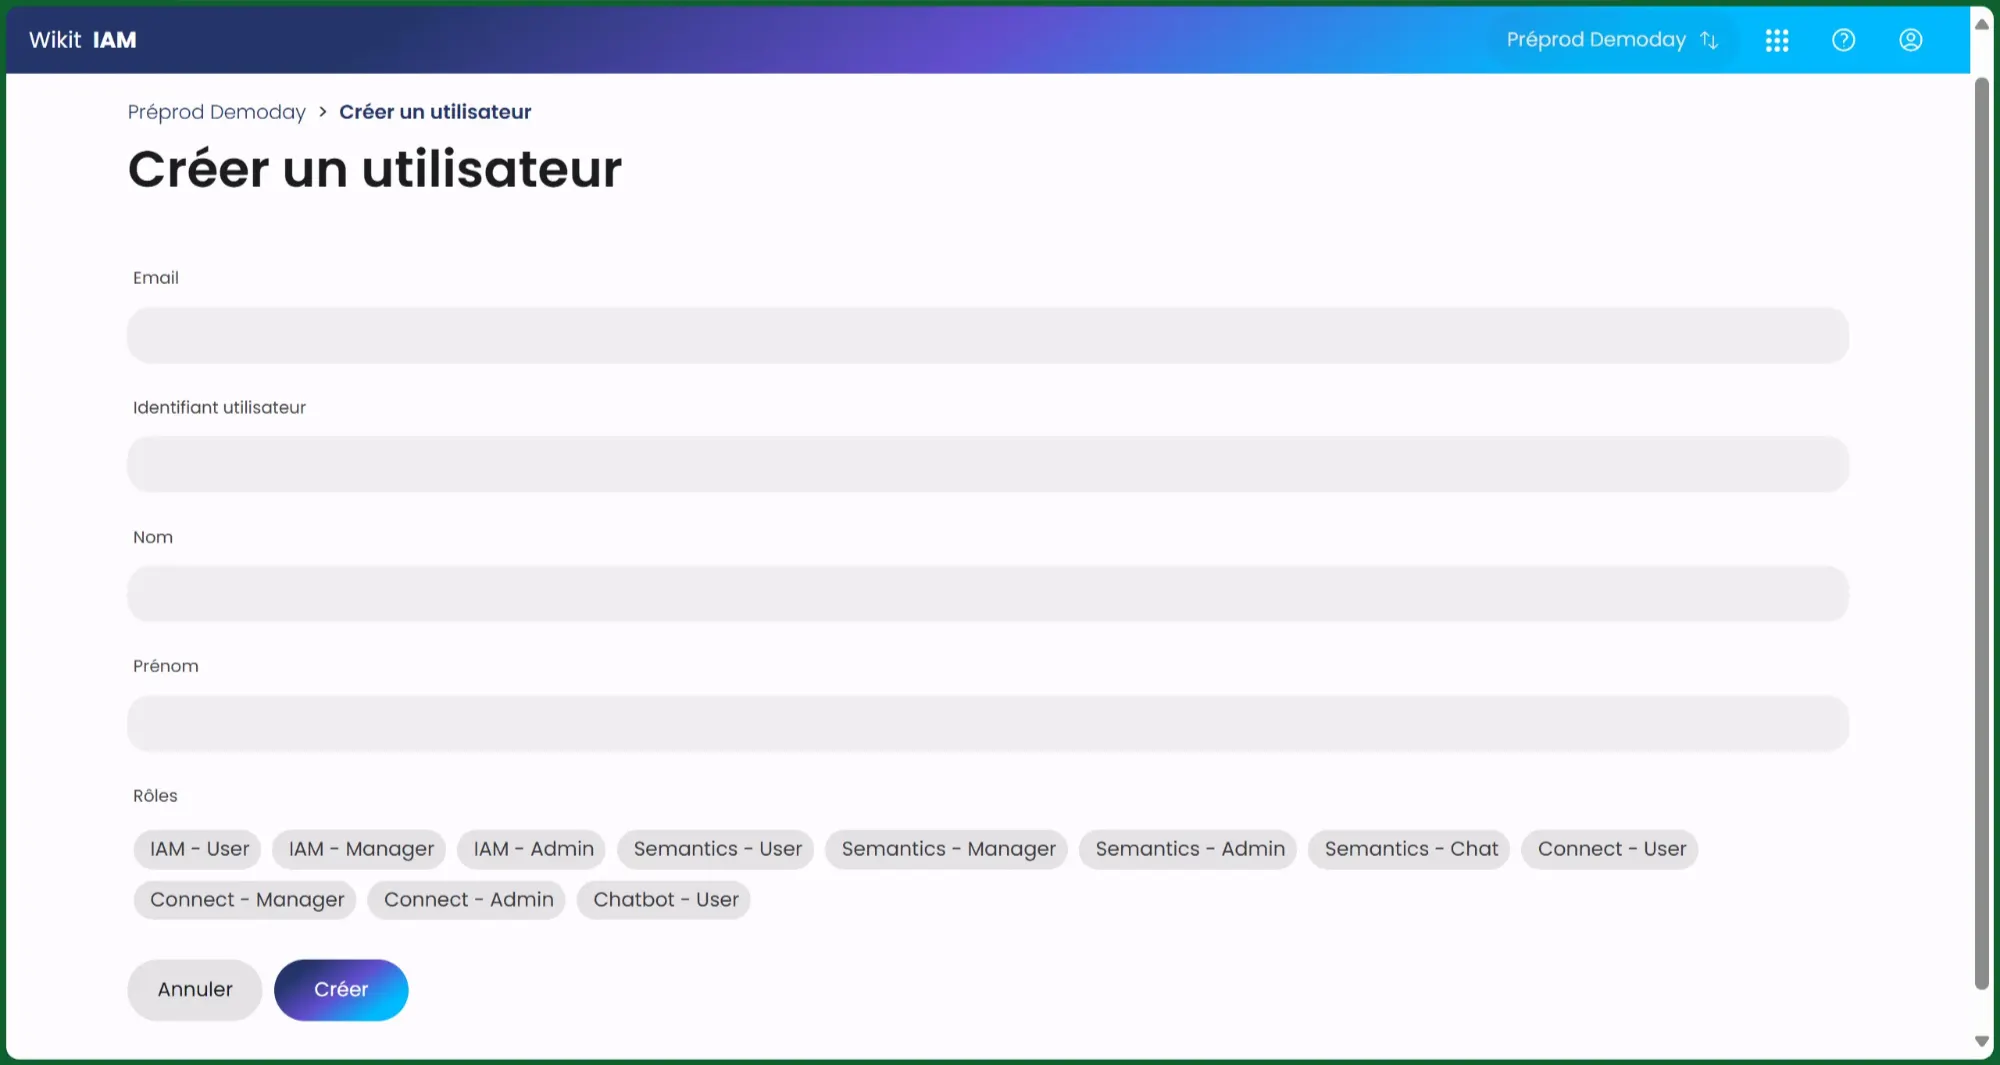
Create a user
This page allows you to add a new user to your organization. The creation form consists of several fields to fill in.
Accessing the page
To create a new user:
- Go to the "Users" tab
- Click the "Create user" button at the top right
Form Fields
Basic Information
- Email: User's professional email address
- User ID (optional field): Unique identifier for the user used by ITSM connectors. By default, the user logs into the ITSM tool with their email address.
- Last Name: User's last name
- First Name: User's first name
Role Assignment
- A series of badges representing the different available roles
- Select the appropriate roles by clicking on them
- Selected roles will appear highlighted
Action Buttons
At the bottom of the form, you will find two options:
- Cancel: Abandons creation and returns to the user list
- Create: Validates the creation of the new user with the configured settings
Note: All fields marked with an asterisk (*) are mandatory and must be filled in before the user can be created.