
Data Source Management
Data Source Overview
The Data Sources page is the central space for managing the platform's knowledge. It displays all the documentary sources that feed your Apps, allowing for a global view and simplified management of your knowledge base.
Main Interface
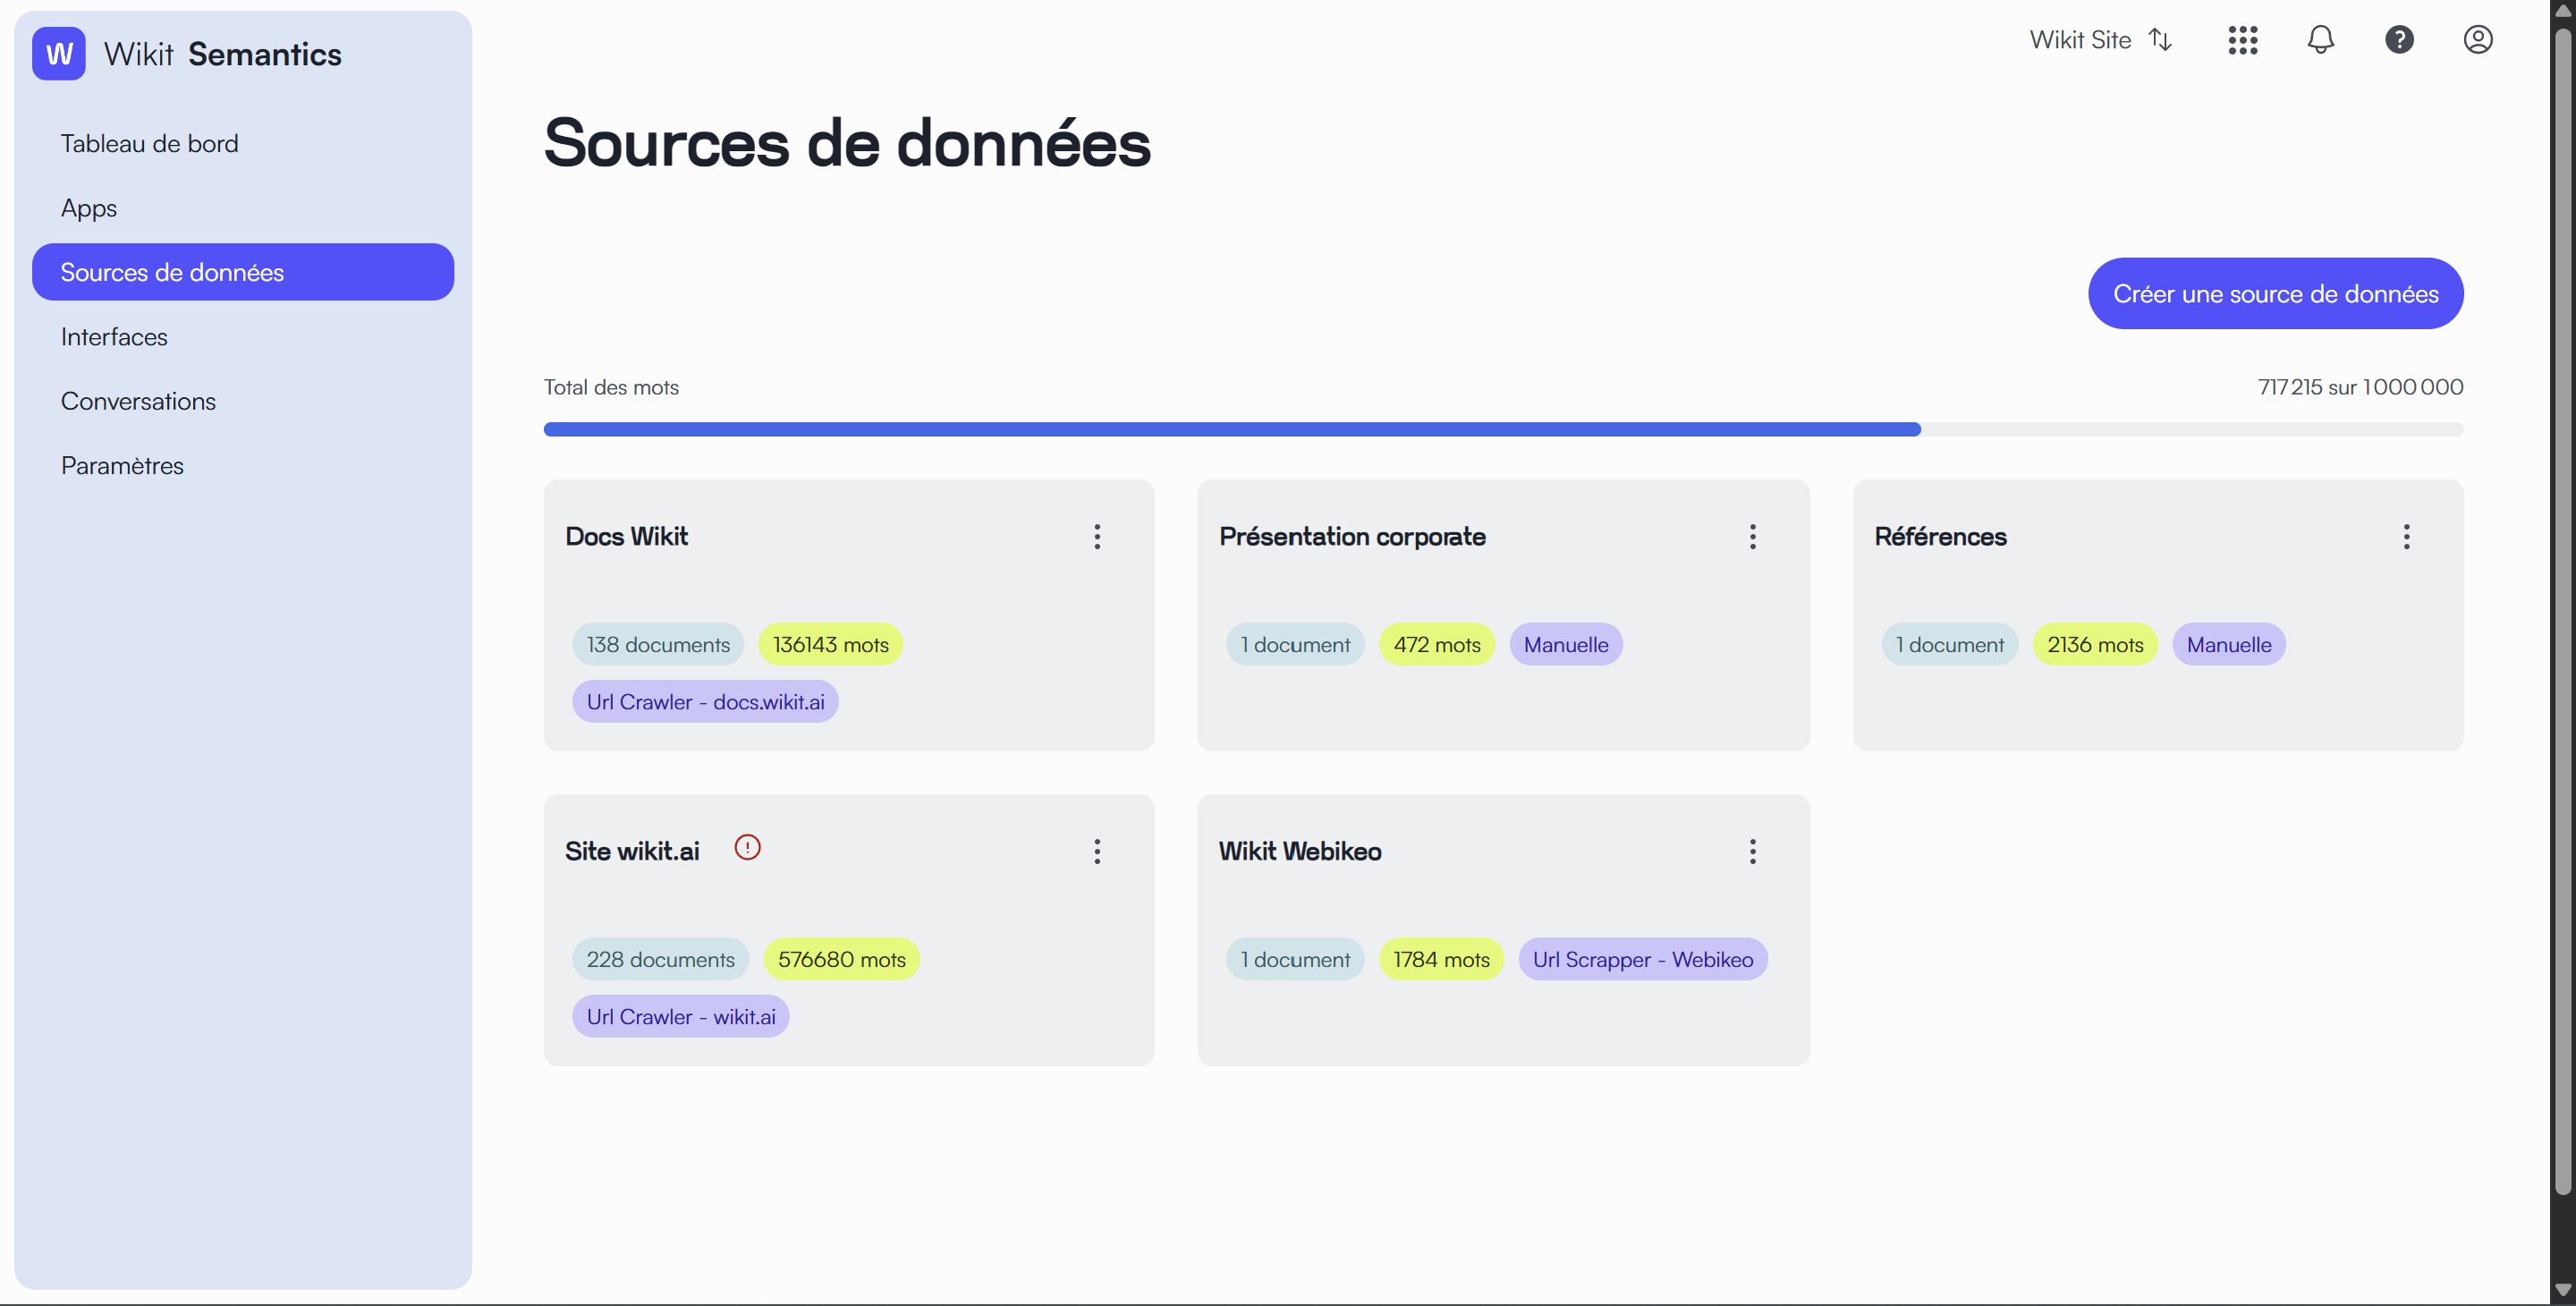
The interface consists of a grid of cards, each representing a distinct data source. At the top of the page, a blue "Create a data source" button allows you to add new sources to your collection.
Data Source Cards
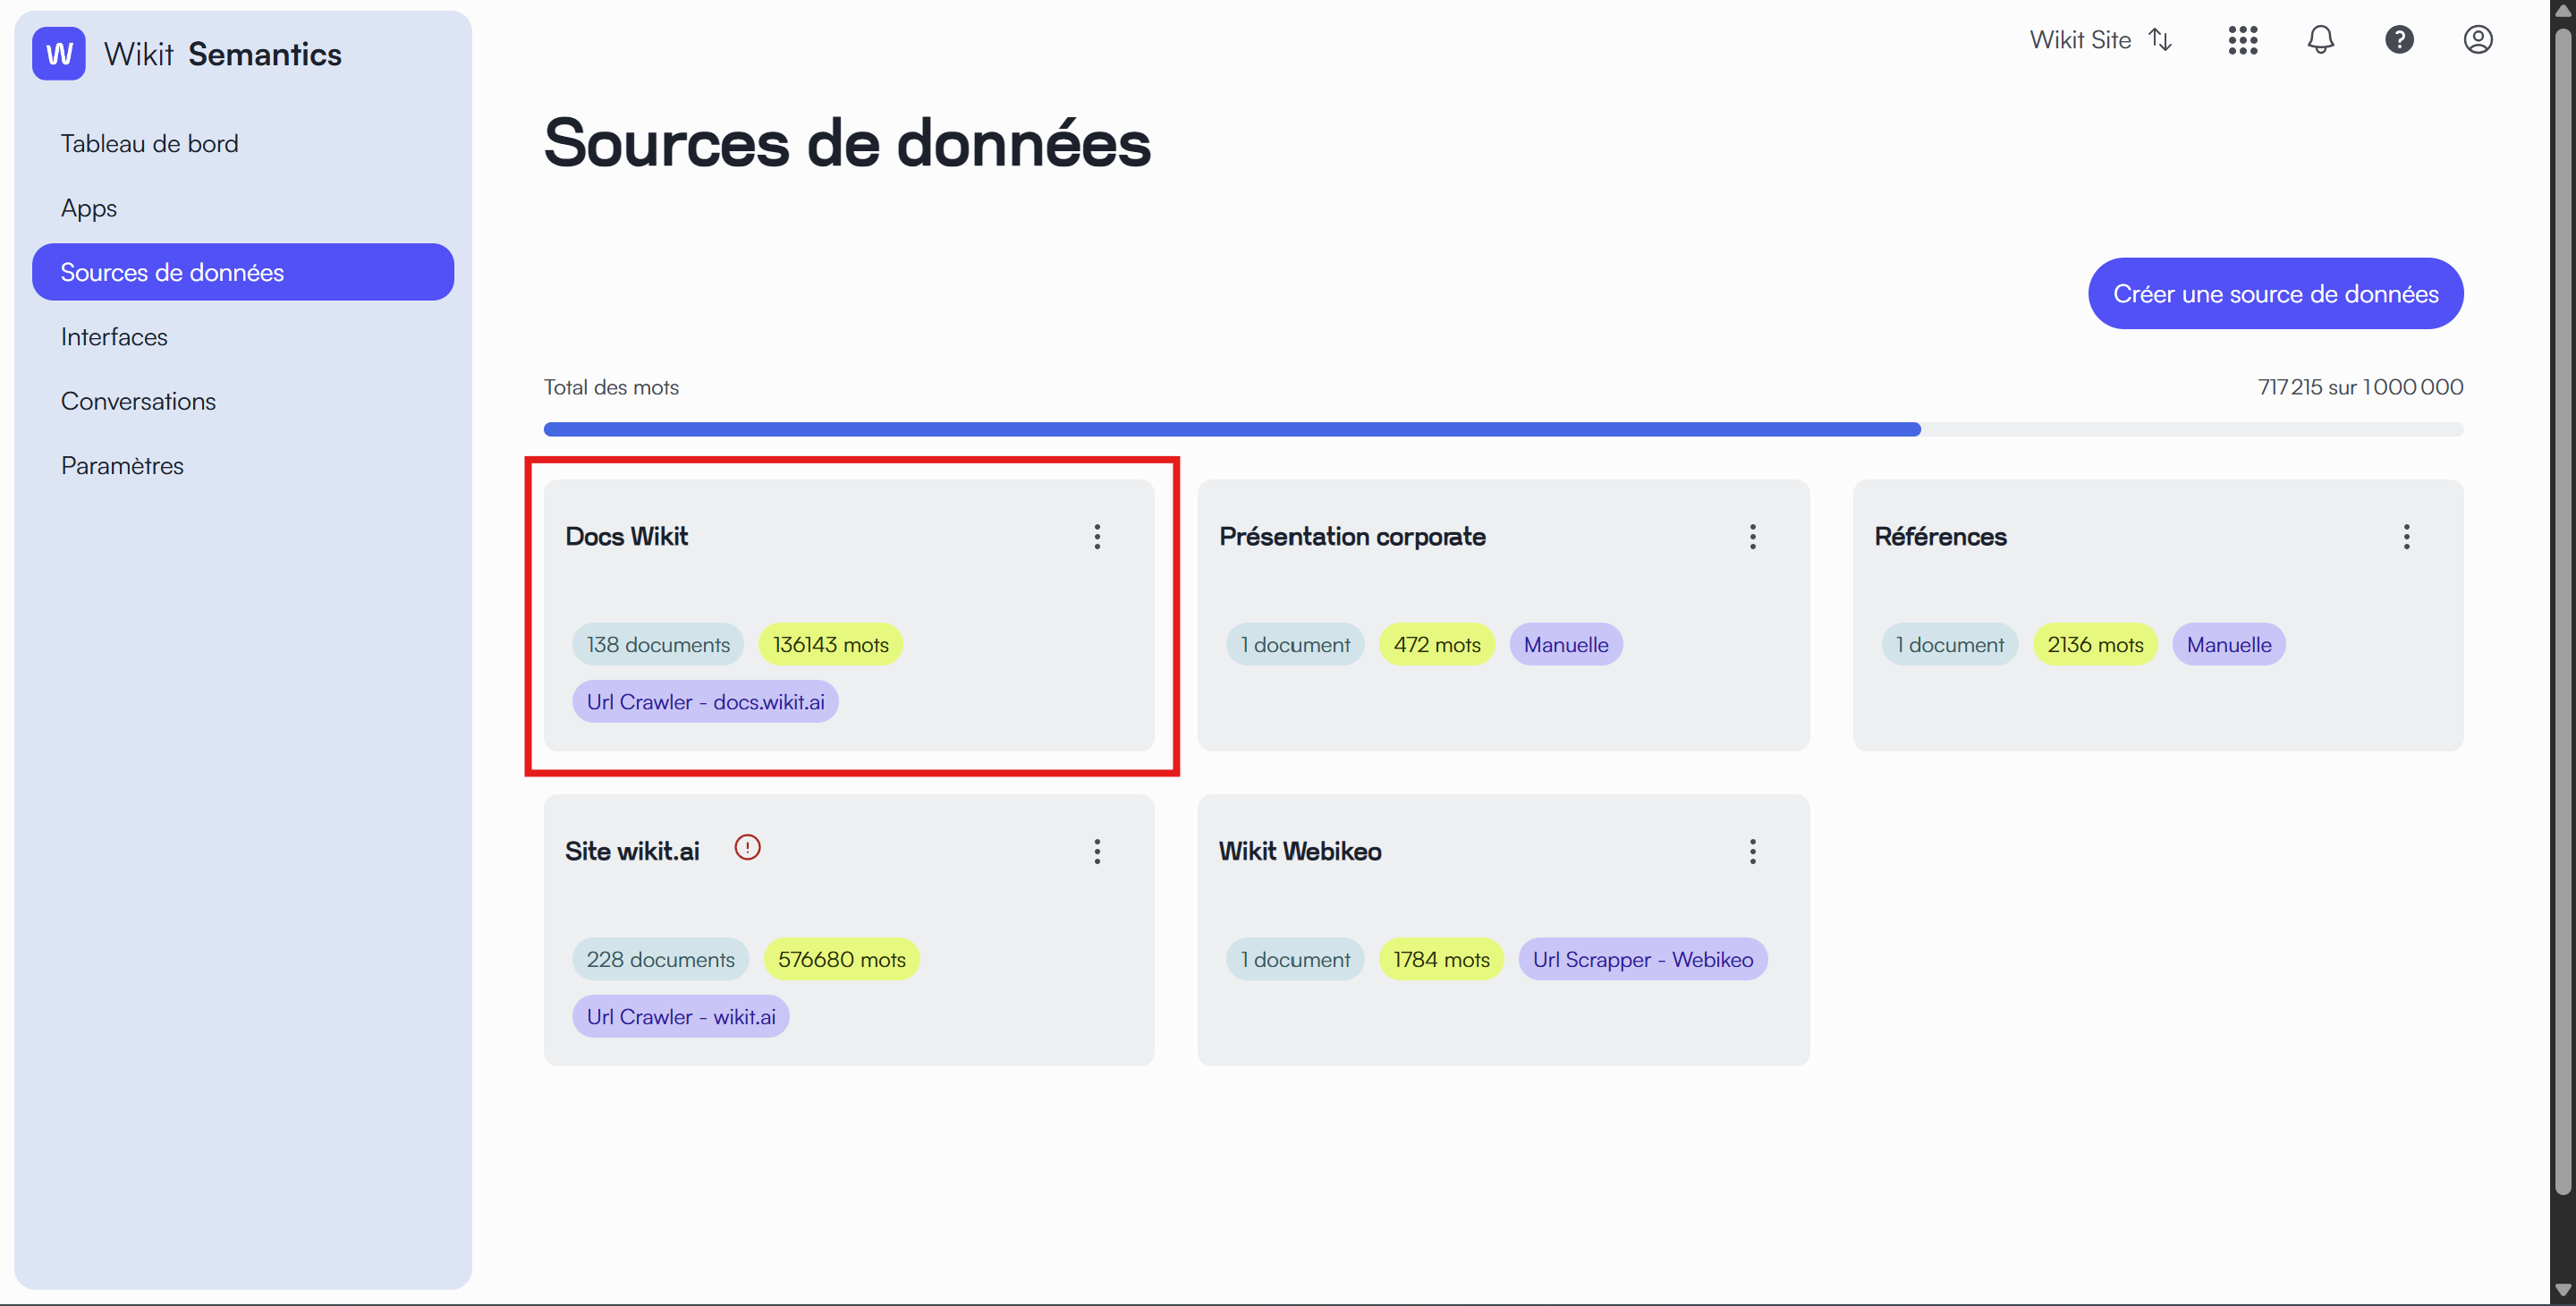
Each data source is represented by a card containing essential information:
General Information
- The name of the source appears as the card title
- A counter indicates the number of documents contained in the source
- The total volume of content is displayed as a word count
- A label identifies the type of source (Manual, Connector, etc.)
Management Menu
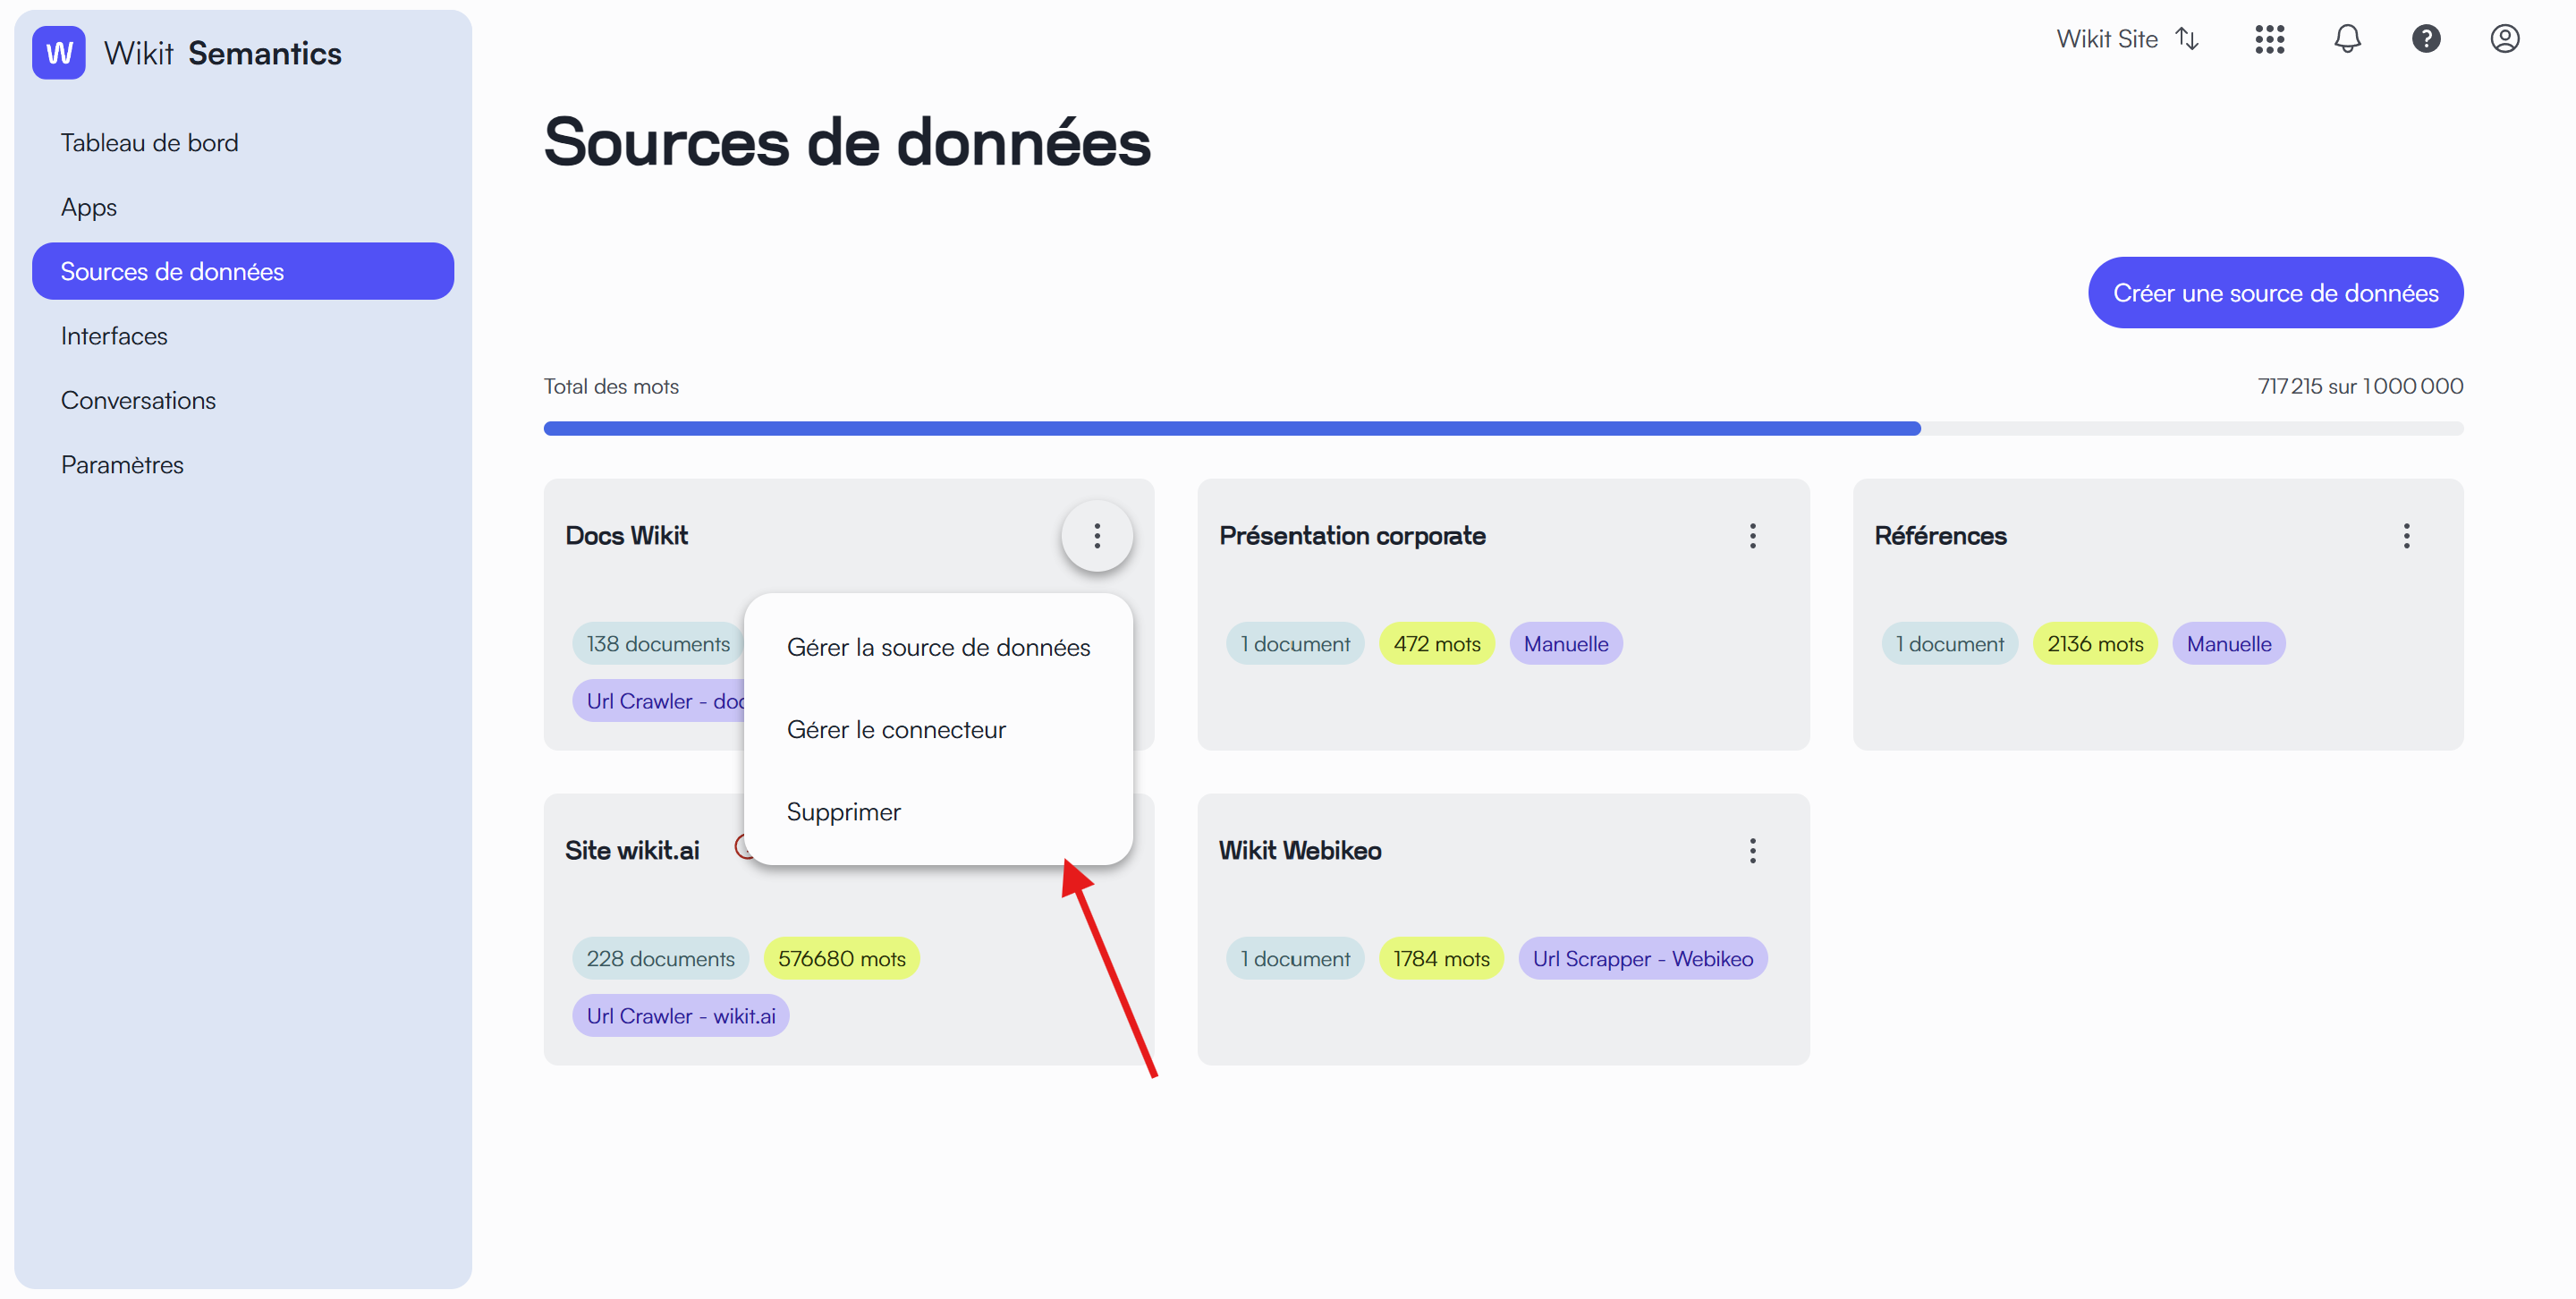
A three-dot menu (⋮) at the top right of each card provides access to management options:
- The "Manage data source" option allows access to settings and content
- "Manage connector" offers control over the data import method (for connector-type sources)
- "Delete" allows you to remove the source from the workspace
Available Source Types
The platform supports several types of data sources, each adapted to specific needs:
Manual Sources
These sources allow direct addition of documents. They are identified by the "Manual" label and are particularly suitable for internal or specific documents.
Connector Sources
These sources are fed by a connector.
Adding and Configuring Data Sources
Creating a Data Source
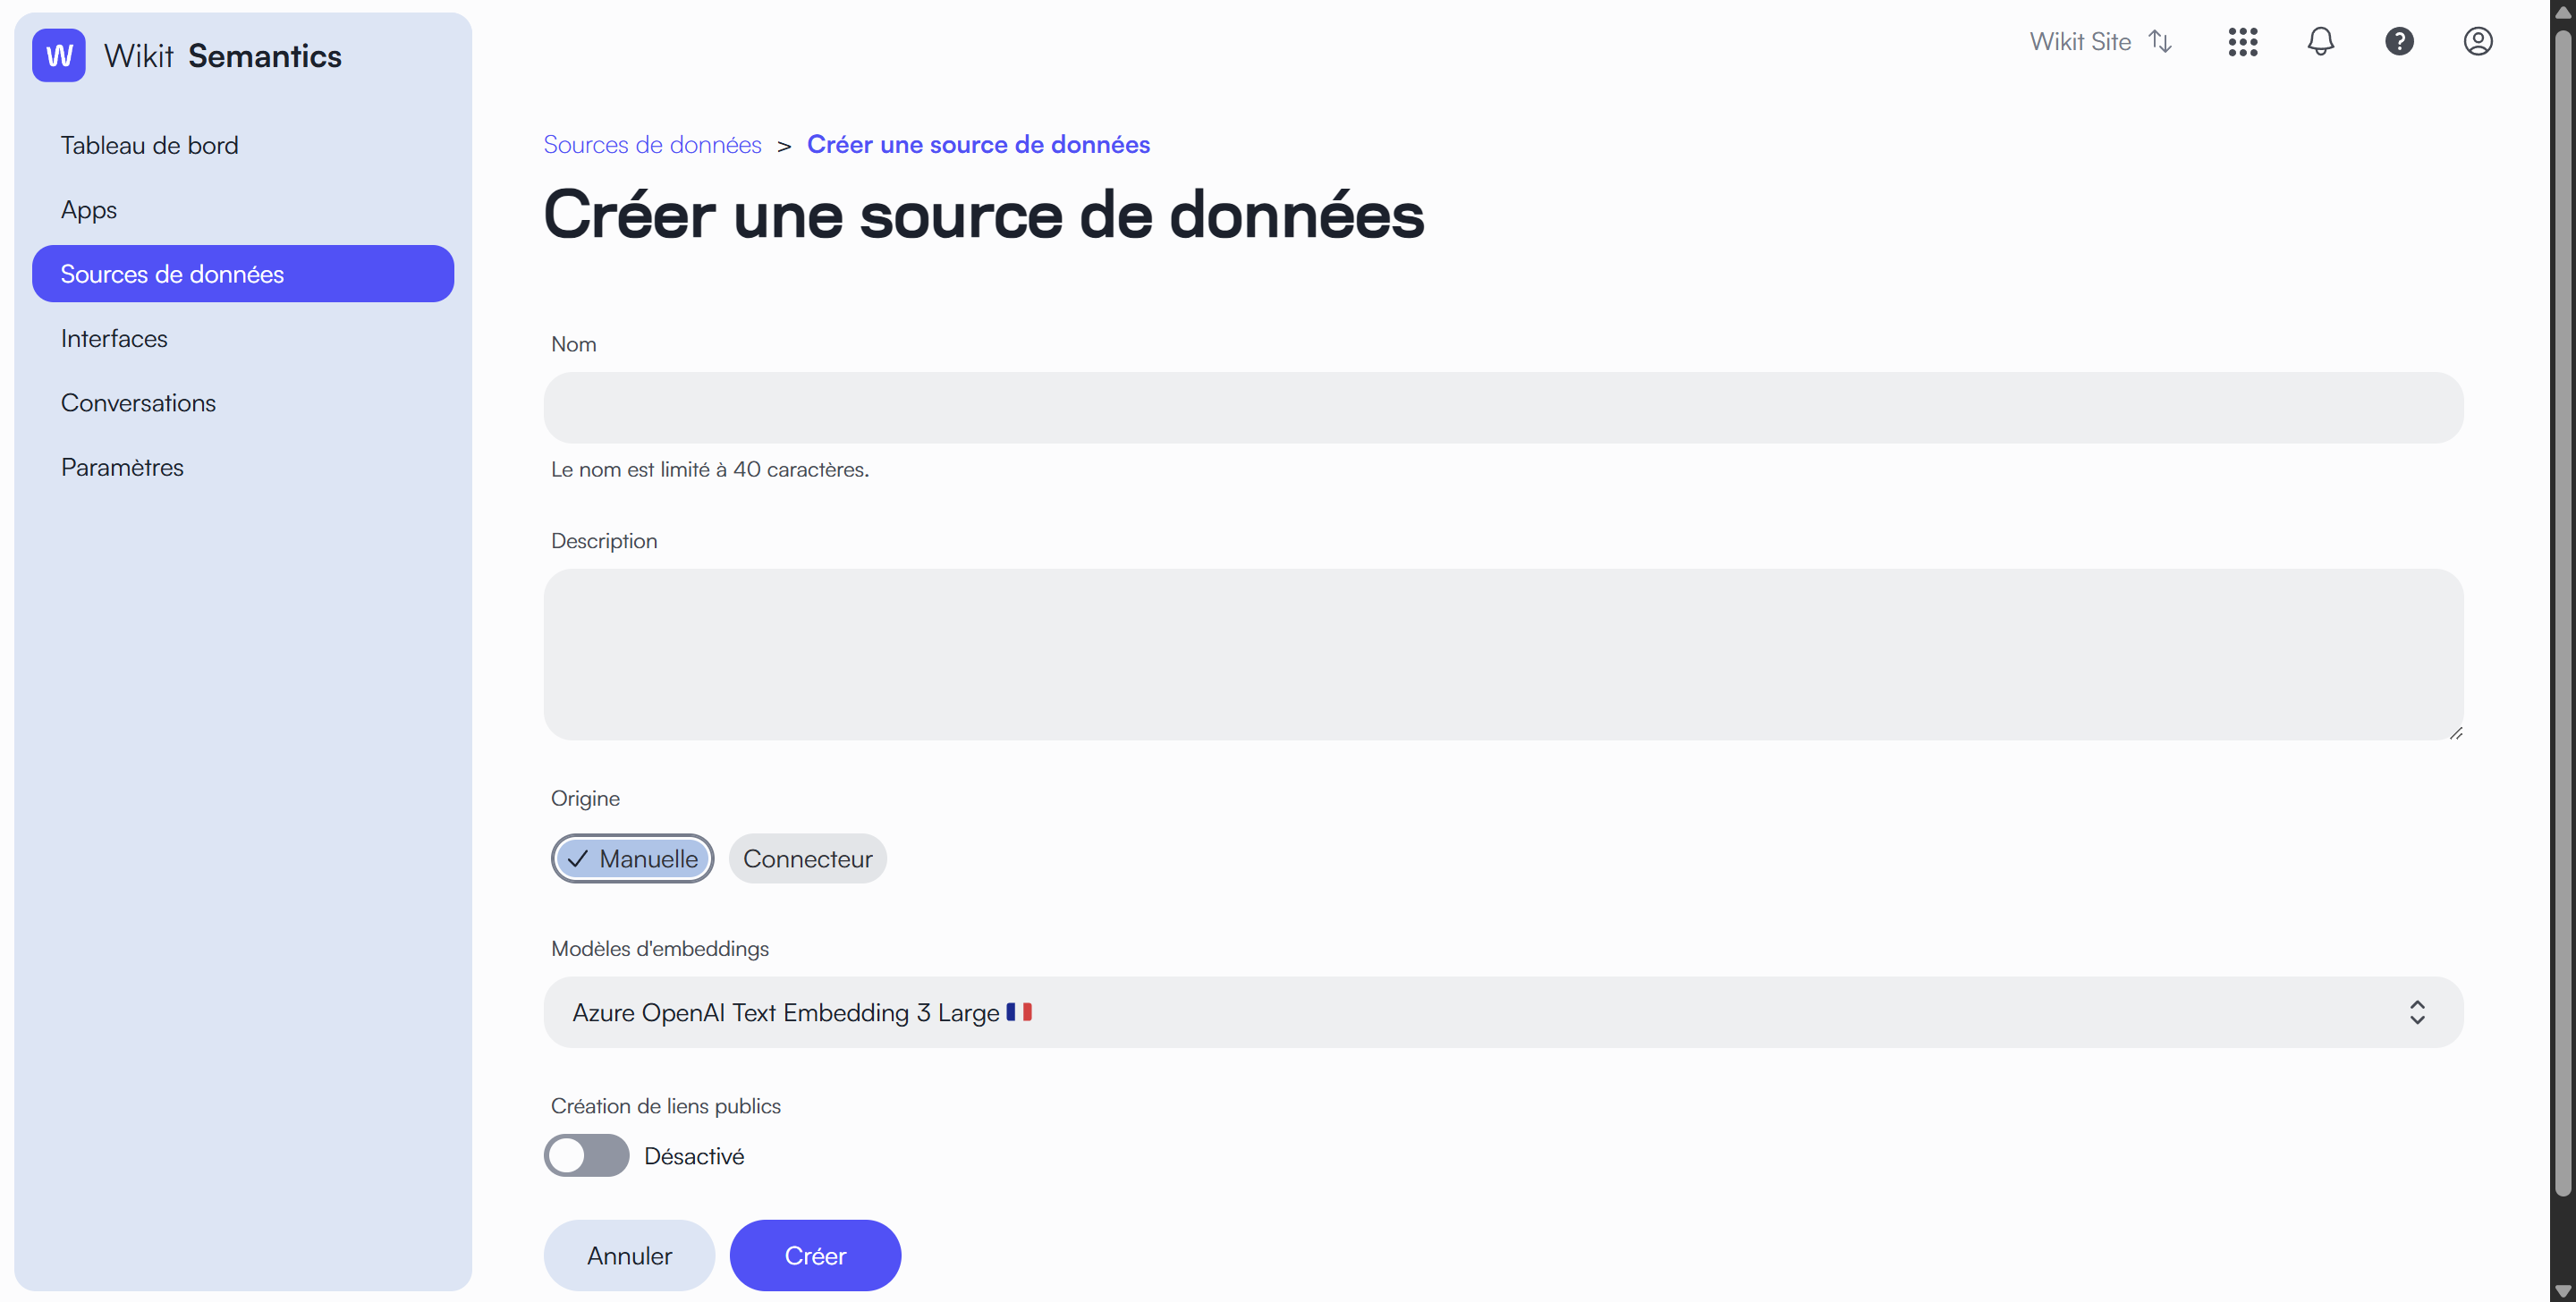
The data source creation page allows you to configure a new source that will feed knowledge into your applications. It consists of several essential configuration fields.
Configuration Fields
Name
The name field allows you to identify your data source. This identification is limited to 40 characters to ensure a clear presentation in the interface.
Description
A text field that allows you to describe in detail the use and content of your data source. This description facilitates understanding of the source's role by all users.
Origin
The origin of the source can be defined according to two options:
- Manual: For direct addition of documents
- Connector: For an automated connection to an external source
Embedding Models
A dropdown list allowing you to select the vectorization model that will be used to process the documents in this source.
Public Link Creation
A toggle switch allowing you to enable or disable the ability to create public links to documents in this source. By default, this option is disabled.
Action Buttons
The page offers two options at the bottom:
- Cancel: To abandon creation
- Create: To validate the creation of the source with the configured parameters
Data Source Details
The data source details page is organized into three main tabs allowing you to view and manage all aspects of the source: Information, Documents, and Advanced Settings.
Information Tab
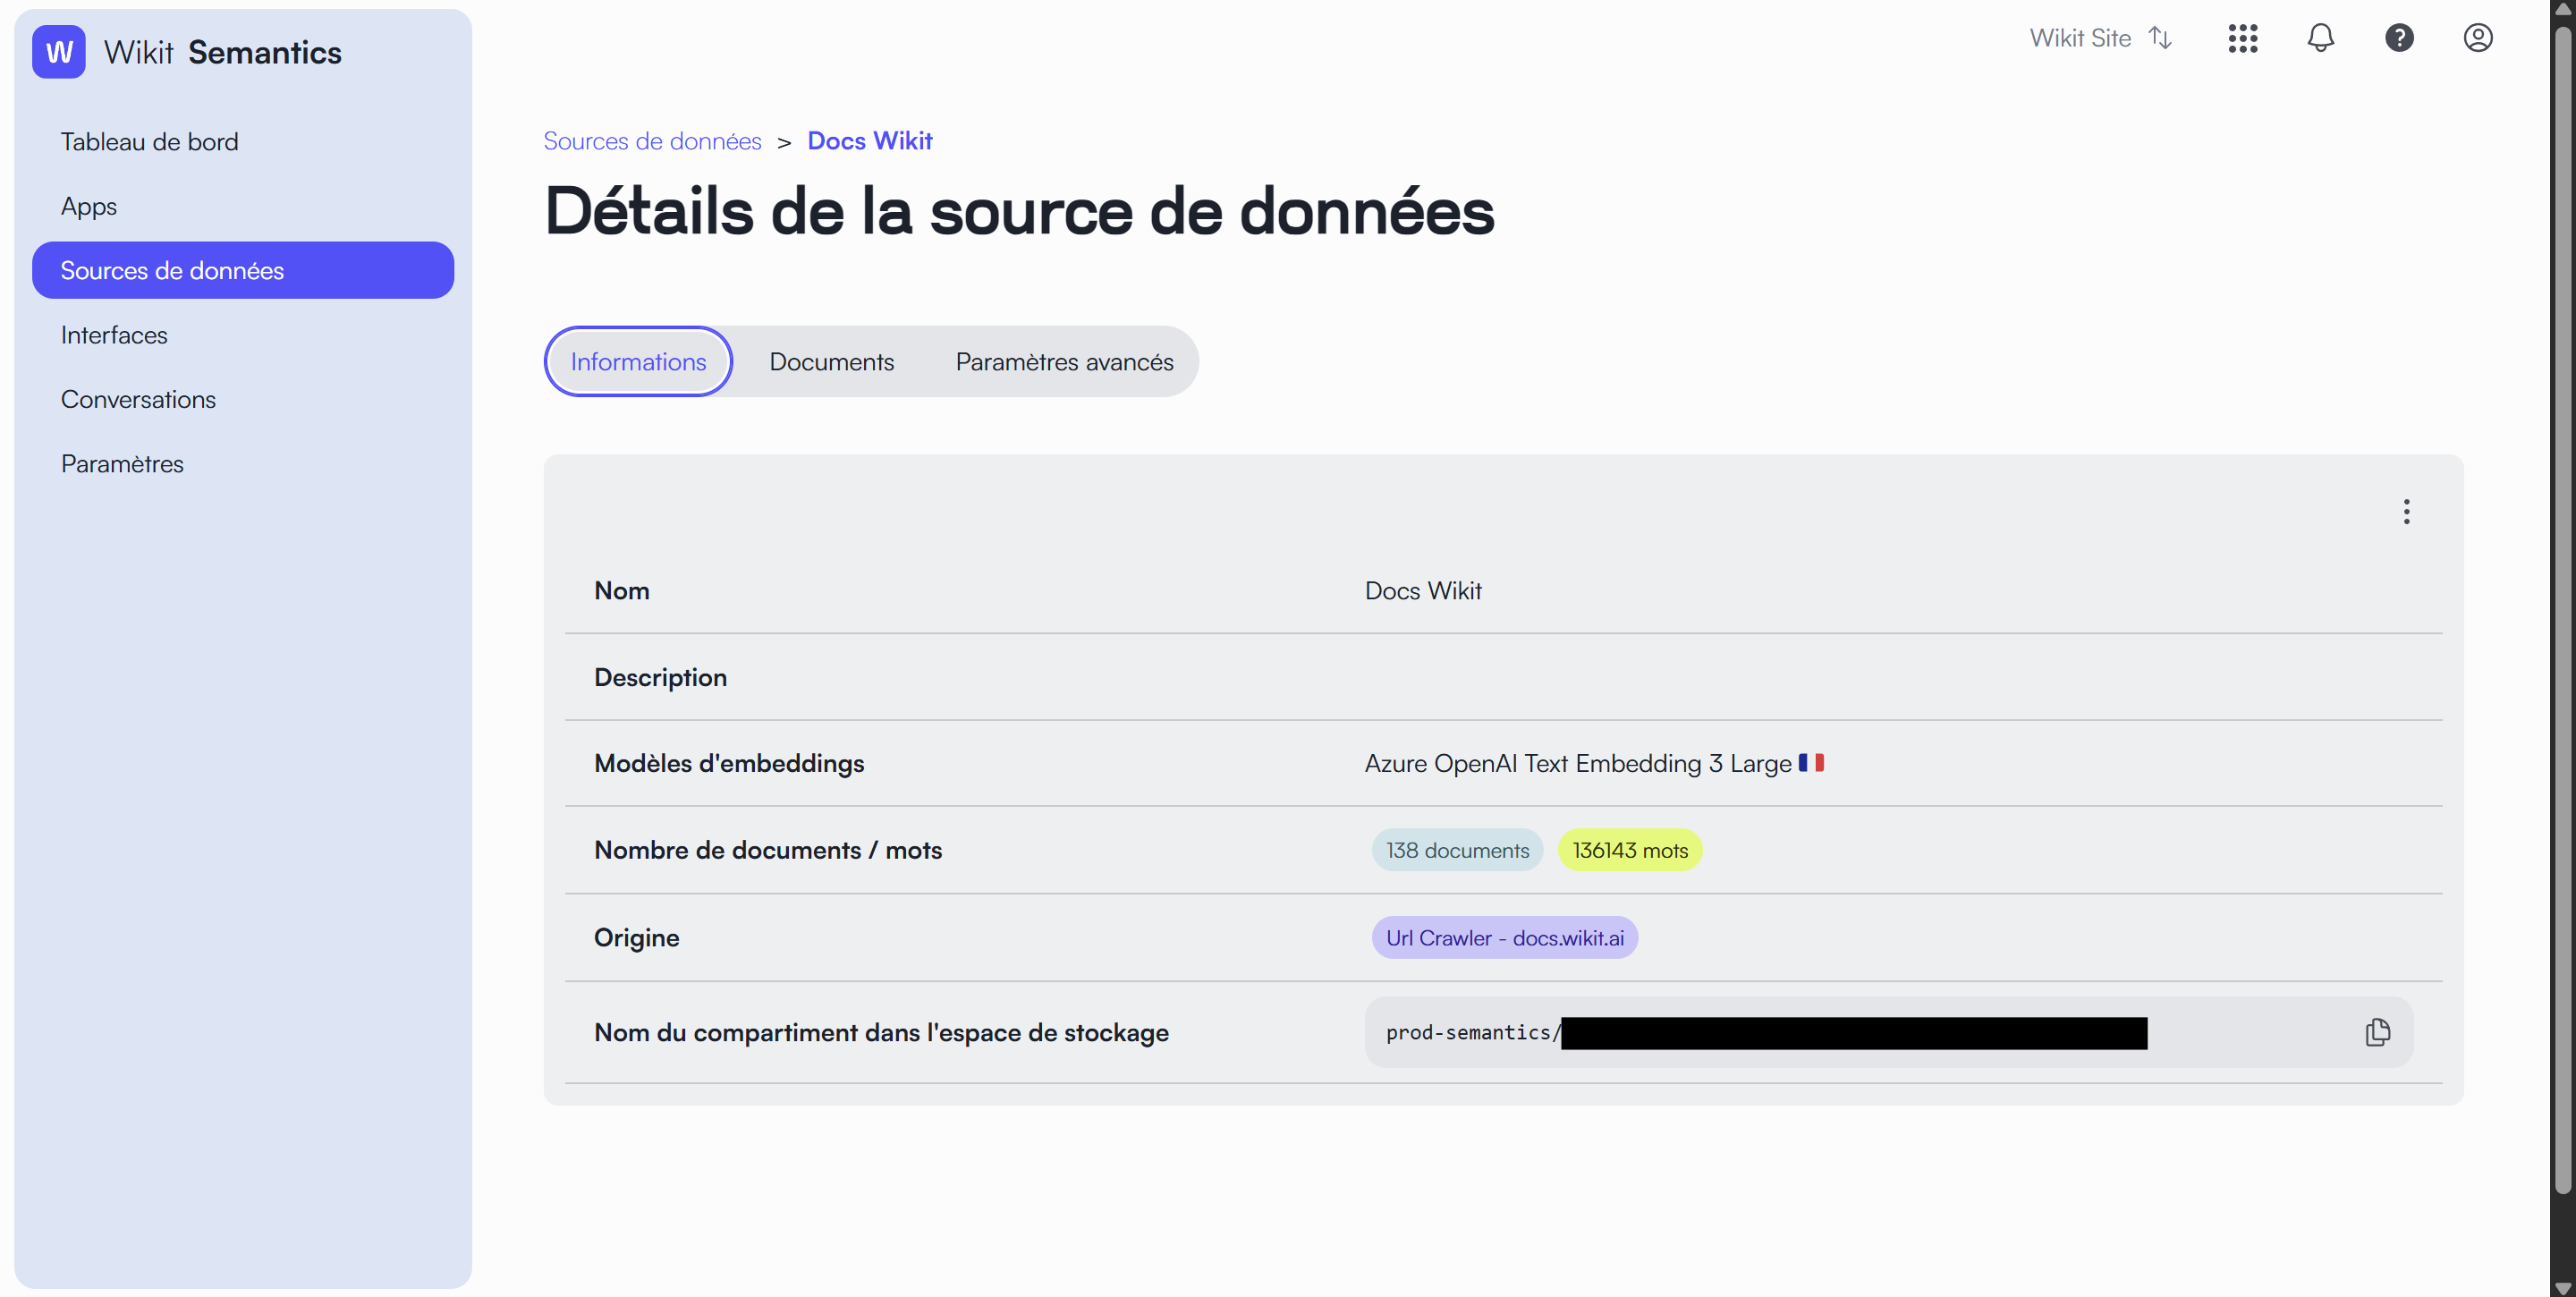
The Information tab presents the main characteristics of the data source:
- Name: The name identifying the source
- Description: The detailed description of the source
- Embedding Models: The model used for document analysis (e.g., Azure Ada v2)
- Number of documents/words: Content statistics (number of documents and total words)
- Origin: The type of document import (Manual or via Connector)
- Bucket Name: The technical storage identifier
- Public Link Creation: The activation status of public links (Enabled/Disabled)
Documents Tab
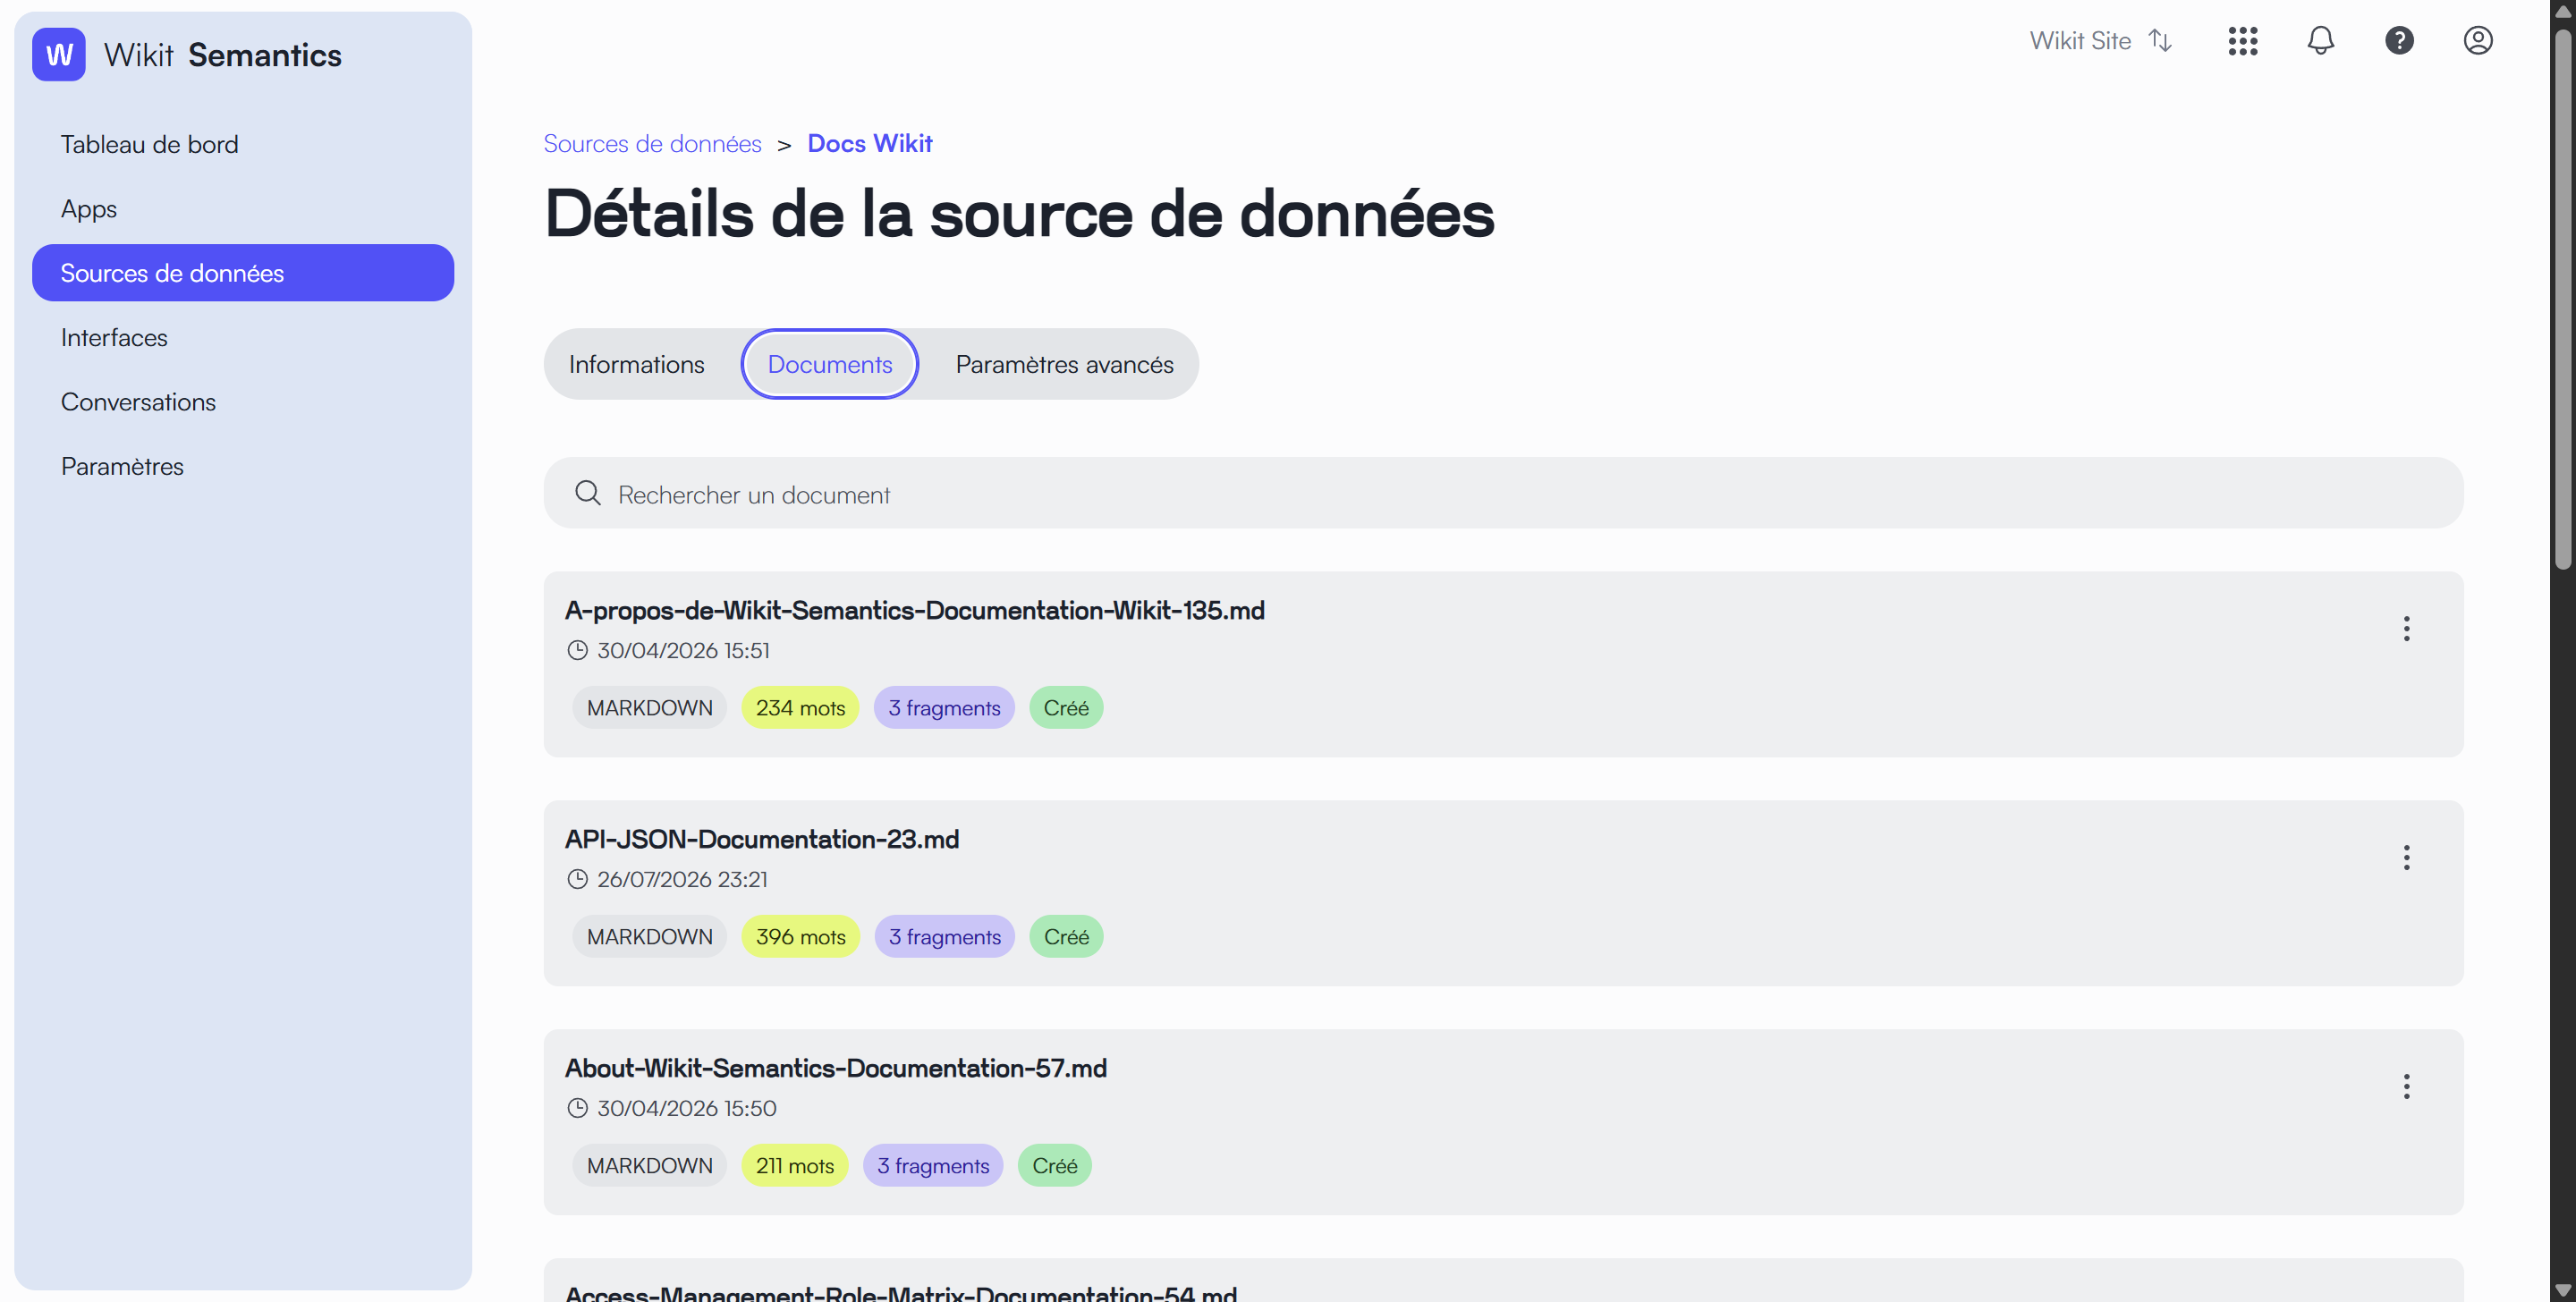
The Documents tab allows you to manage the content of the data source:
Toolbar
- A search bar to filter documents
- An "Import documents" button to add content
Document List
Each document is presented with:
- The file name
- The import date and time
- The file type (e.g., application/pdf)
- The word count
- The fragment count
- An actions menu (⋮)
Advanced Settings Tab
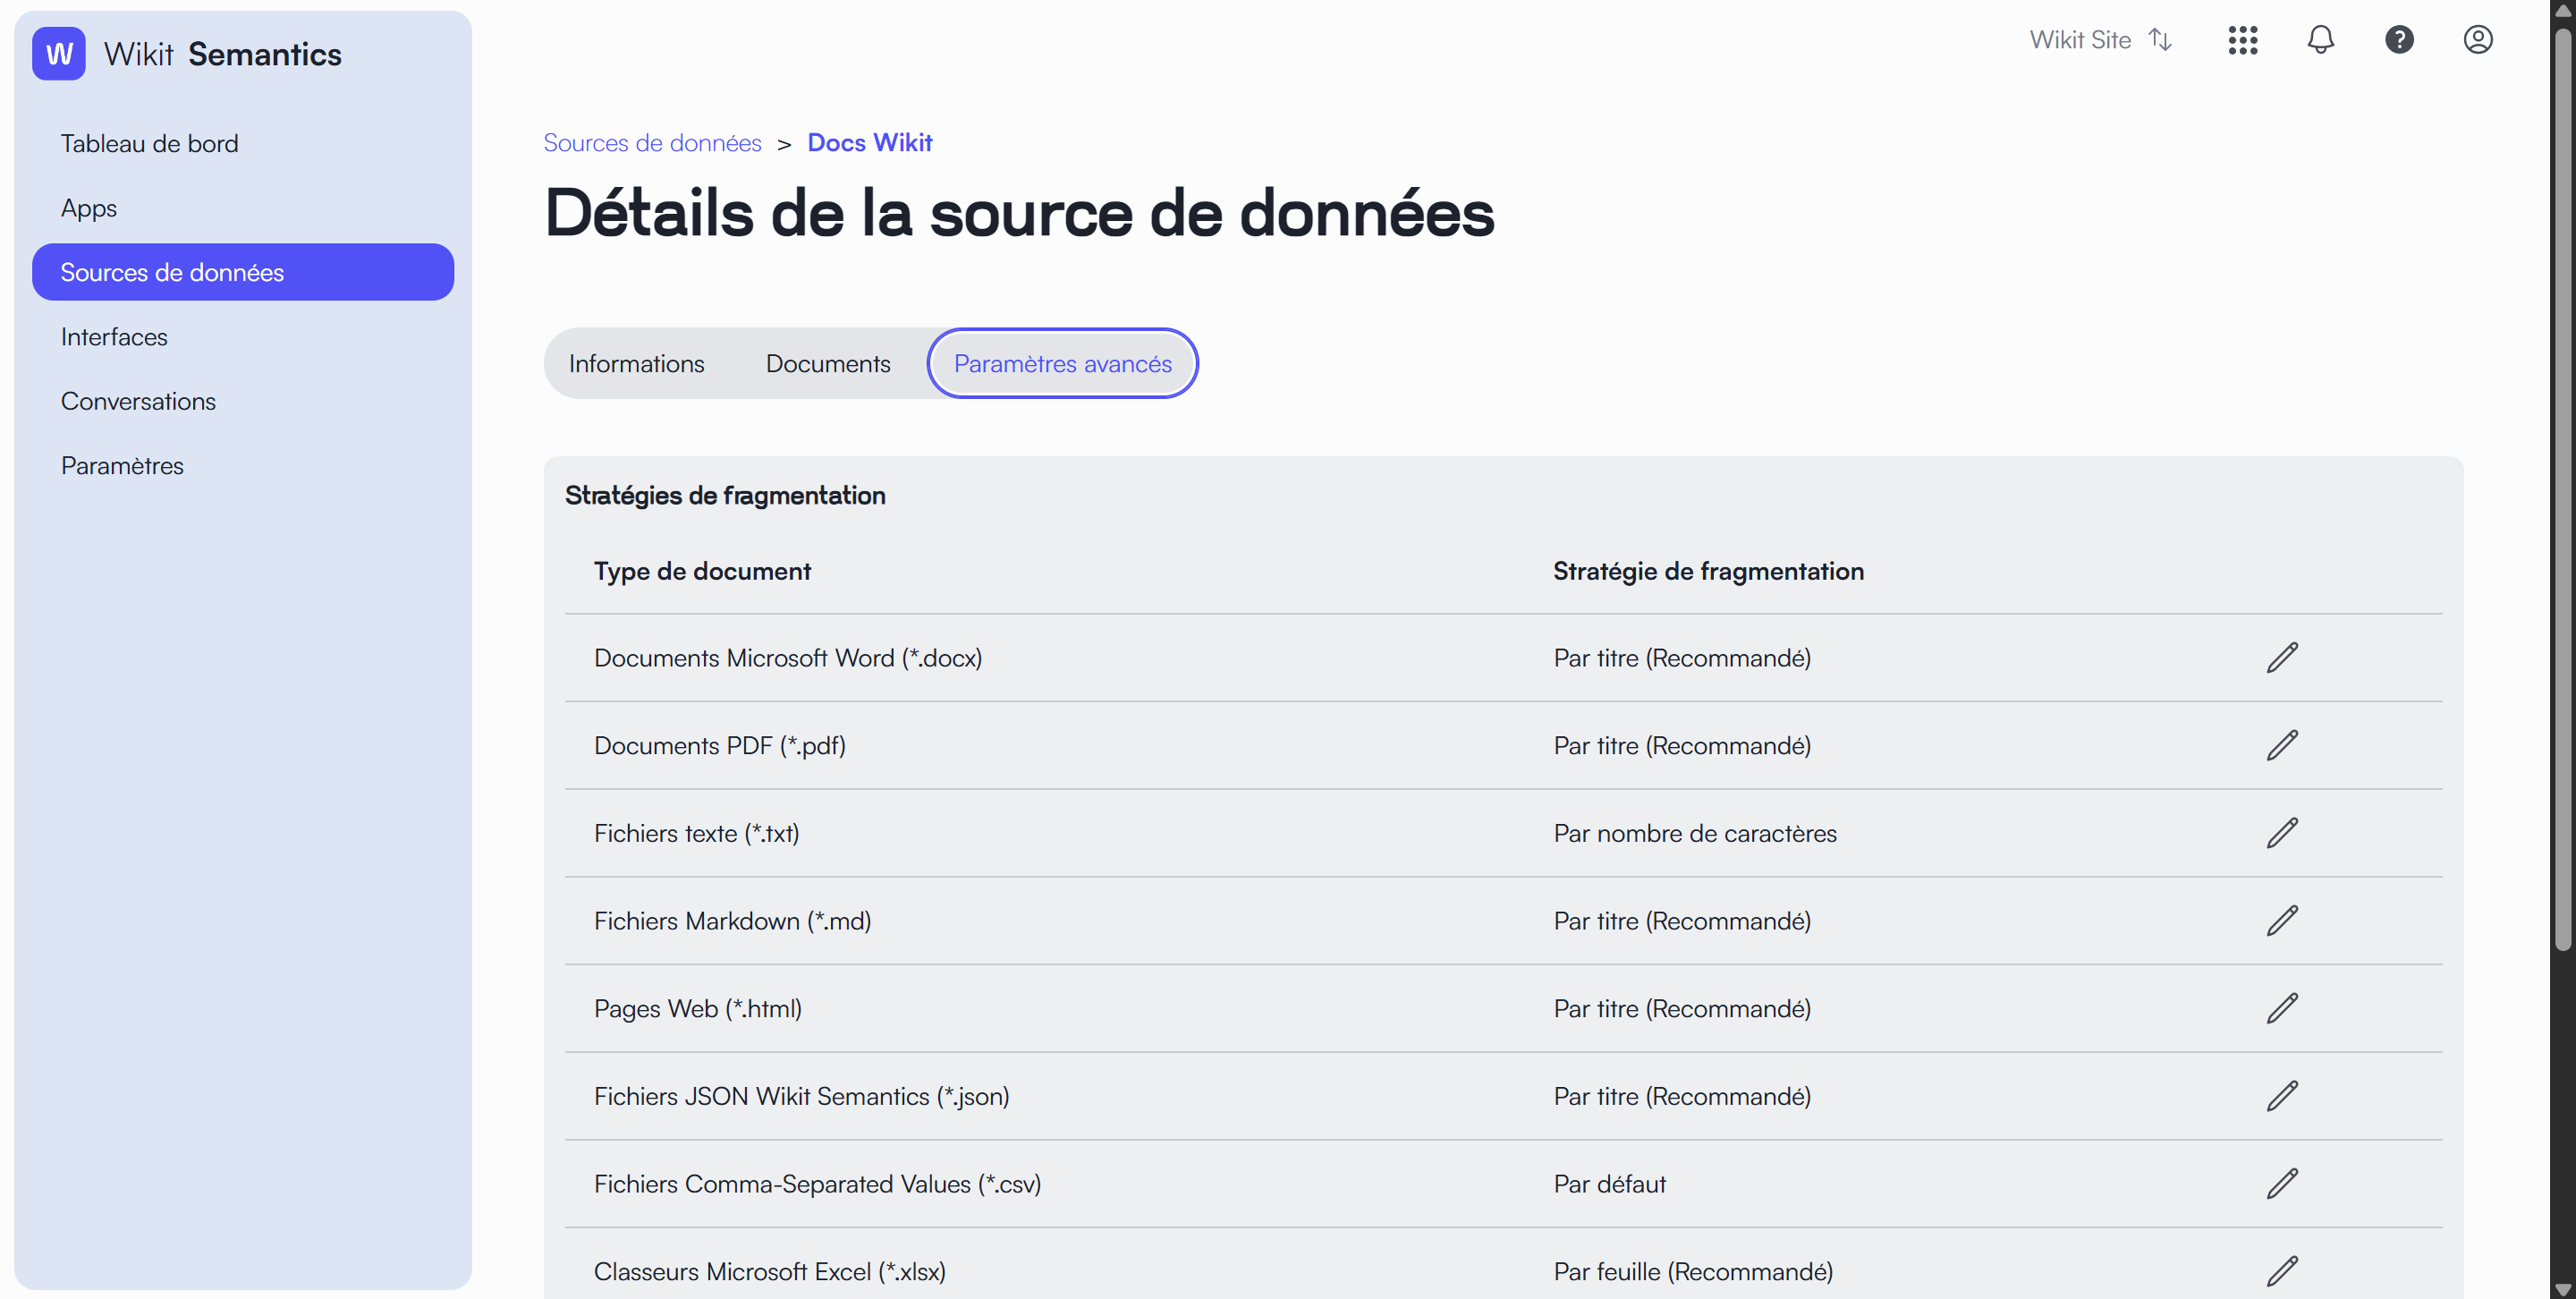
The Advanced Settings tab contains document fragmentation strategies:
Fragmentation Strategies
A table presenting the fragmentation strategy used by Wikit Semantics for each document type:
- Microsoft Word documents (*.docx): By title (Recommended)
- PDF documents (*.pdf): By title (Recommended)
- Text files (*.txt): By character count
- Markdown files (*.md): By title (Recommended)
- Web Pages (*.html): By title (Recommended)
- JSON files (*.json): By title (Recommended)
Each strategy can be modified via the pencil icon to the right of the table.
This configuration allows optimizing how documents are cut for analysis, based on their format and structure.
Tabular Data Sources
A tabular data source allows you to import a .csv file and use it as a structured database, rather than adding classic documents to it.
Creating the Source
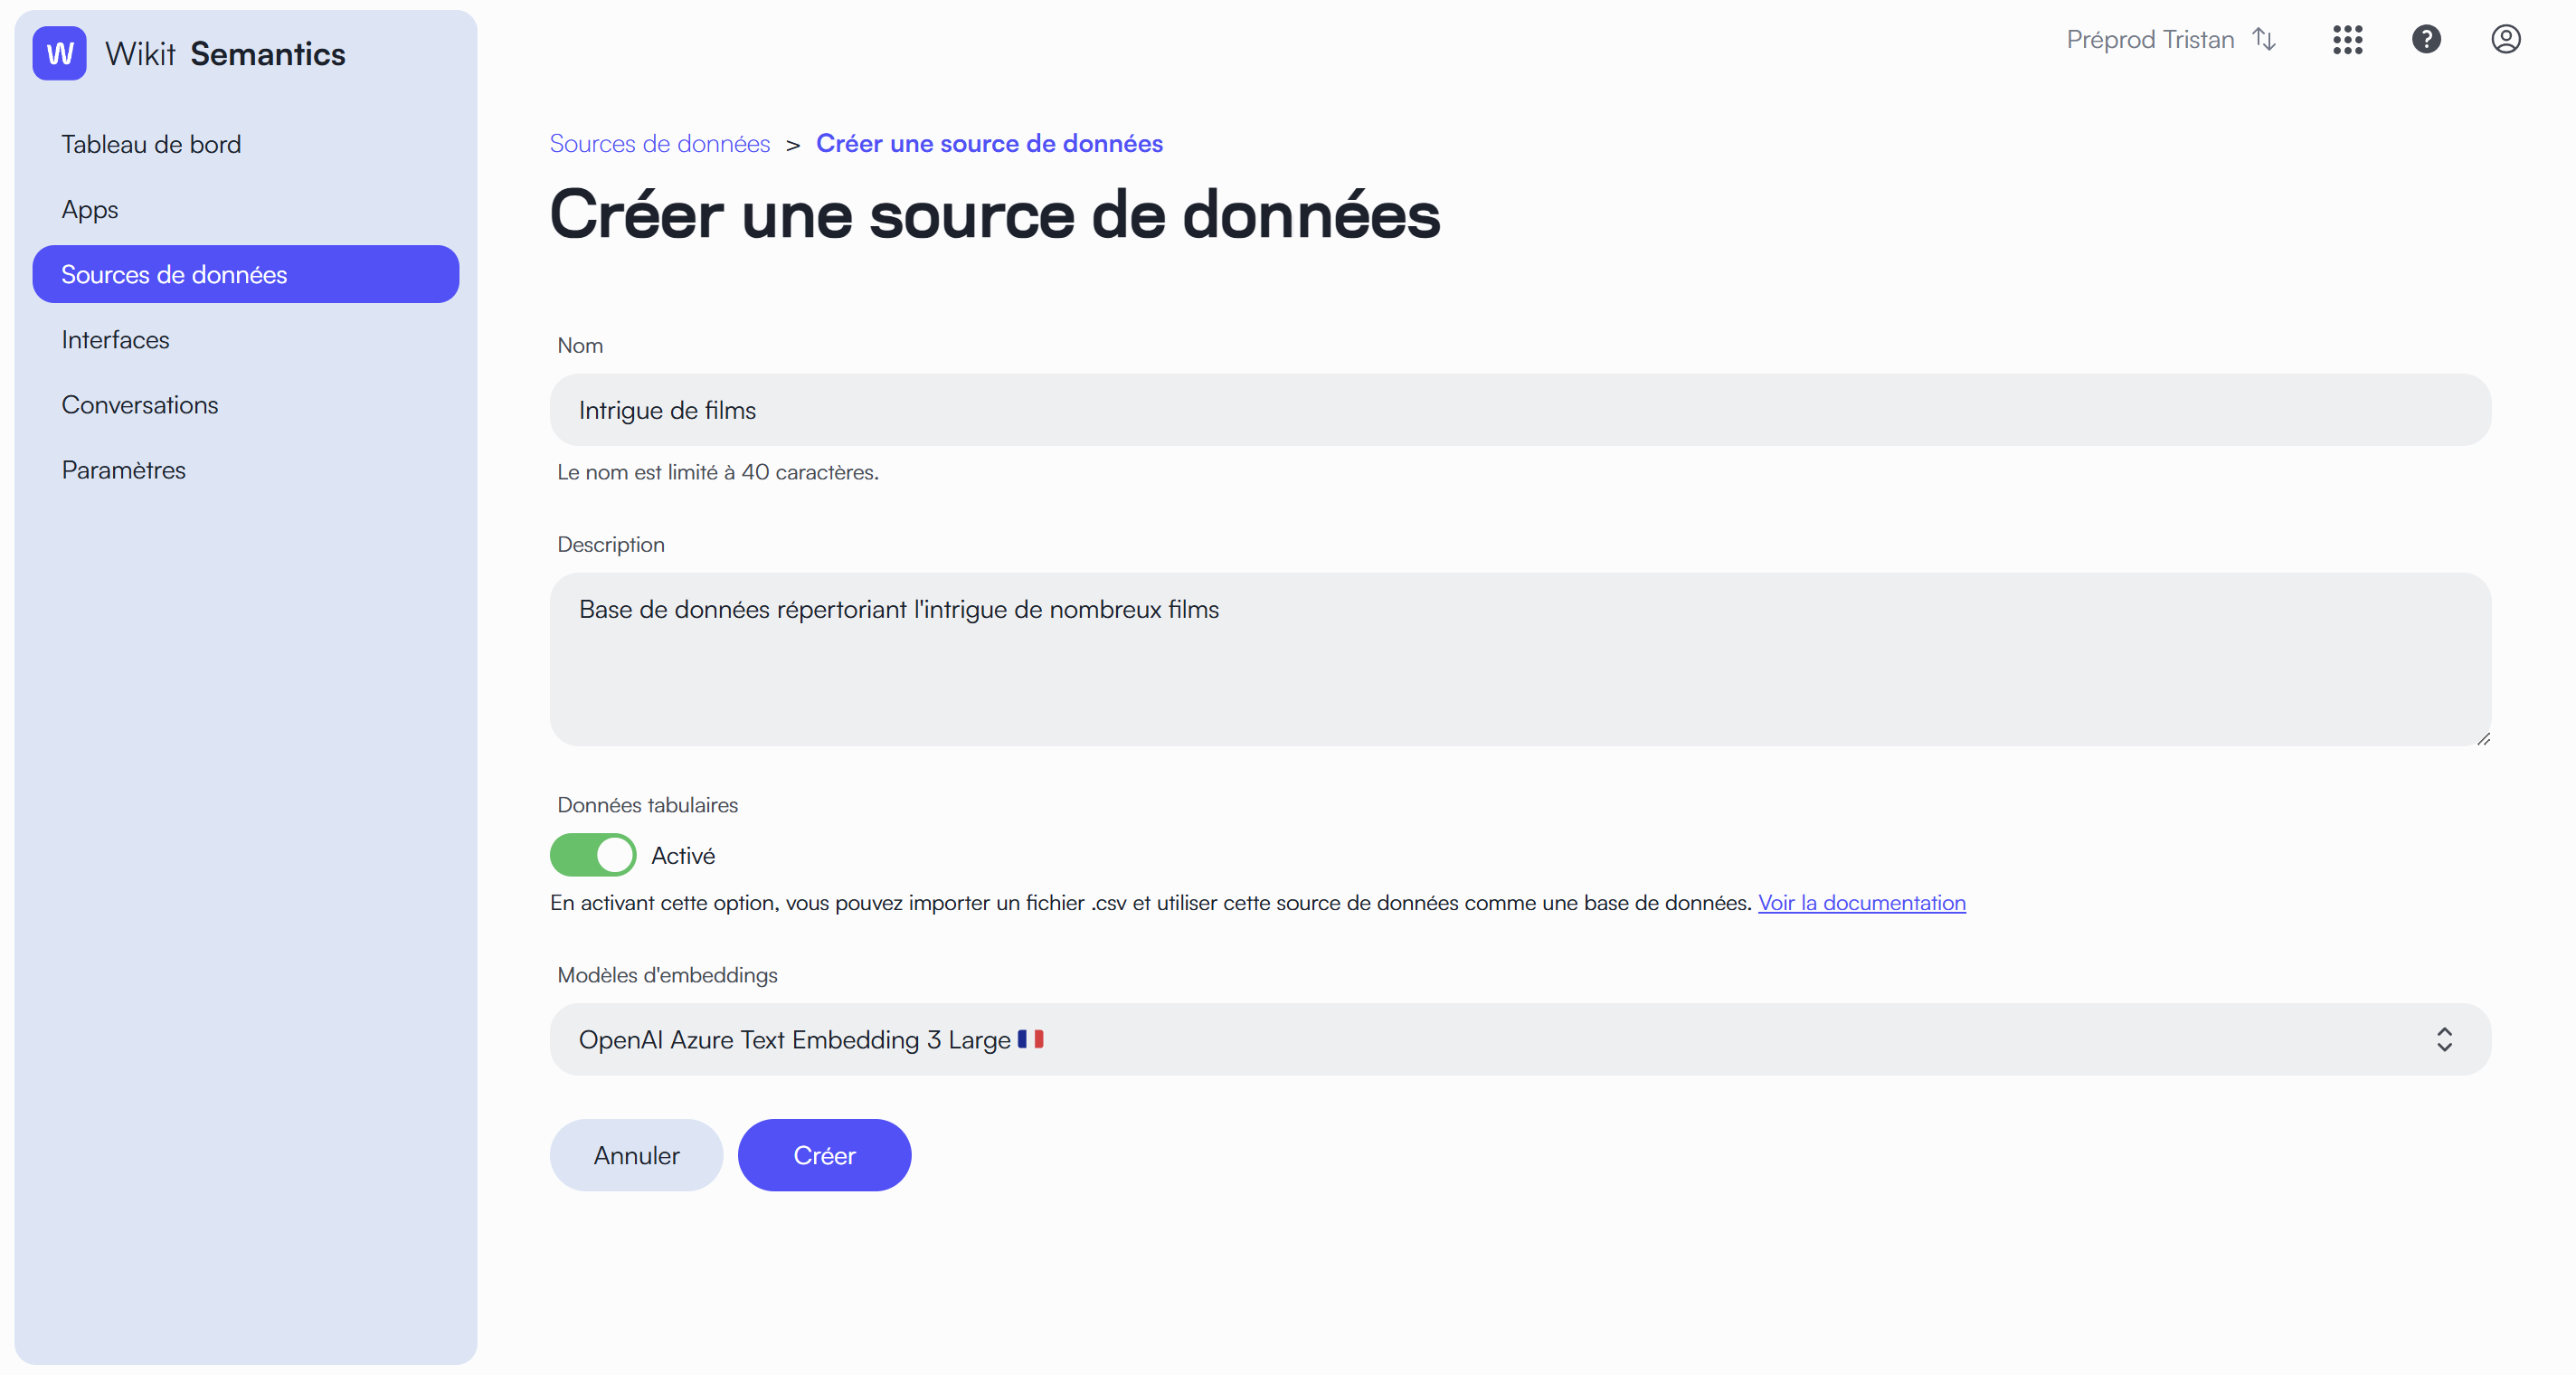 On the data source creation page, enable the Tabular Data toggle. Once enabled, simply fill in the Name, Description, and Embedding Model, then click Create.
Importing the .csv File
Once the source is created, it opens on the Information tab. 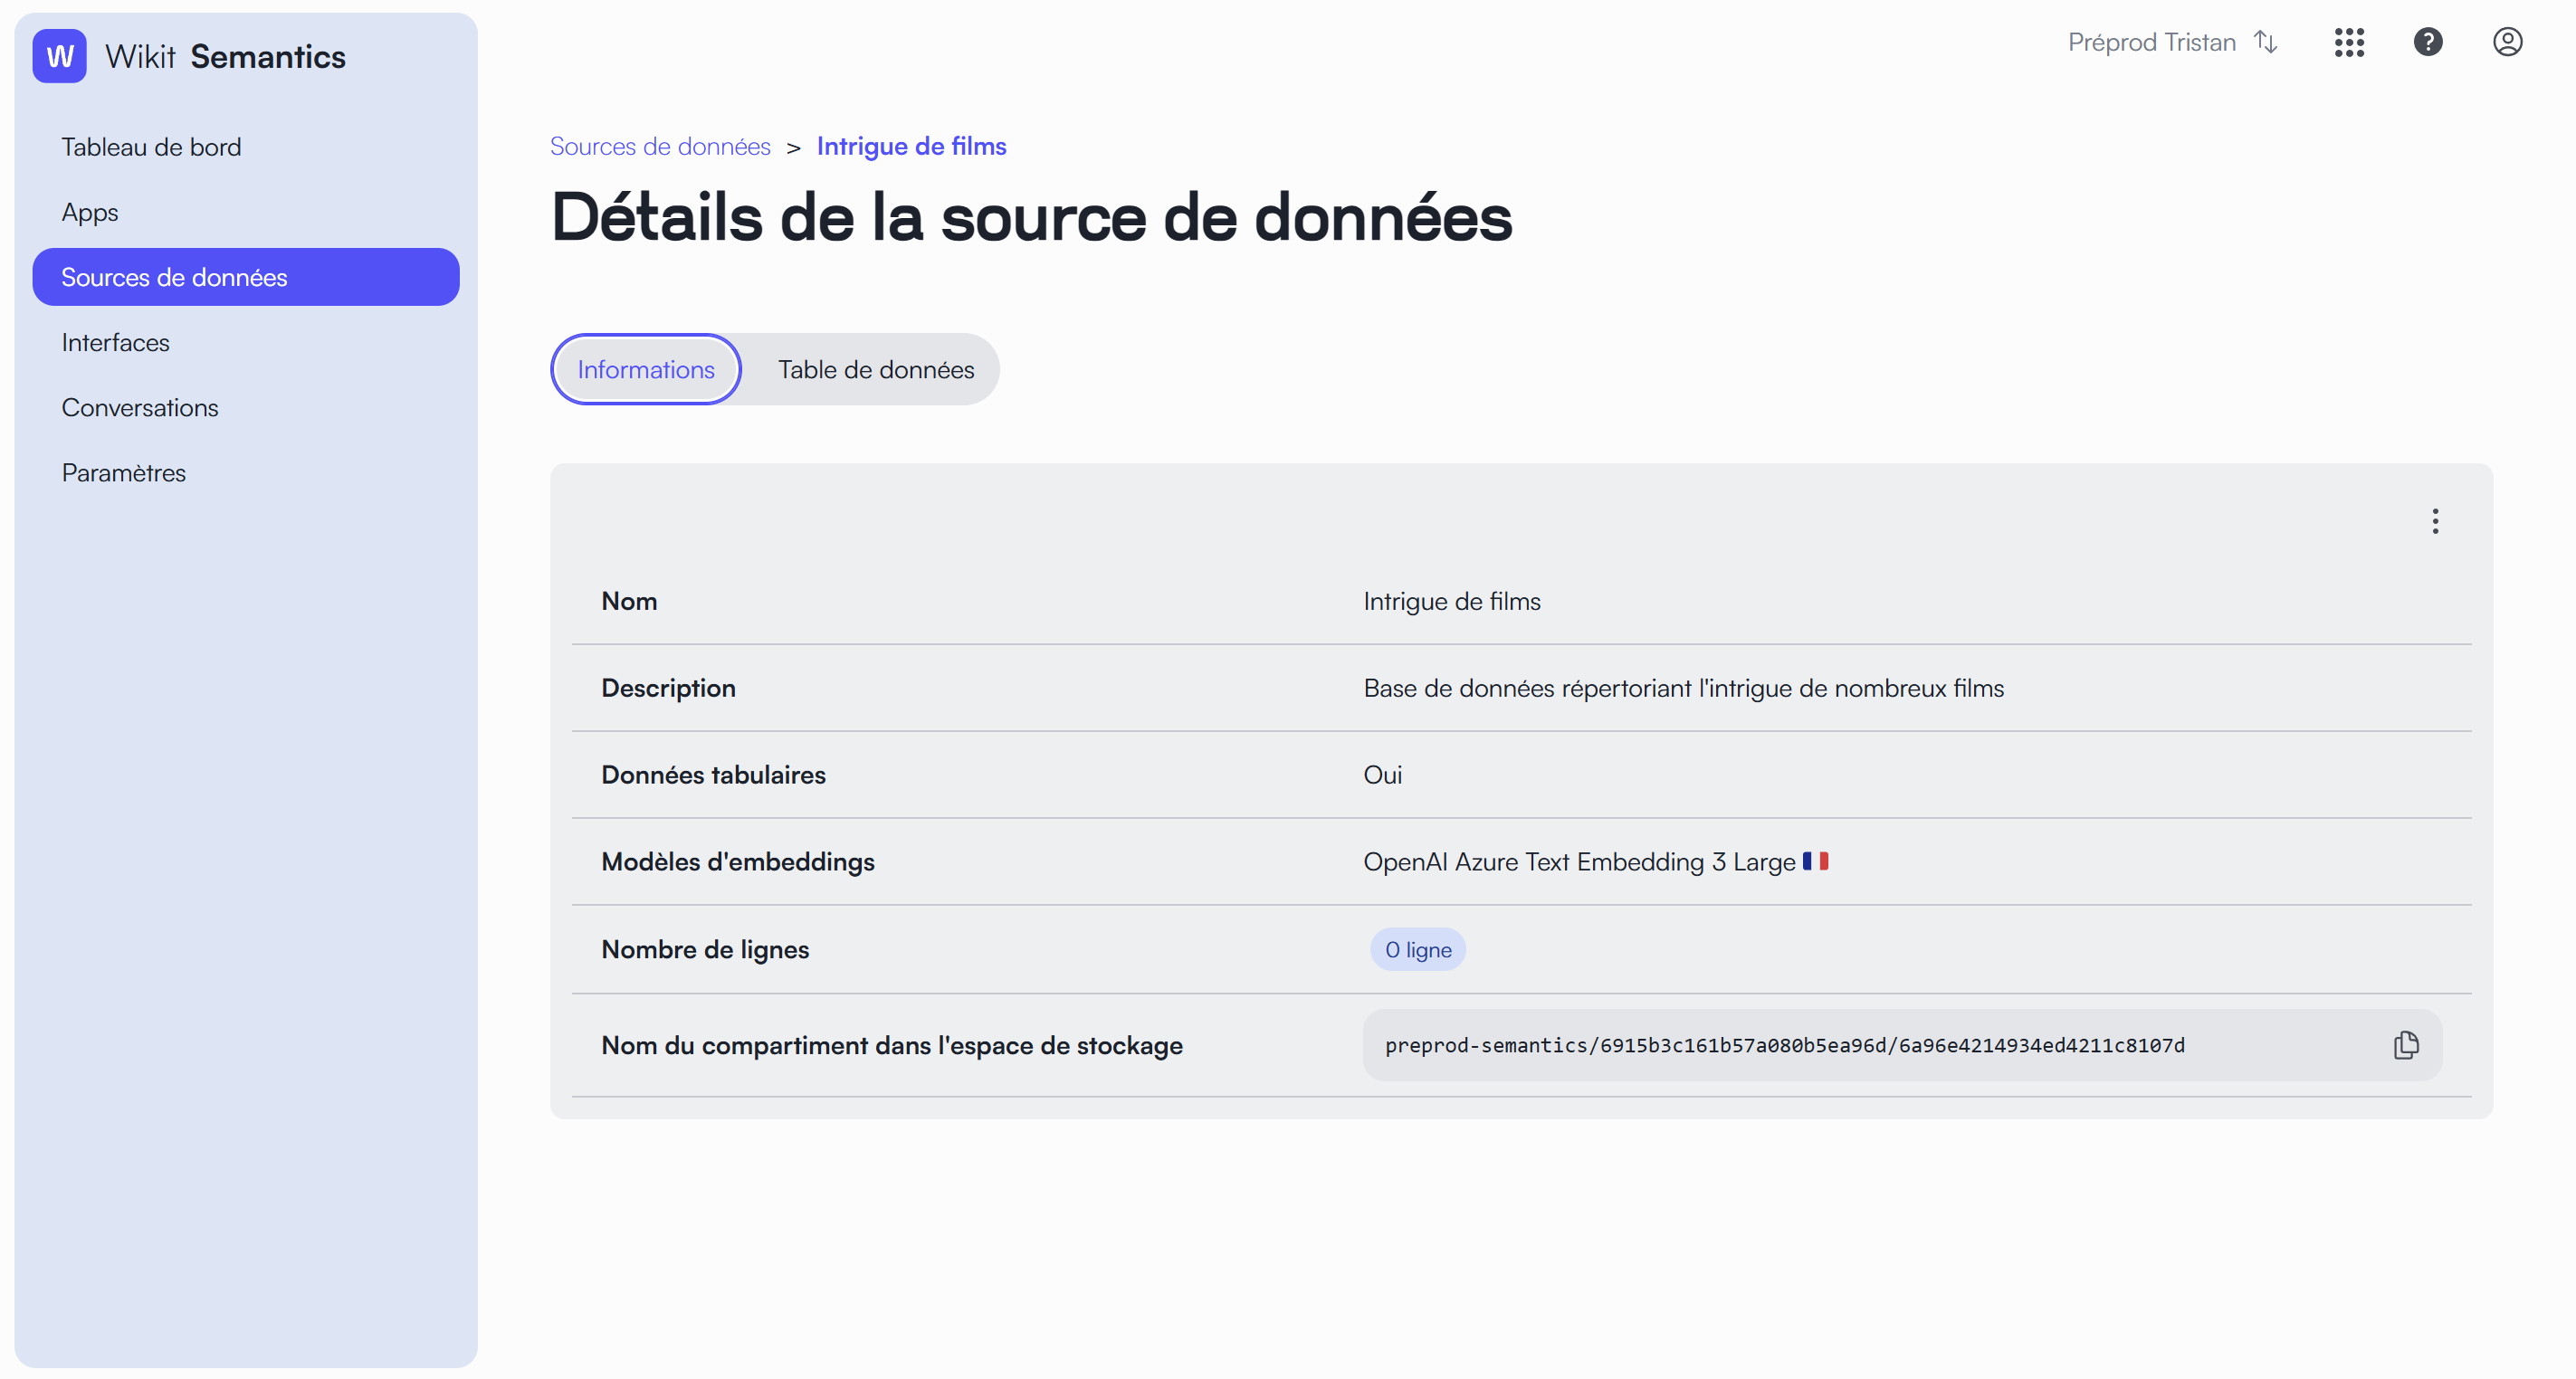
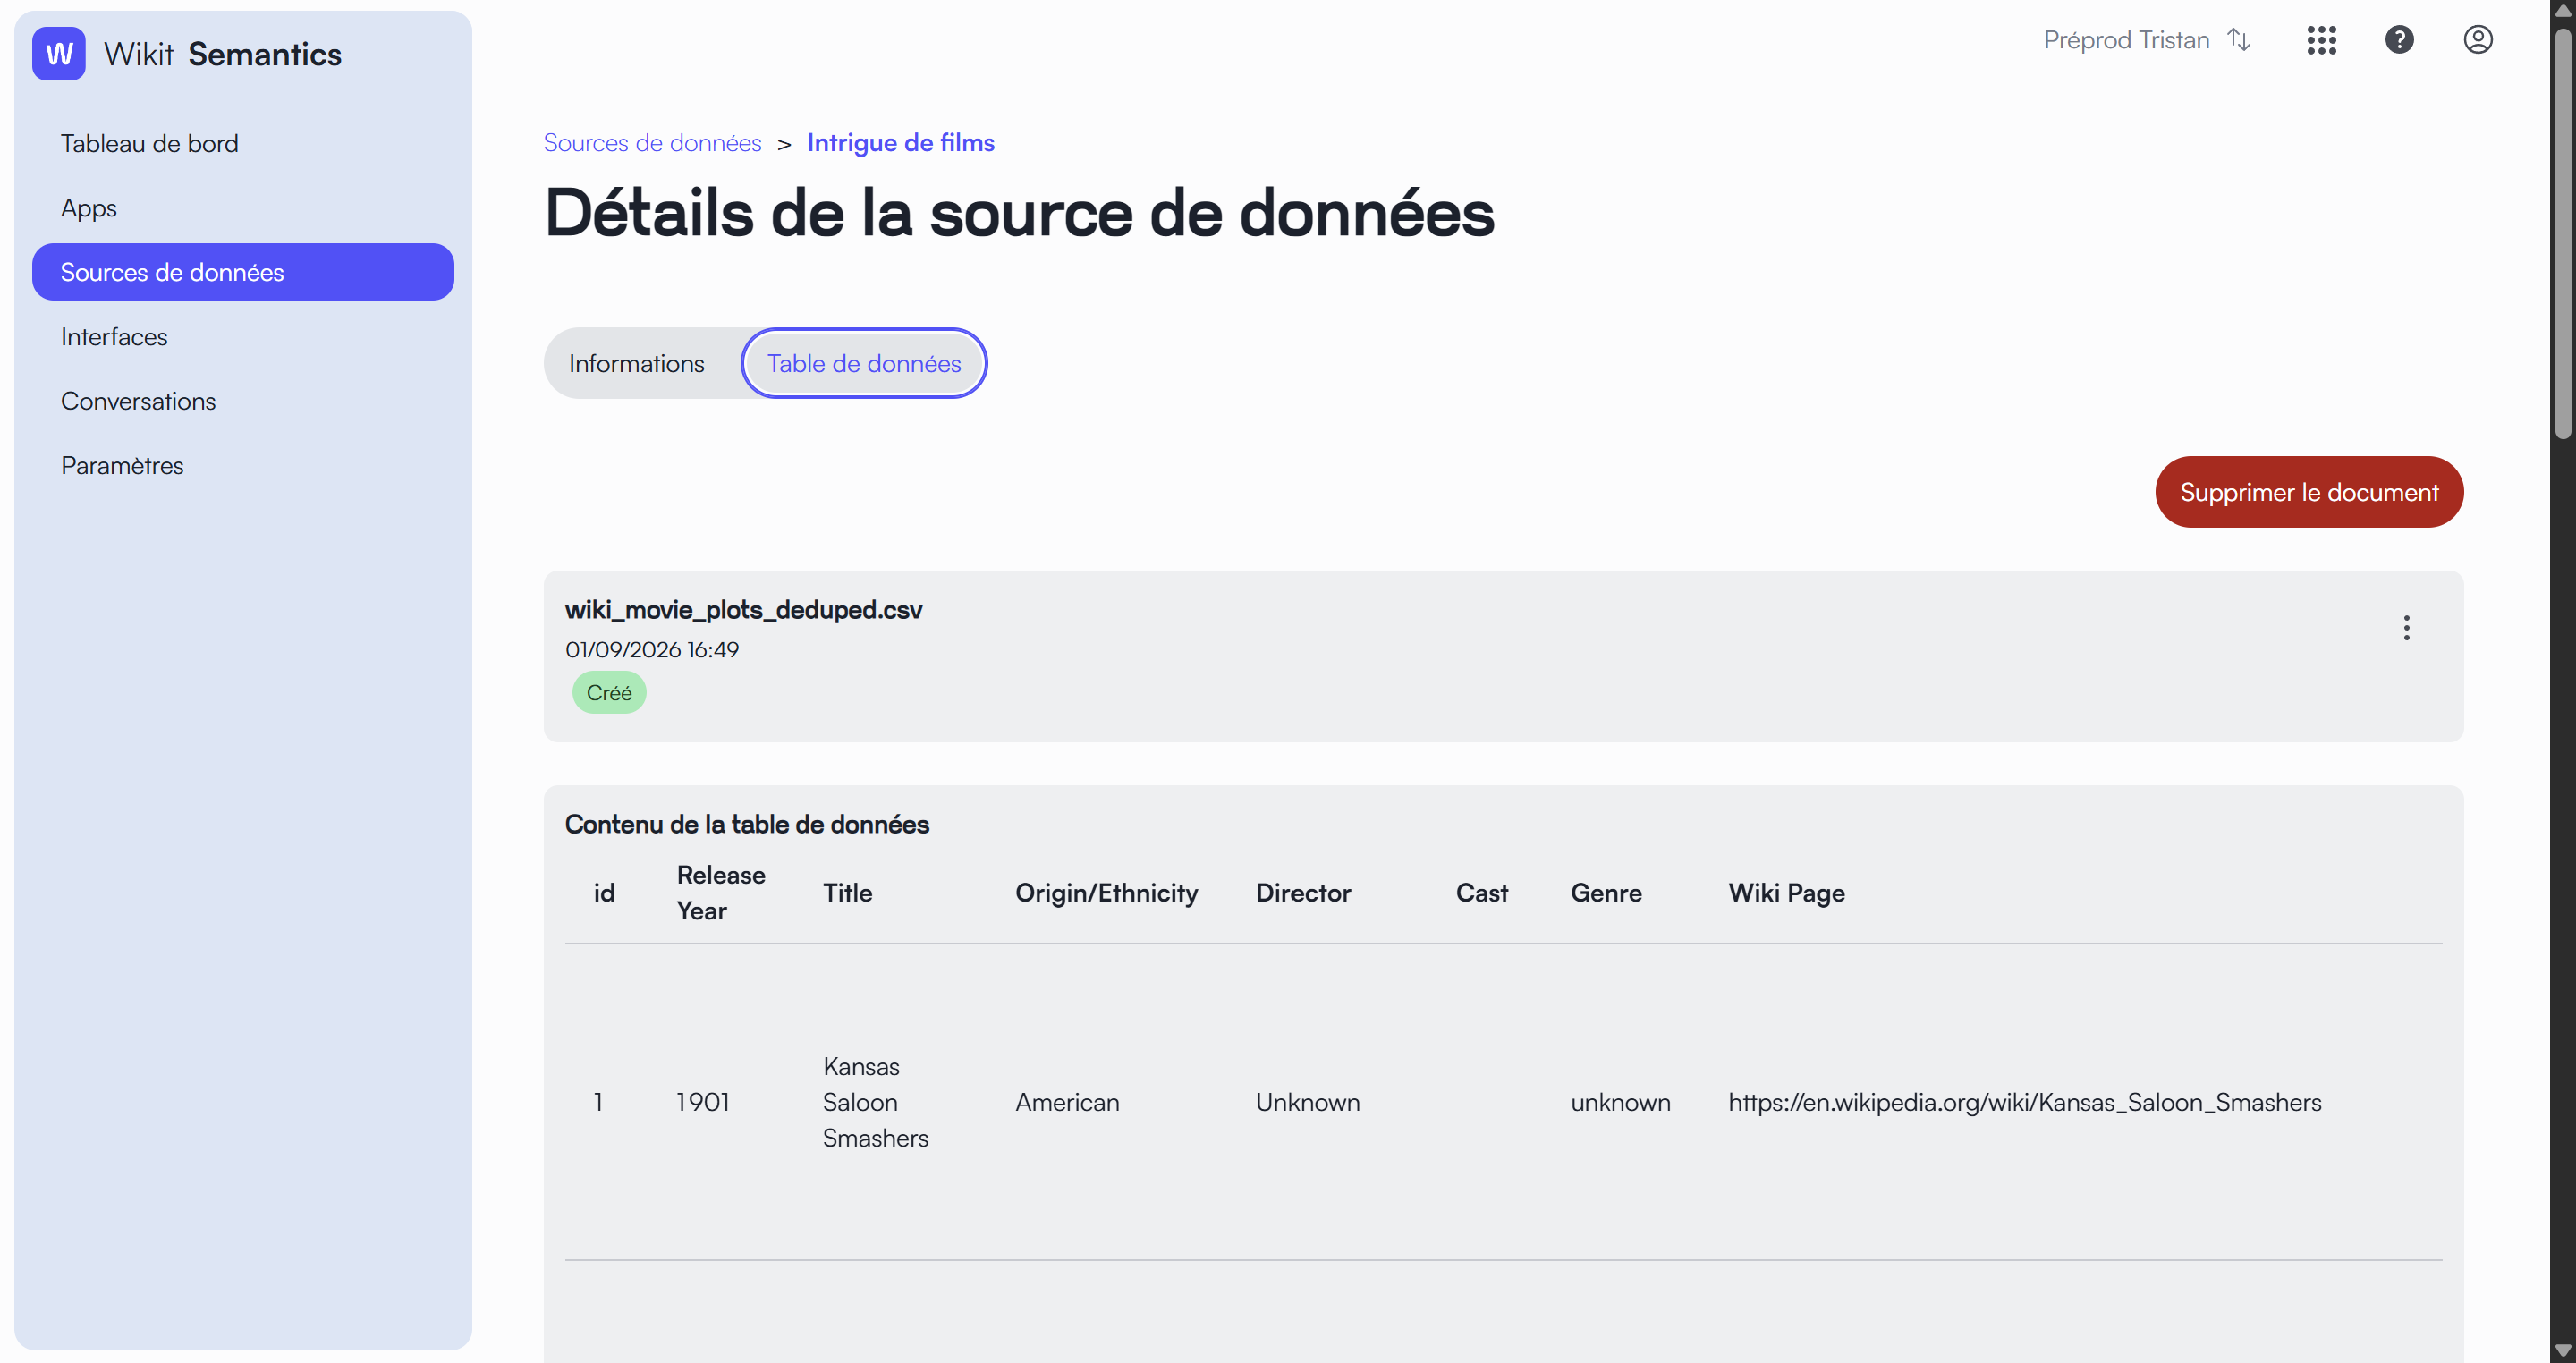
Click on the Data Table tab, then on the Import a document button to access the import page. 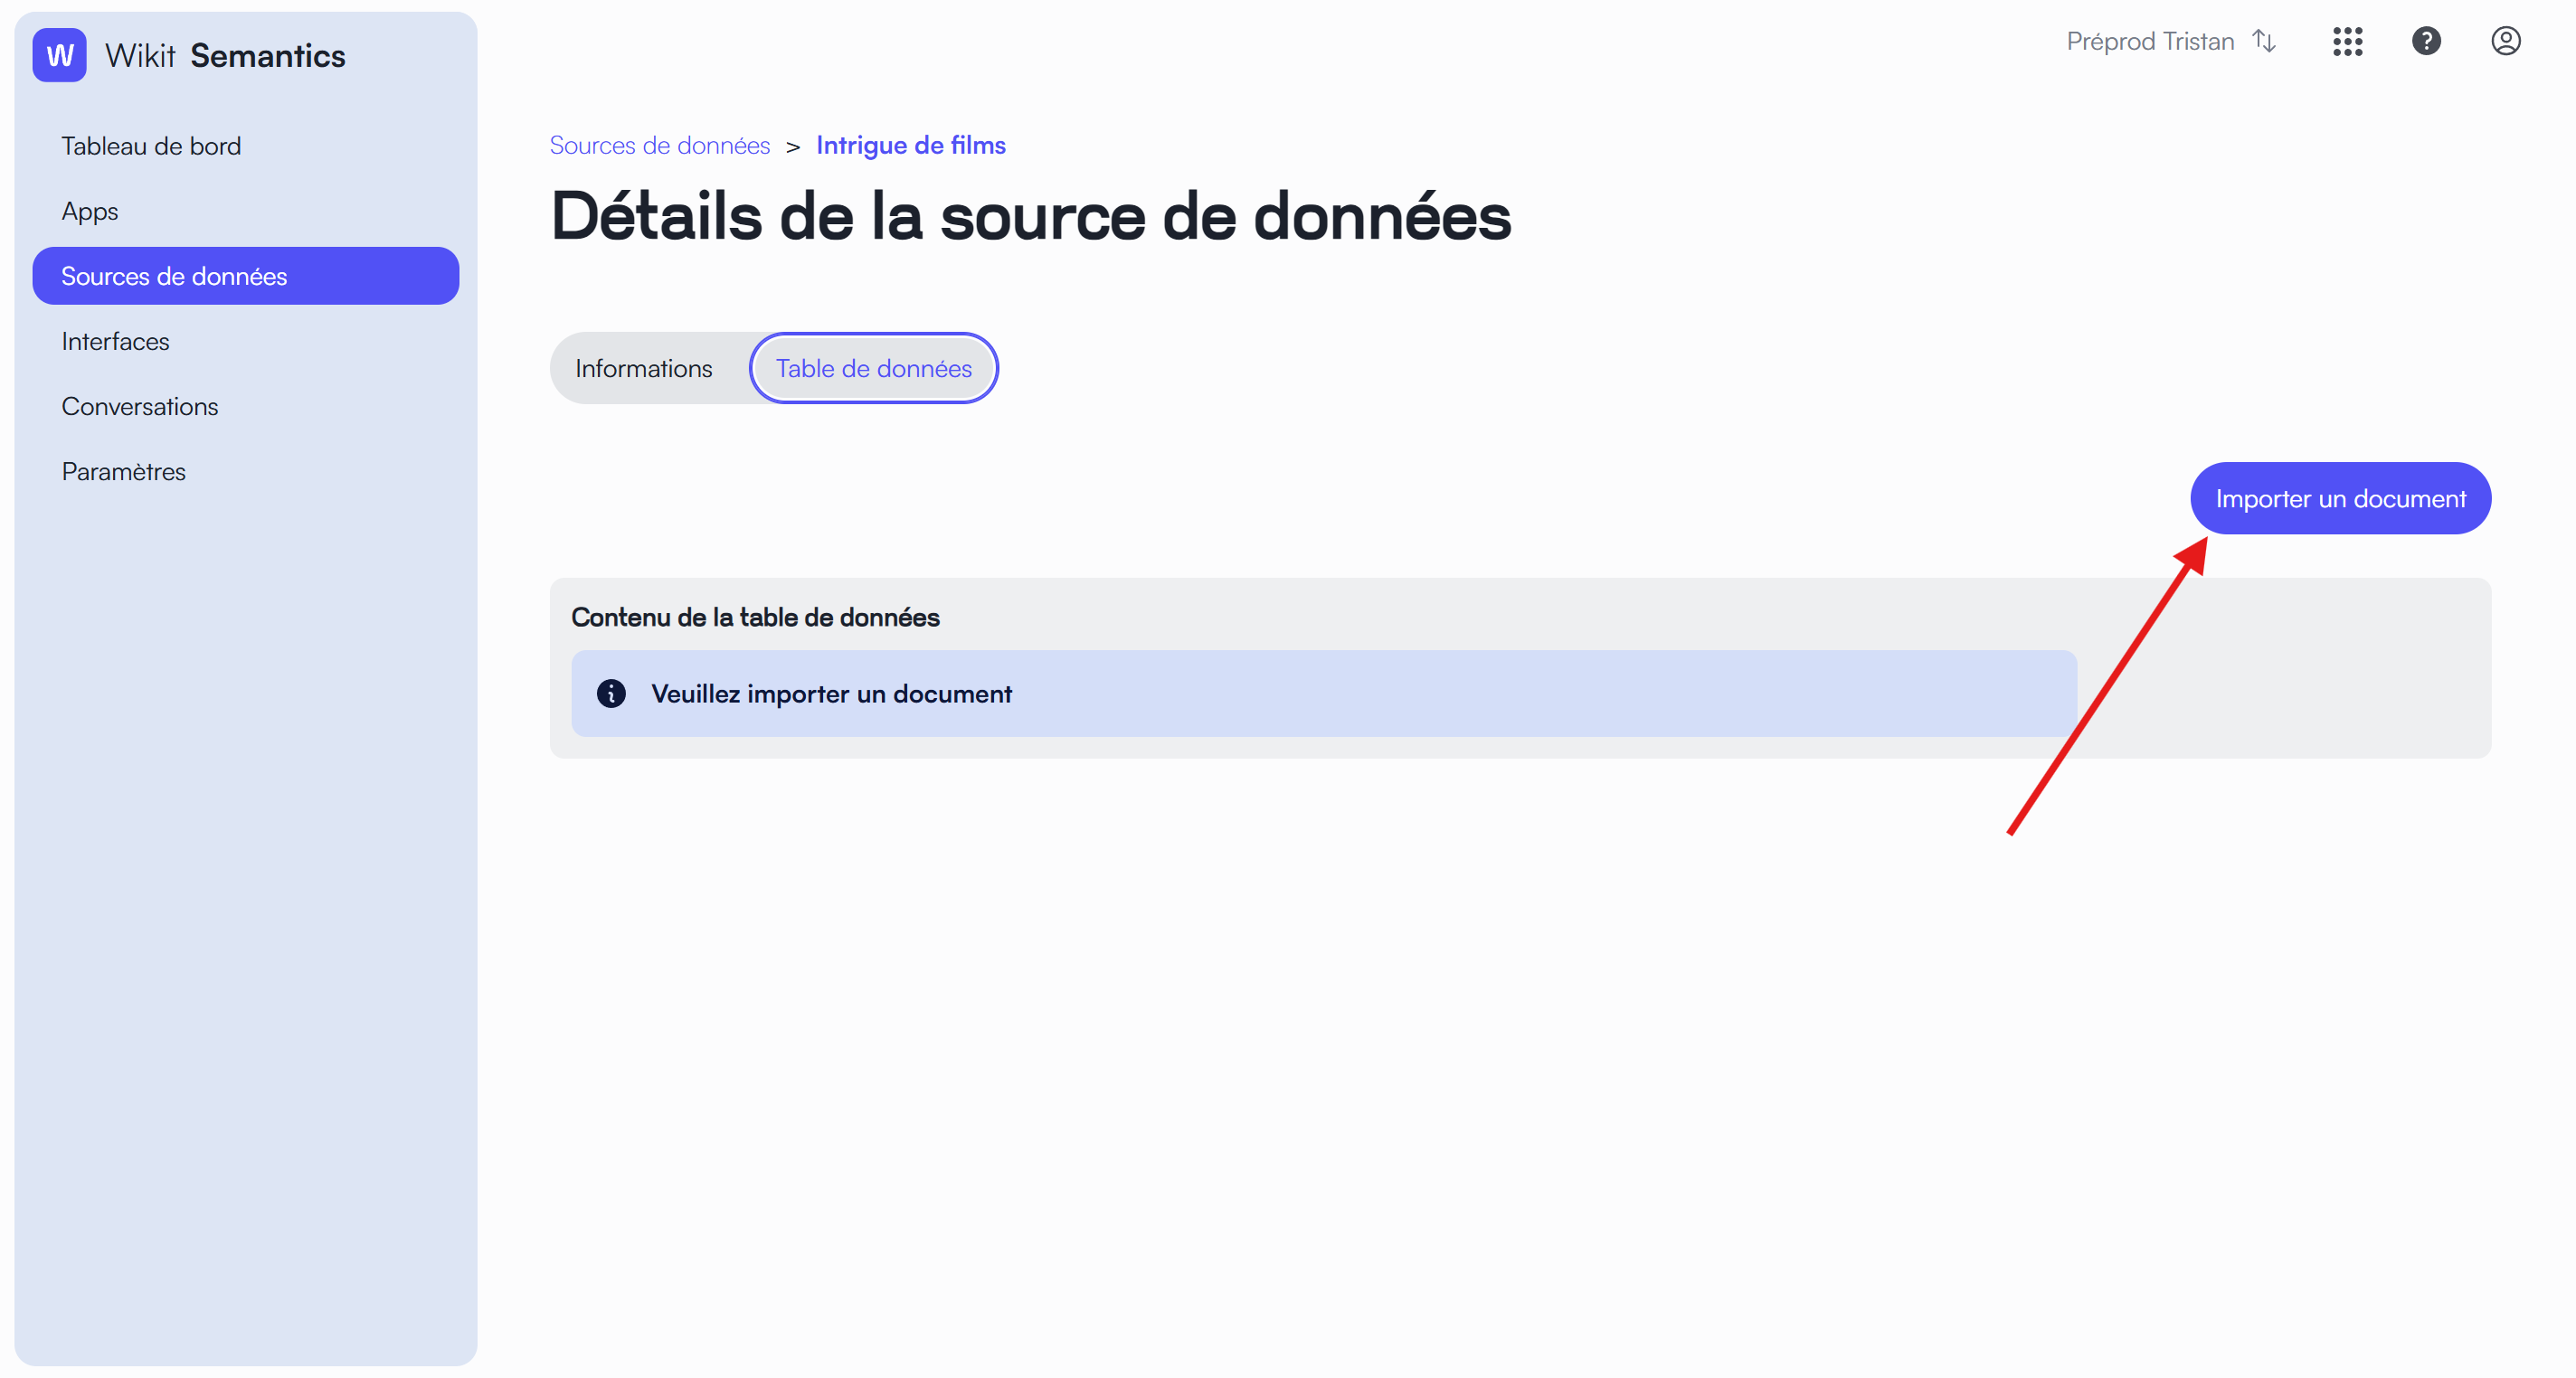
On this page, click on Select a document to import a .csv file (100 MB maximum). 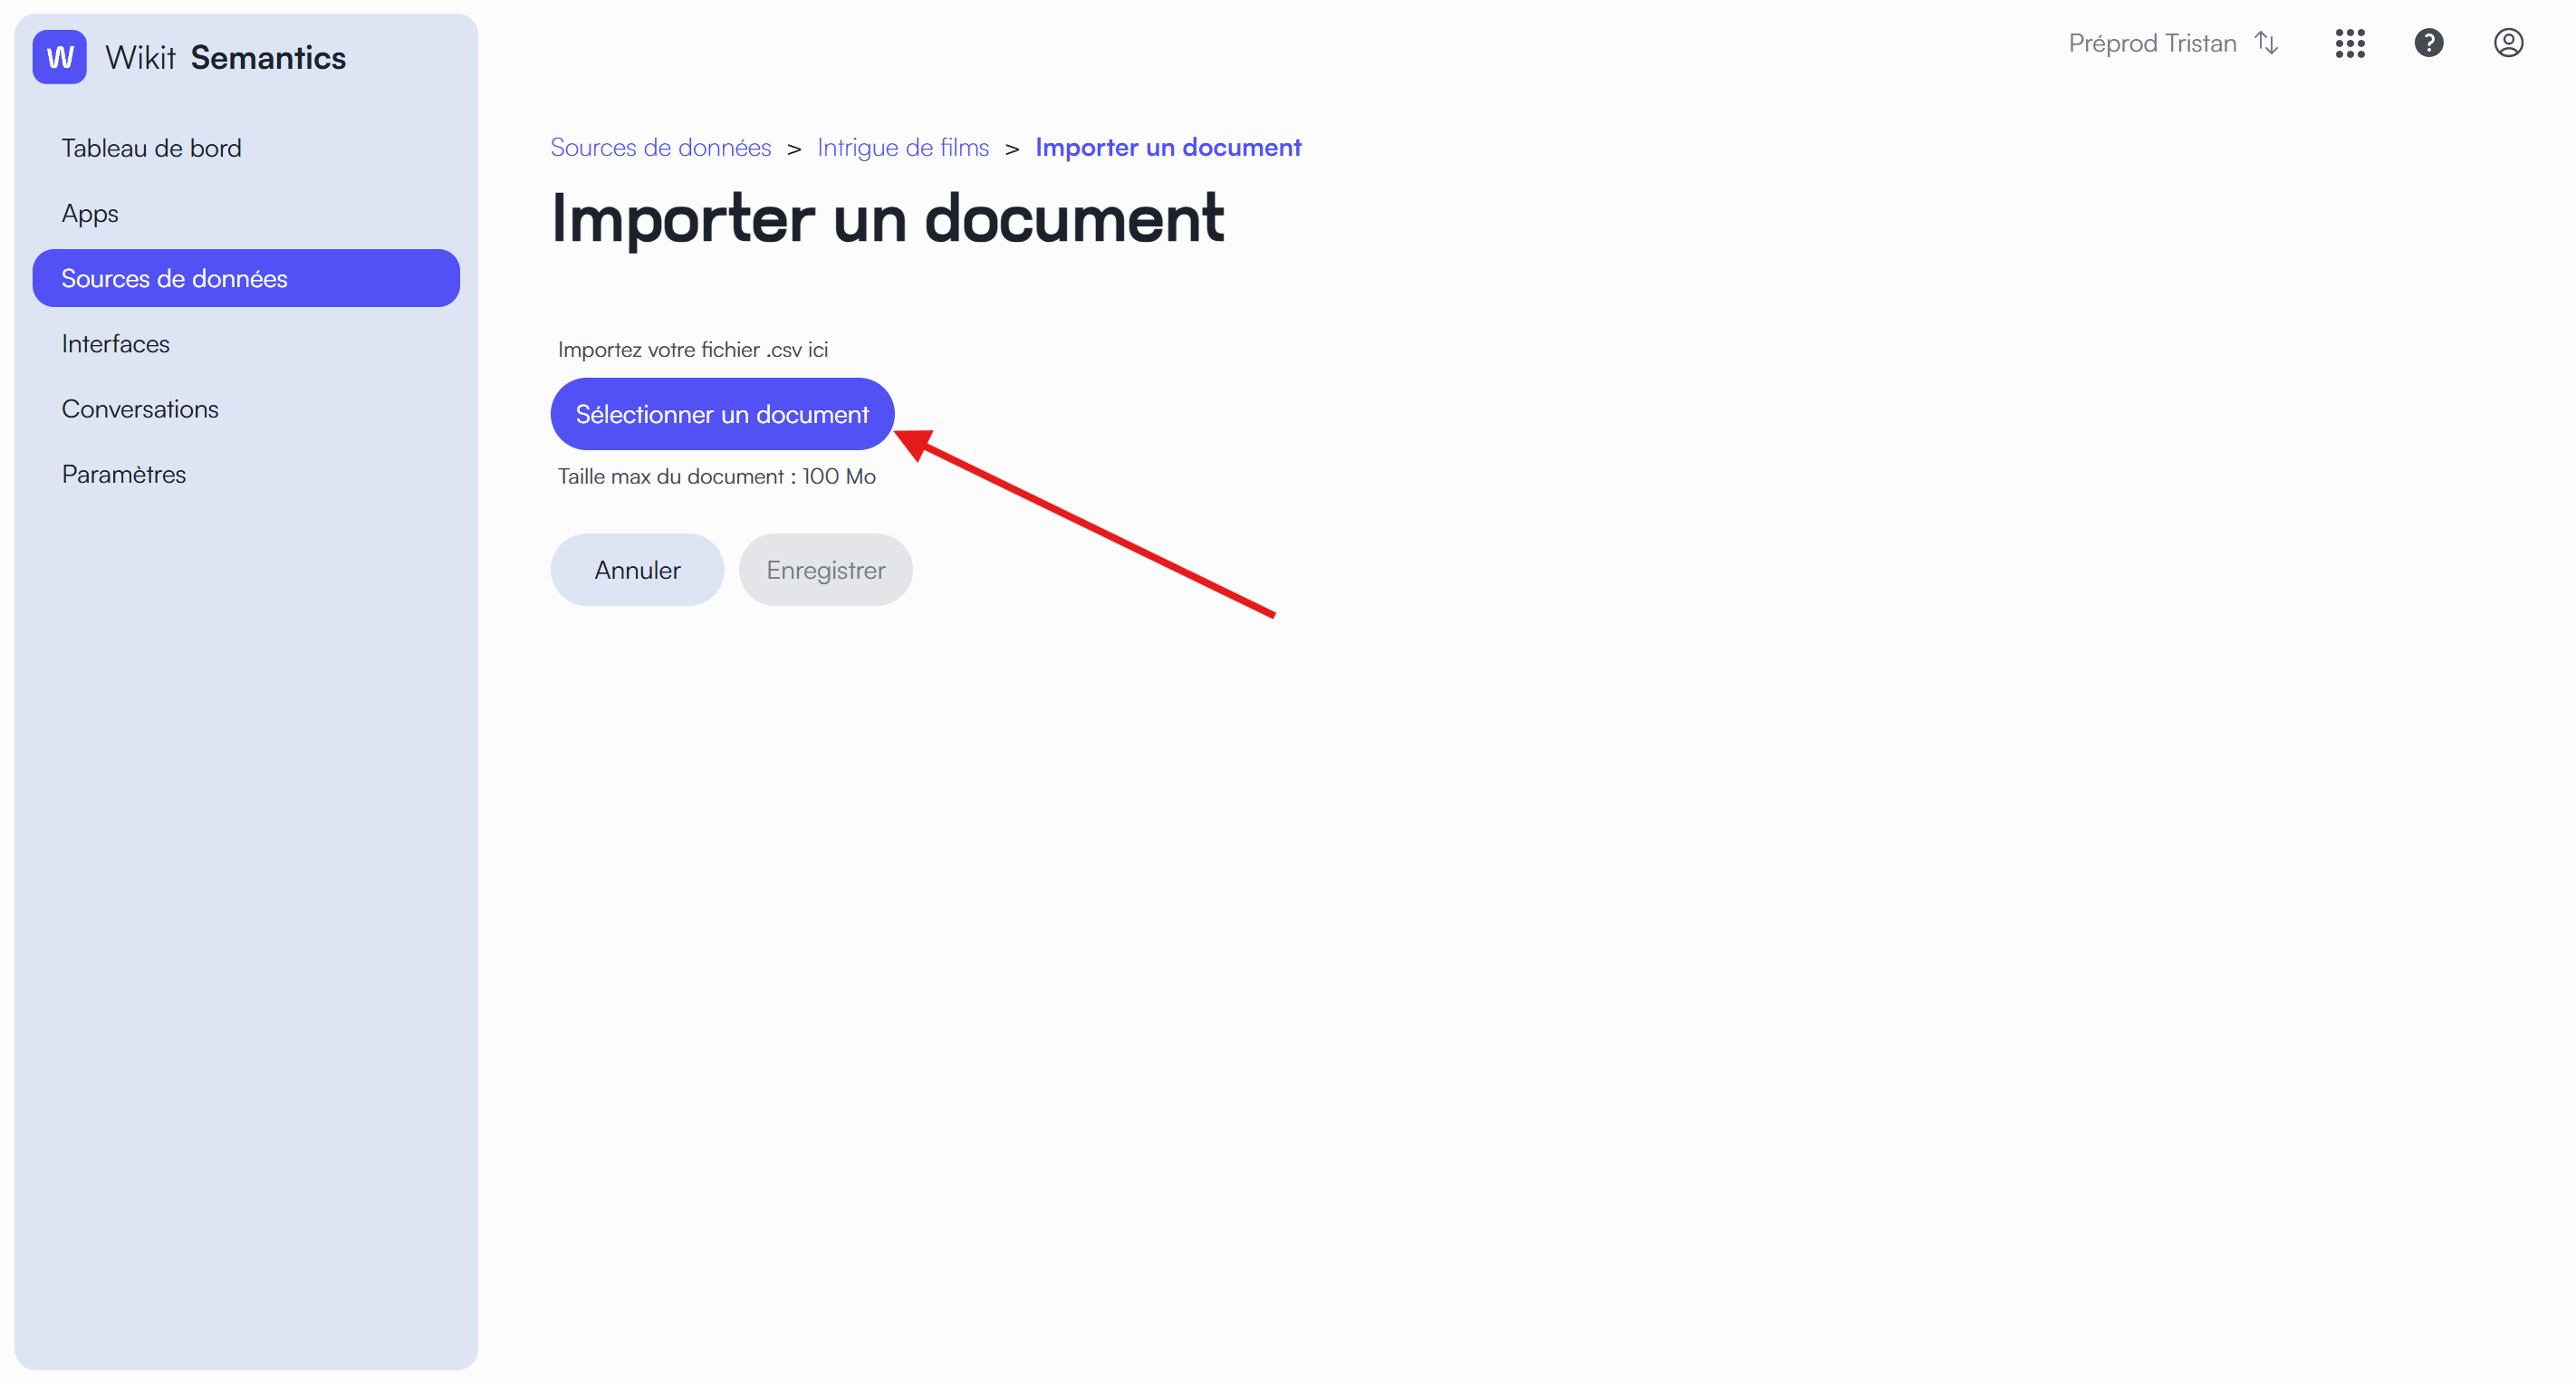
Handling Excel spreadsheets or other formats
Spreadsheets other than .csv are not supported by the application. To use them in the application, they must be converted to .csv before importing. Here is a guide from Microsoft support for performing this conversion with an Excel file.
After the file is loaded, each detected column can be configured:
- Its Property type (Text, Number, etc.)
- Whether it should be Active or not (an unchecked column is not imported)
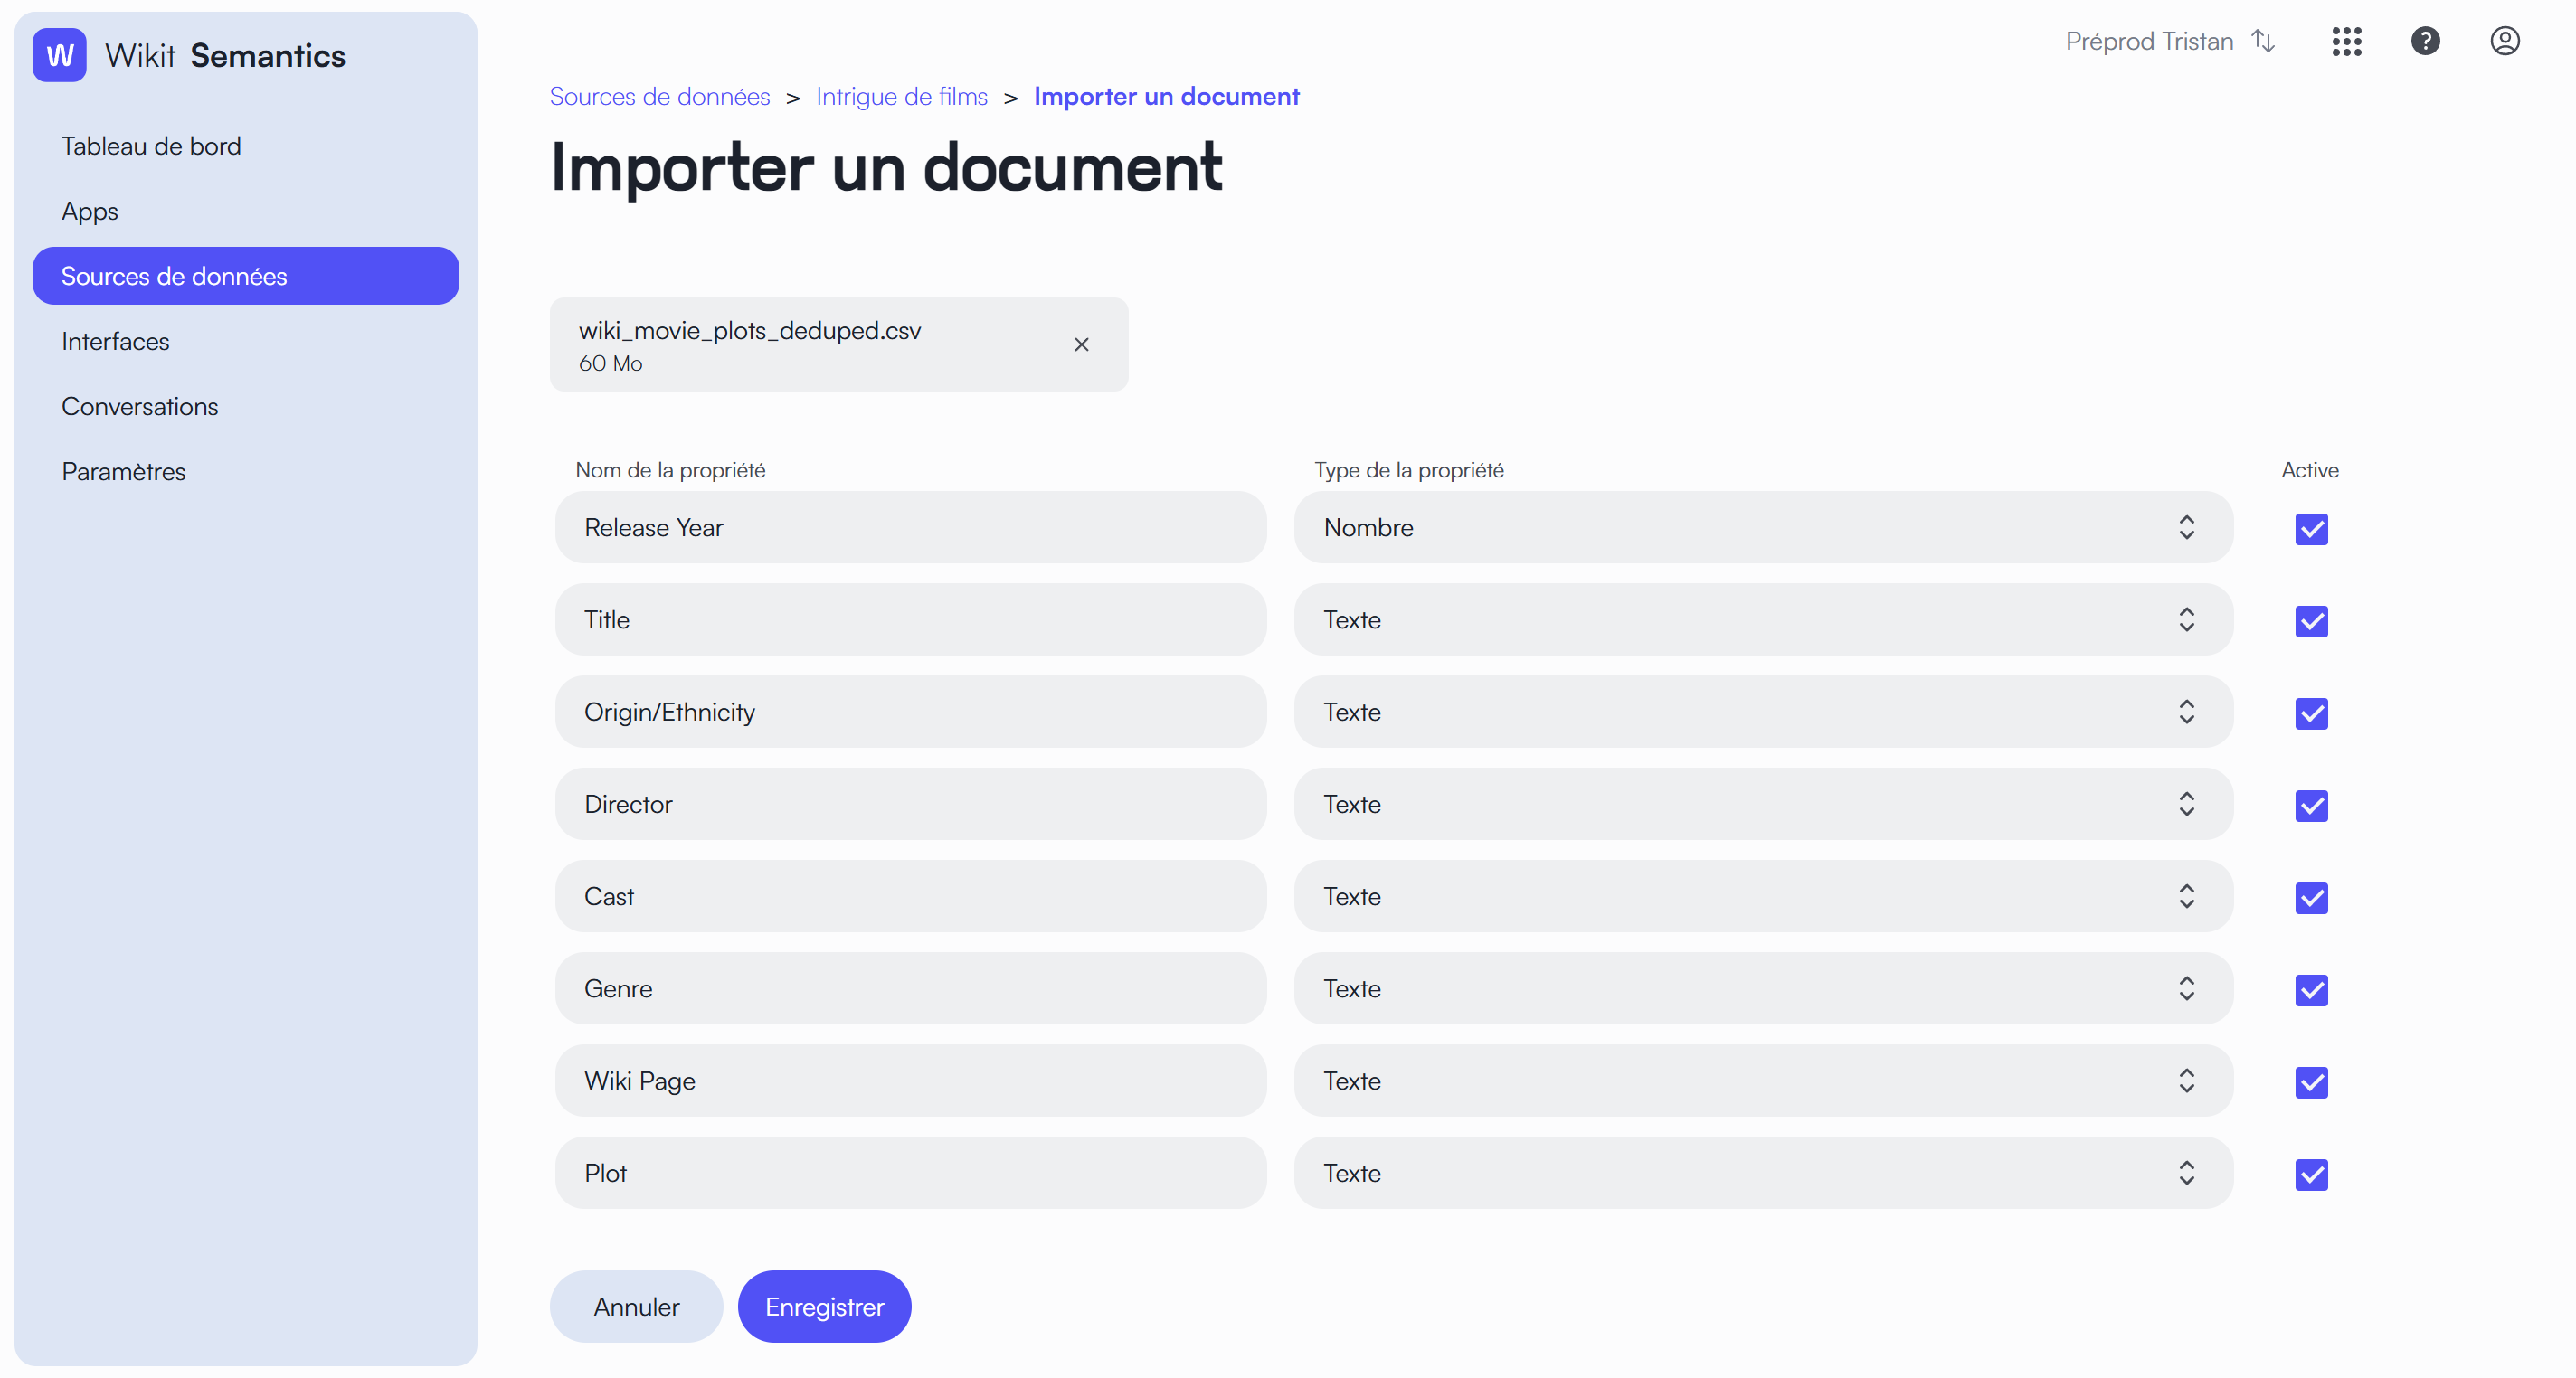
Click Save to start the import. The document status changes from "Generating metadata" to "Created", and its content is then displayed in the Data Table tab.
Using the Tabular Data Source in an App
To do this, you need to use a workflow-type App connected to an MCP Retriever server. If you have access to the Studio feature, a guide is available in the Studio section. Otherwise, please contact your Wikit representative.