
Clarilog ITSM Connector
The connector developed by Wikit uses the Clarilog API and allows apps to communicate with the Clarilog solution, giving your users the ability to create and track their tickets.
Configuration
| Field name | Format / Type | Required | Comment |
|---|---|---|---|
| External URL of the Clarilog instance | URL | ✅ | Format: https://XXX.one-clarilog.com/ |
| Application ID (optional) | Identifier | ➖ | Optional |
| Application token | Token | ✅ | Generated from the personal access keys |
| Language | Free text | ✅ | Language used for created tickets |
| Type of tickets to create | Value list | ✅ | Clarilog ticket type created when a user submits a request from the chat |
| Reception channel ID | Identifier | ✅ | Identifier of the Clarilog reception channel associated with created tickets |
| Category ID | Identifier | ✅ | Identifier of the Clarilog category associated with created tickets |
| Impact ID | Identifier | ✅ | Identifier of the Clarilog impact level associated with created tickets |
| Urgency ID | Identifier | ✅ | Identifier of the Clarilog urgency level associated with created tickets |
| Wikit account ID | Identifier | ✅ | Account identifier used to identify Wikit users in Clarilog |
💡 Fields marked ✅ are required for the connector to work.
Setup
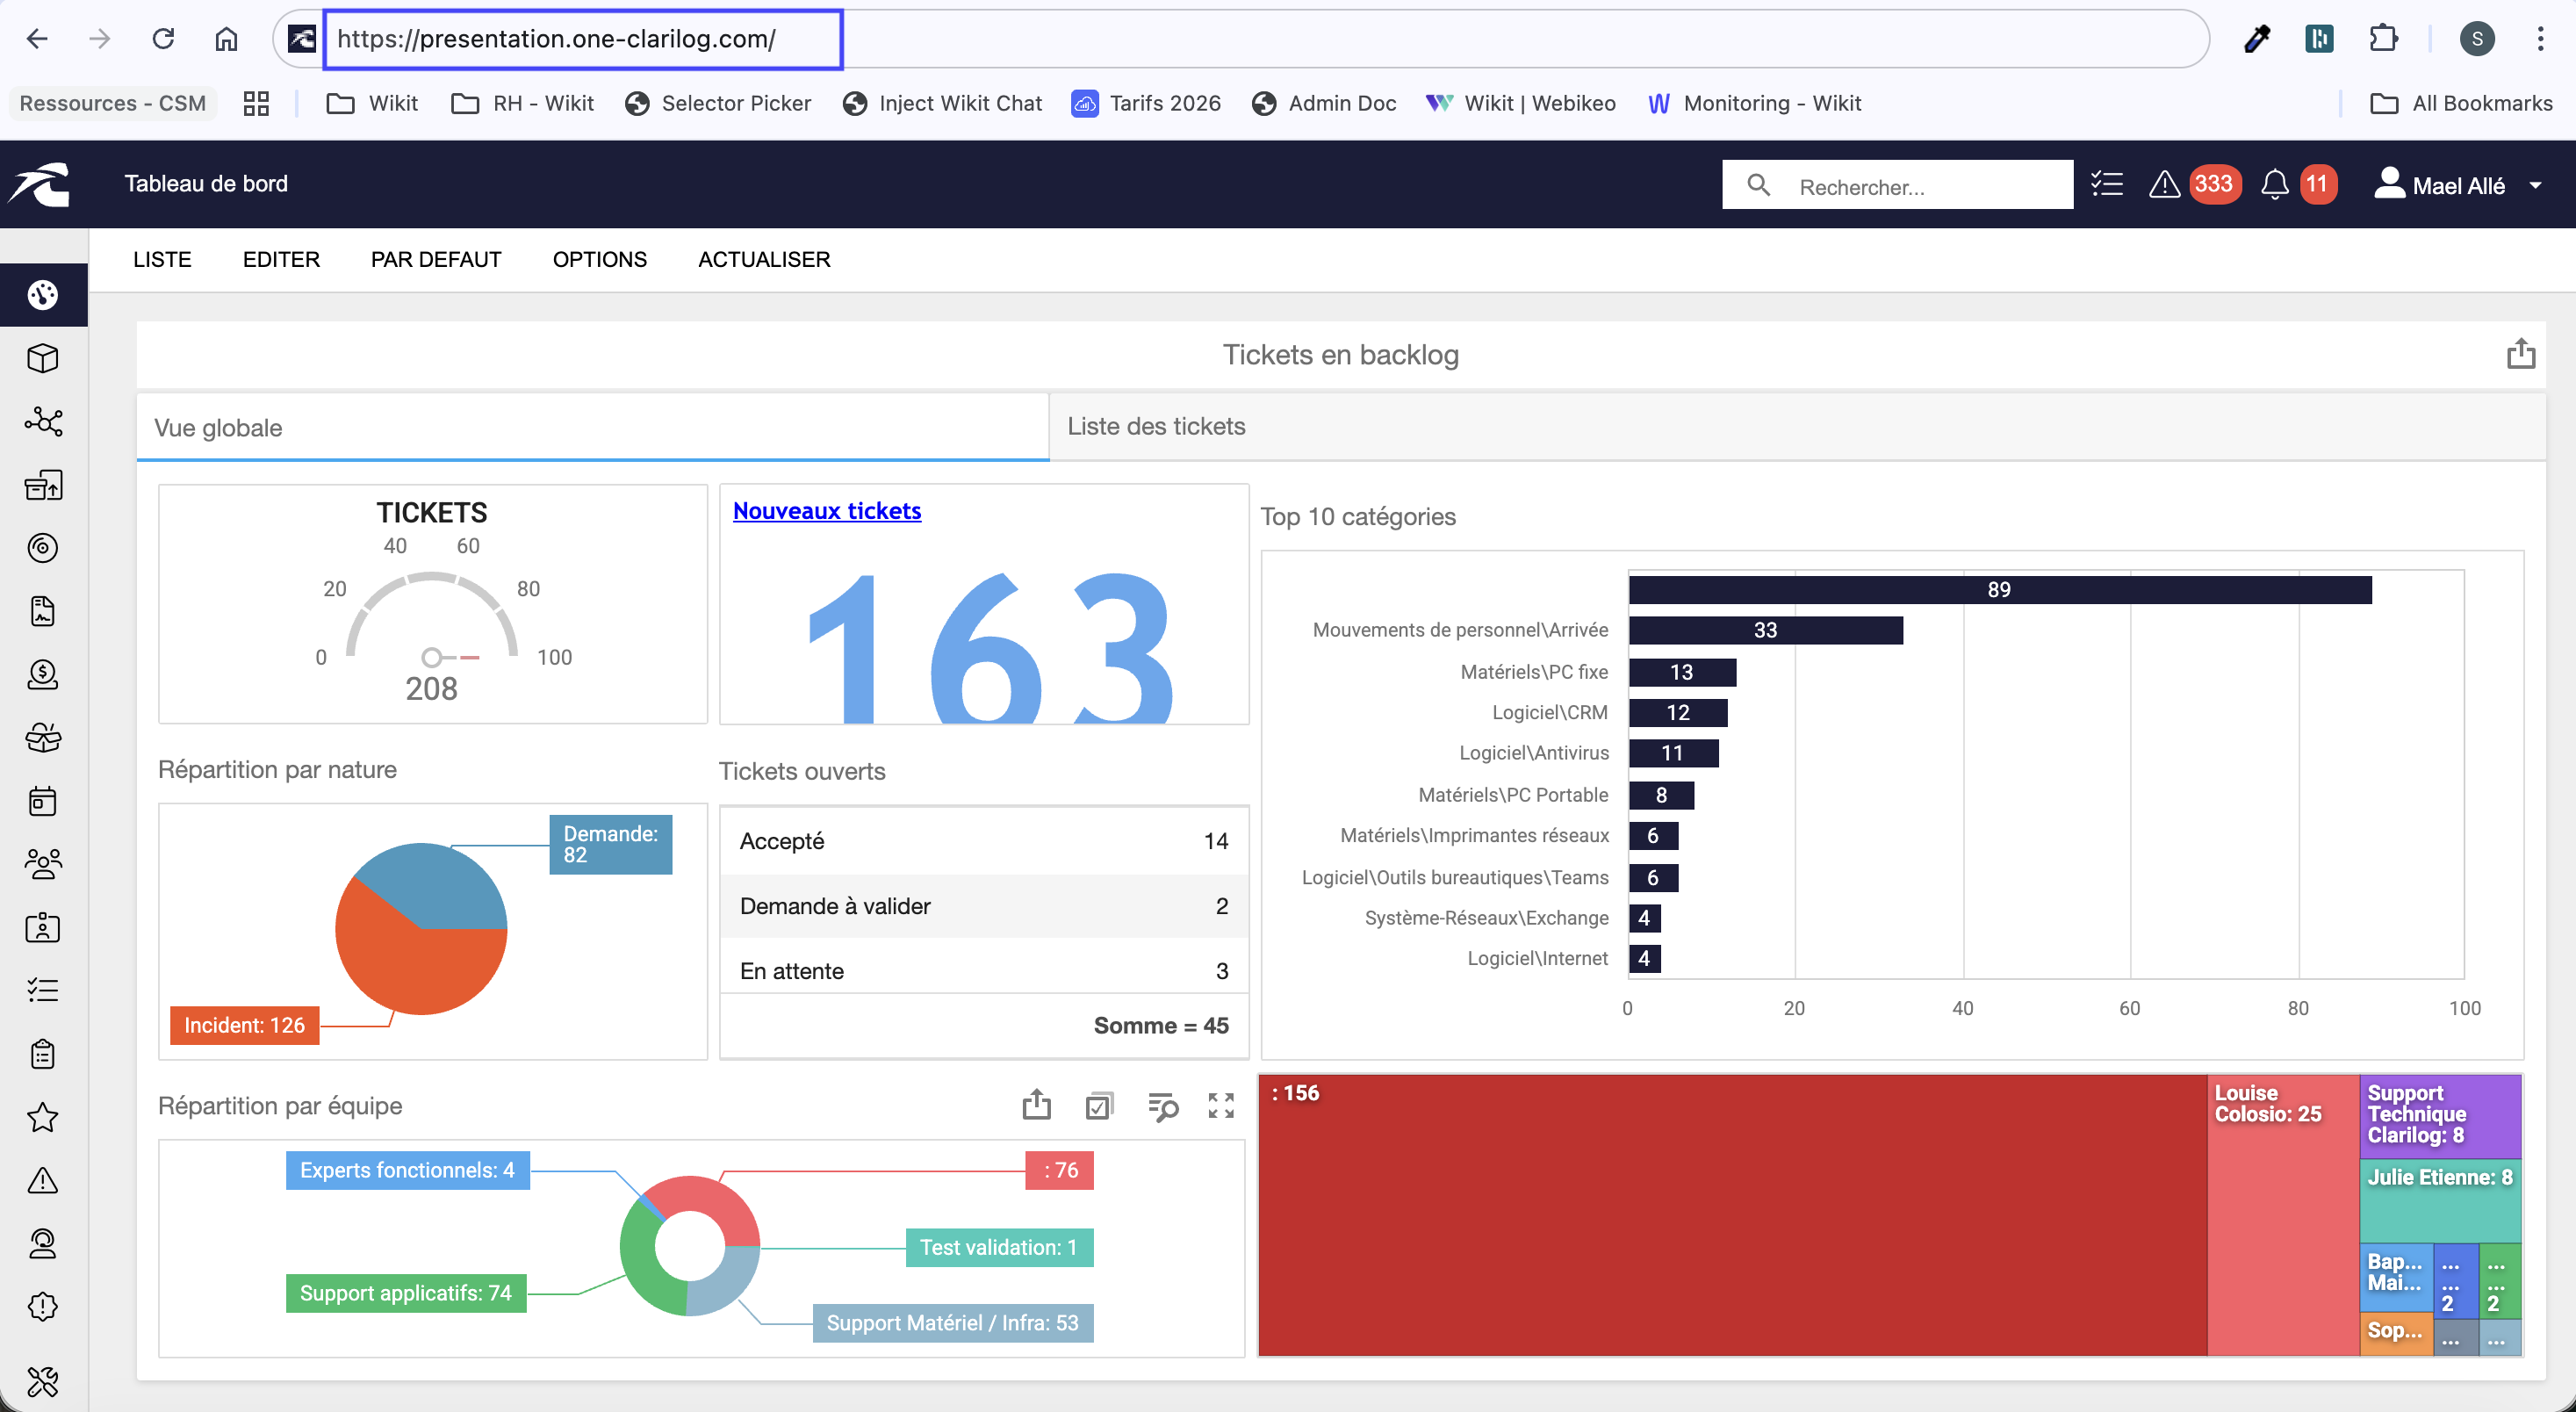
Finding the external URL
To find the external URL, simply go to the login page and copy/paste the URL available in your browser directly into the Wikit Semantics connector configuration as shown below:
Generate the authentication token or API token:
To do this, simply go to the Administration menu (1) → Security (2) → Personal access keys (3):
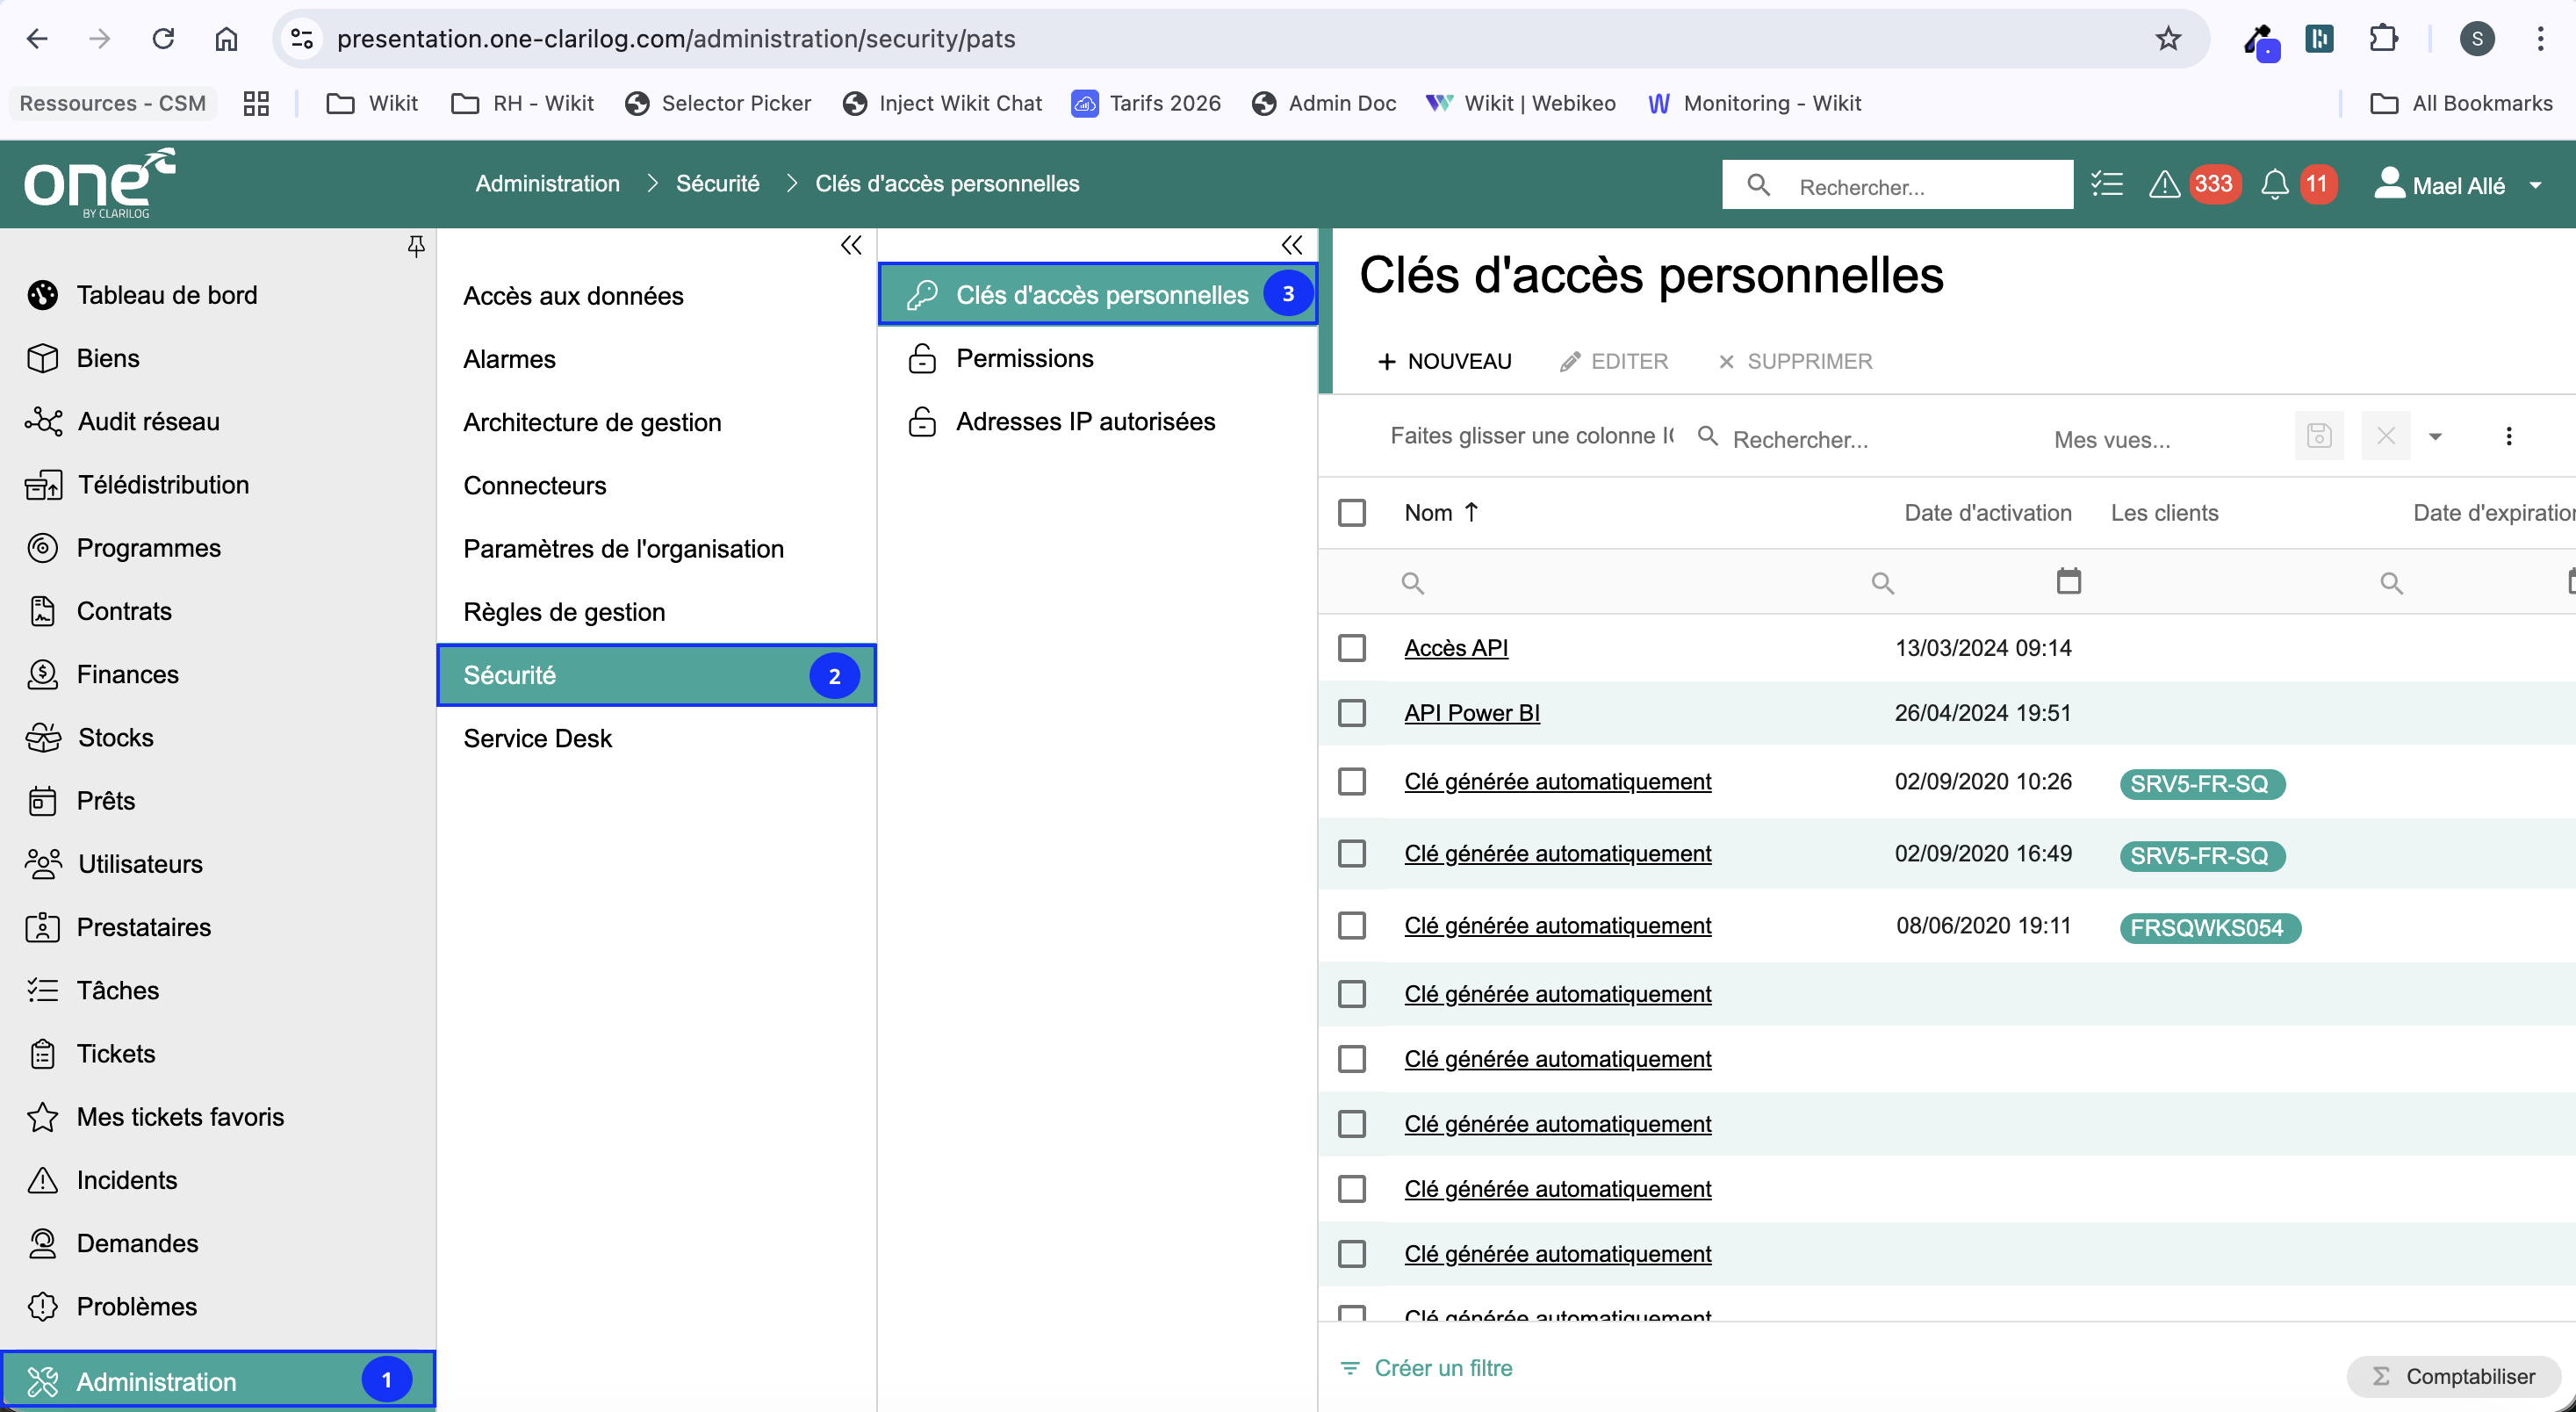
Once you access this menu, you can click on New → give it the name you want and save. You can now retrieve the token in the field of the same name.
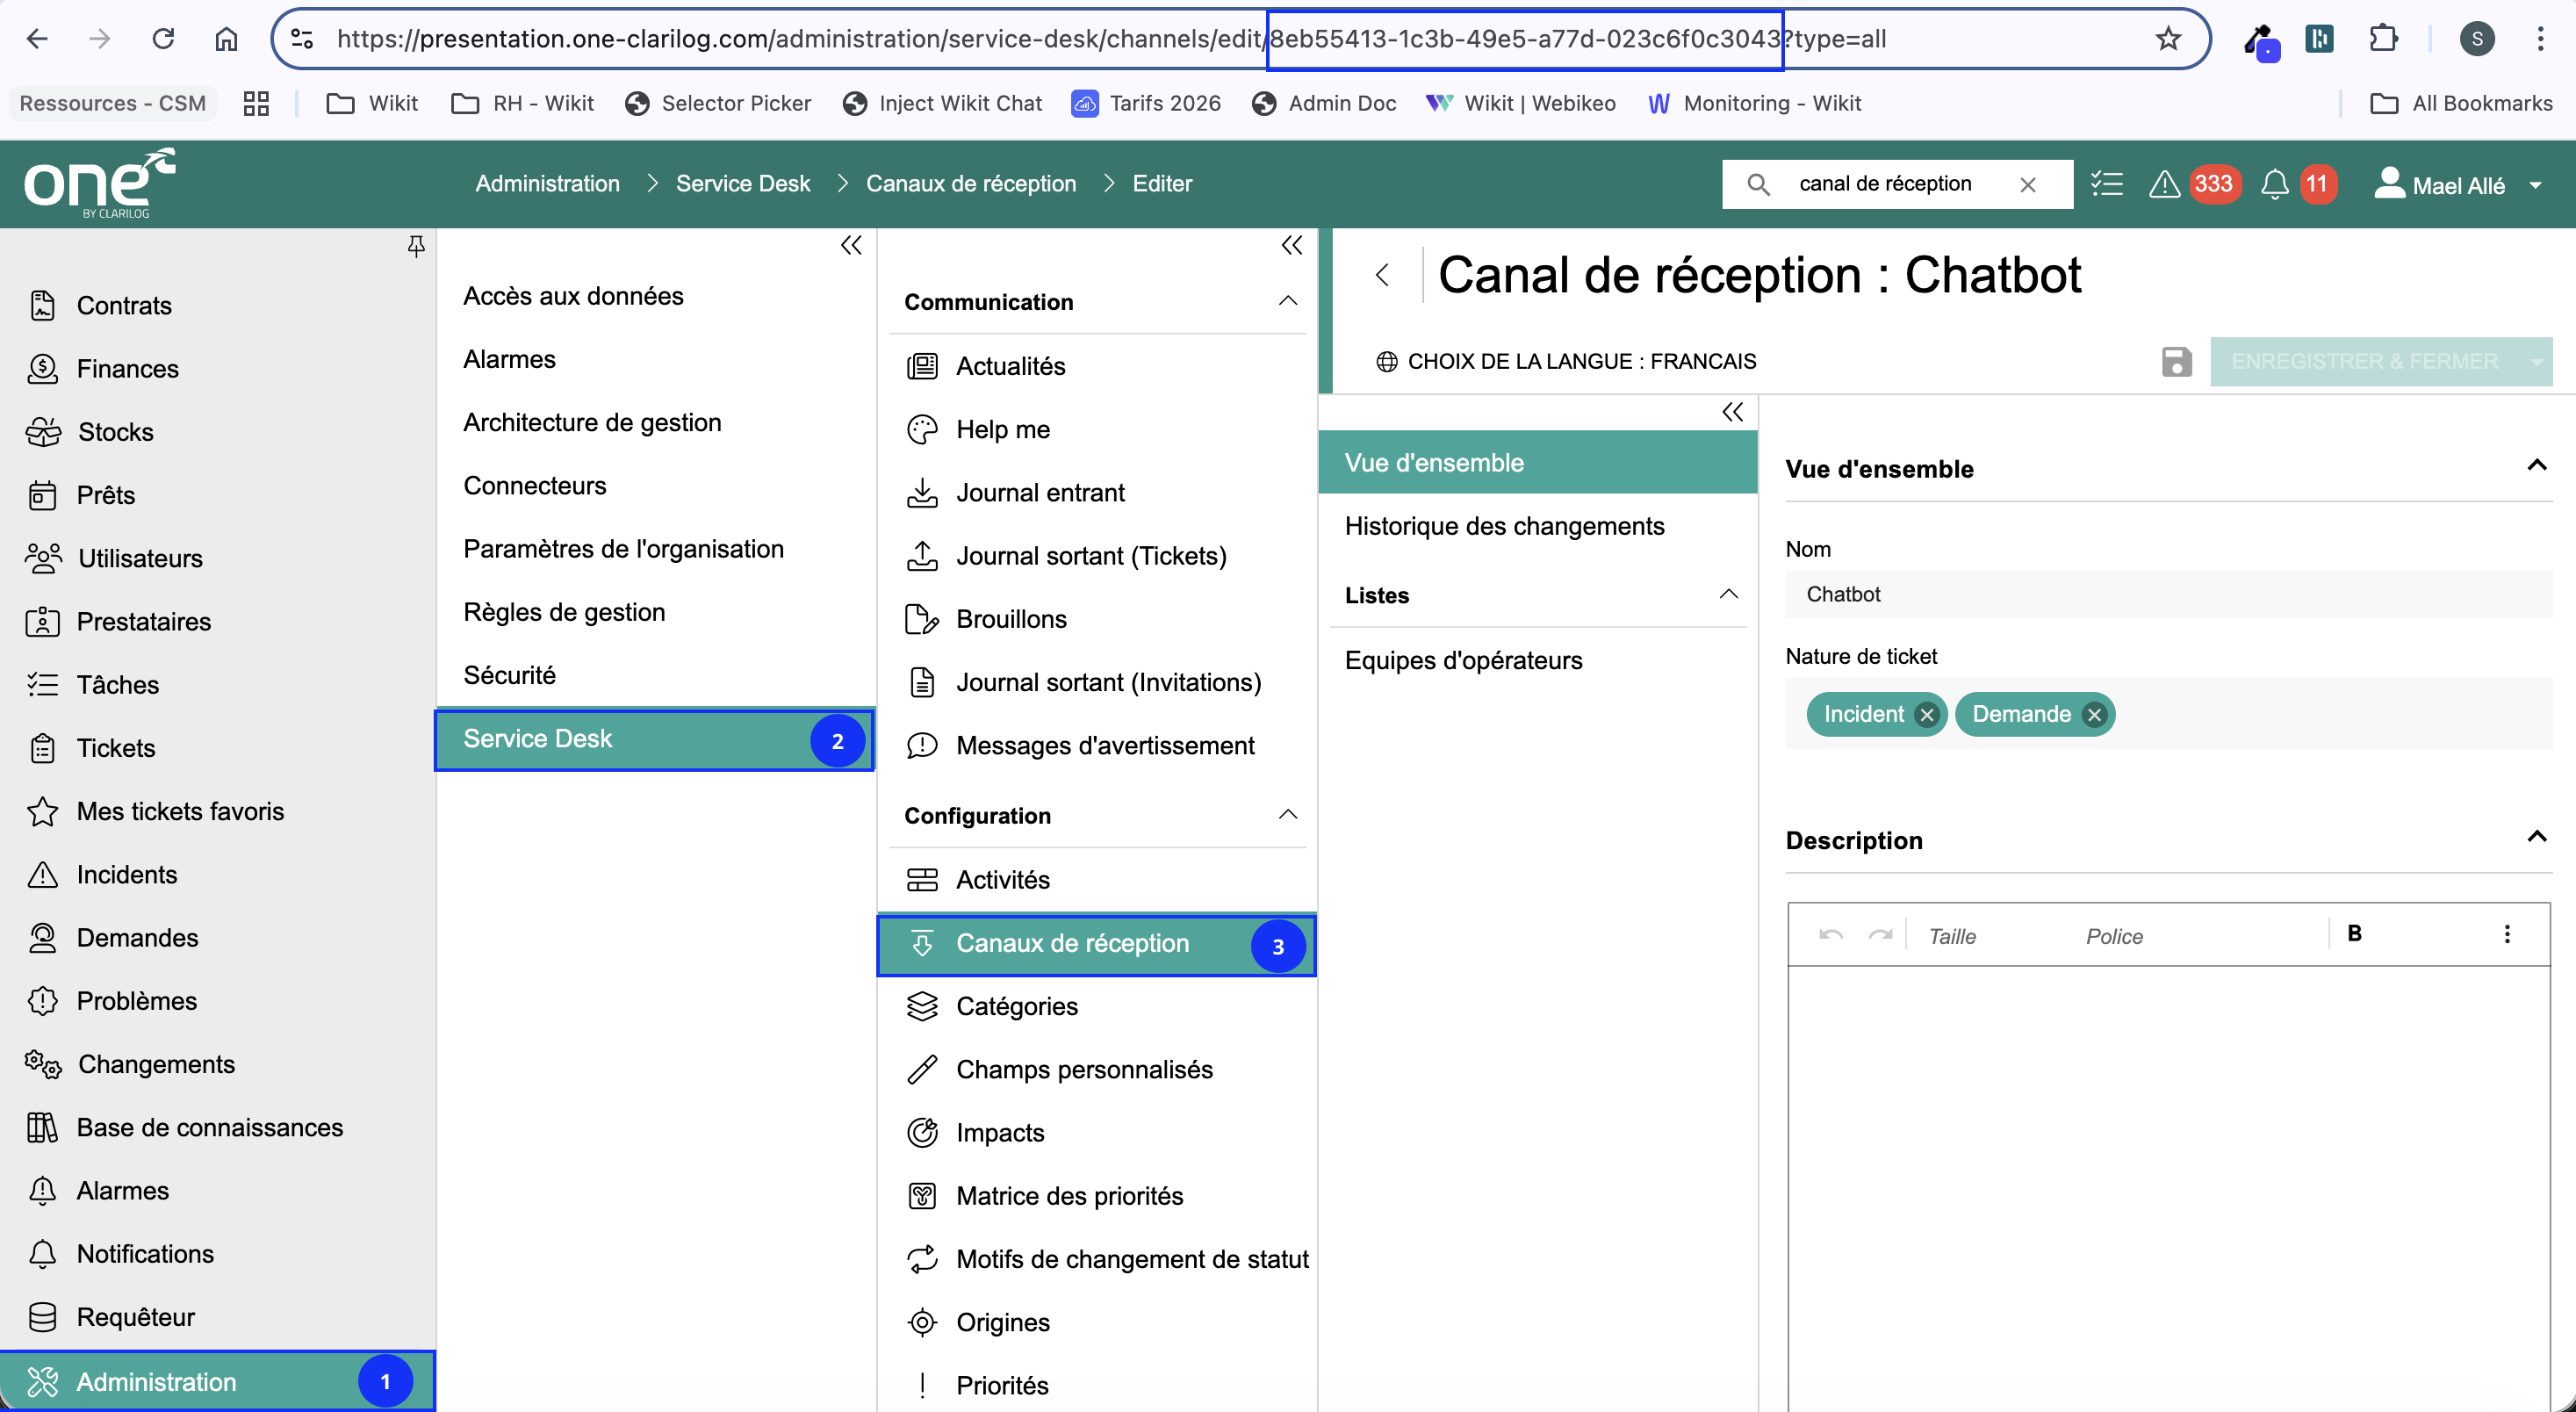
Finding the reception channel ID:
To find the reception channel, simply go to the Administration menu (1) → Service Desk (2) → Reception channels (3). Then select the channel of your choice and retrieve the associated identifier available in your browser's URL:
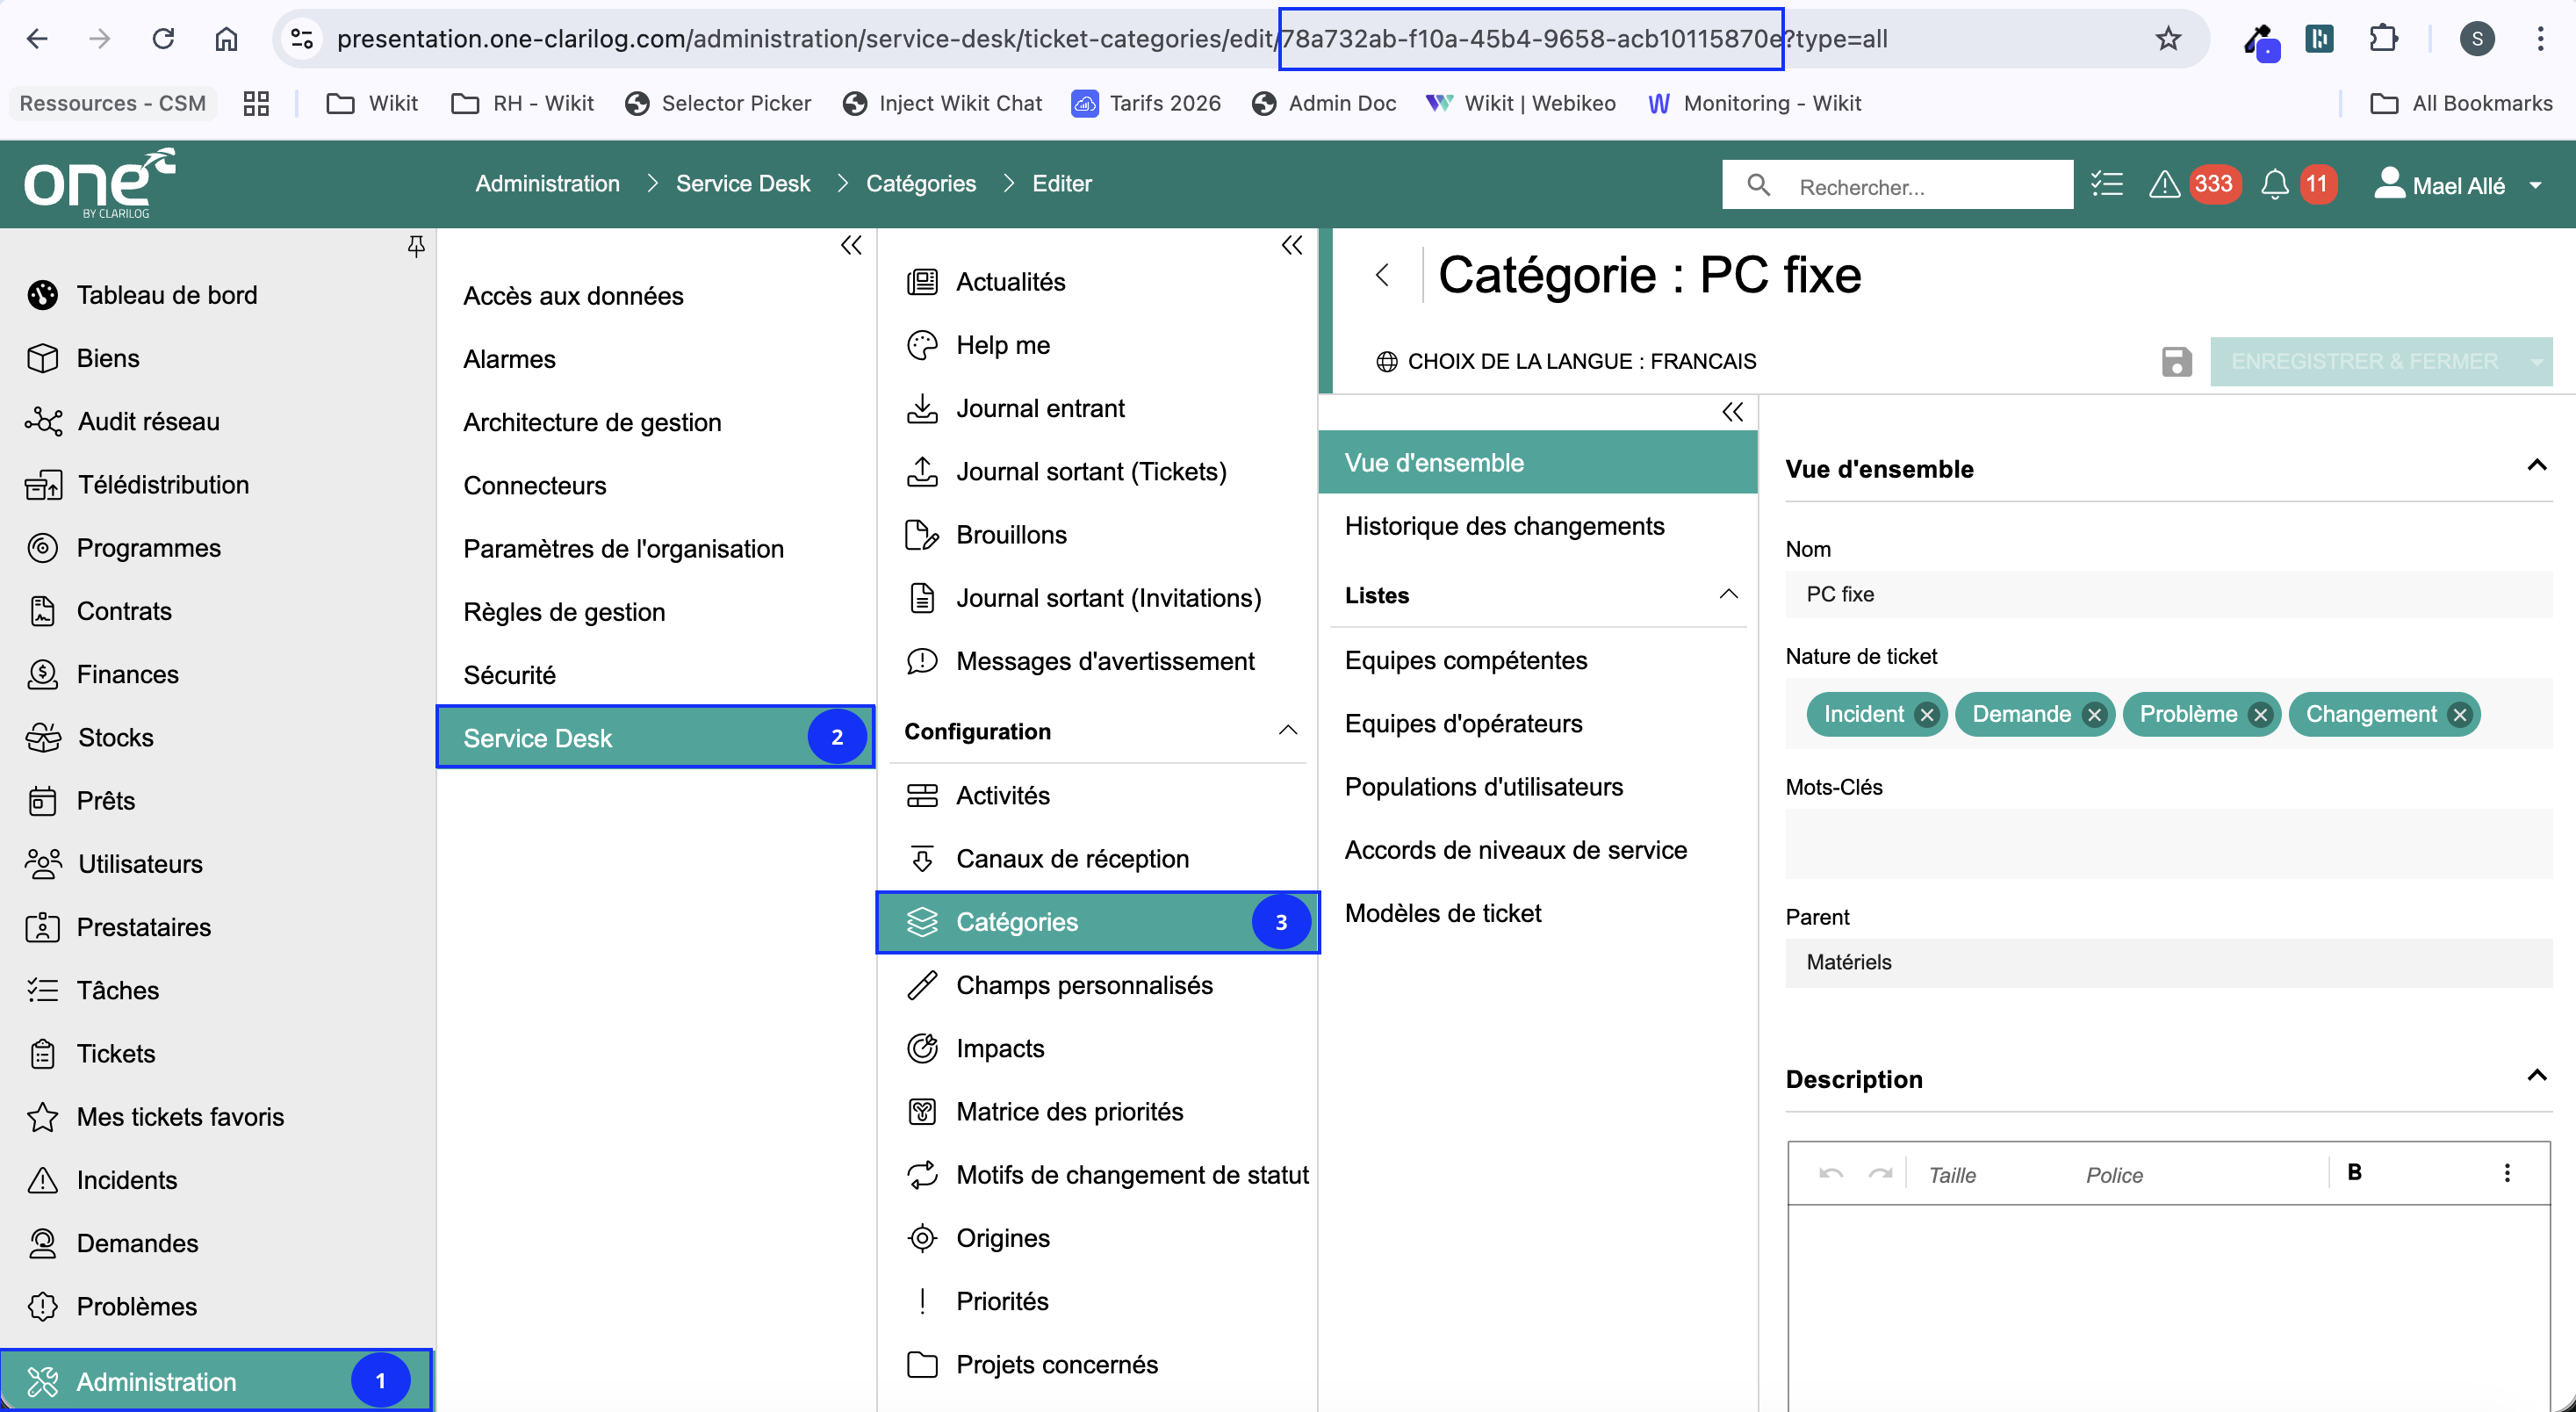
Finding the category ID:
To find the category ID, simply go to the Administration menu (1) → Service Desk (2) → Categories (3). Then select the category of your choice and retrieve the associated identifier available in your browser's URL:
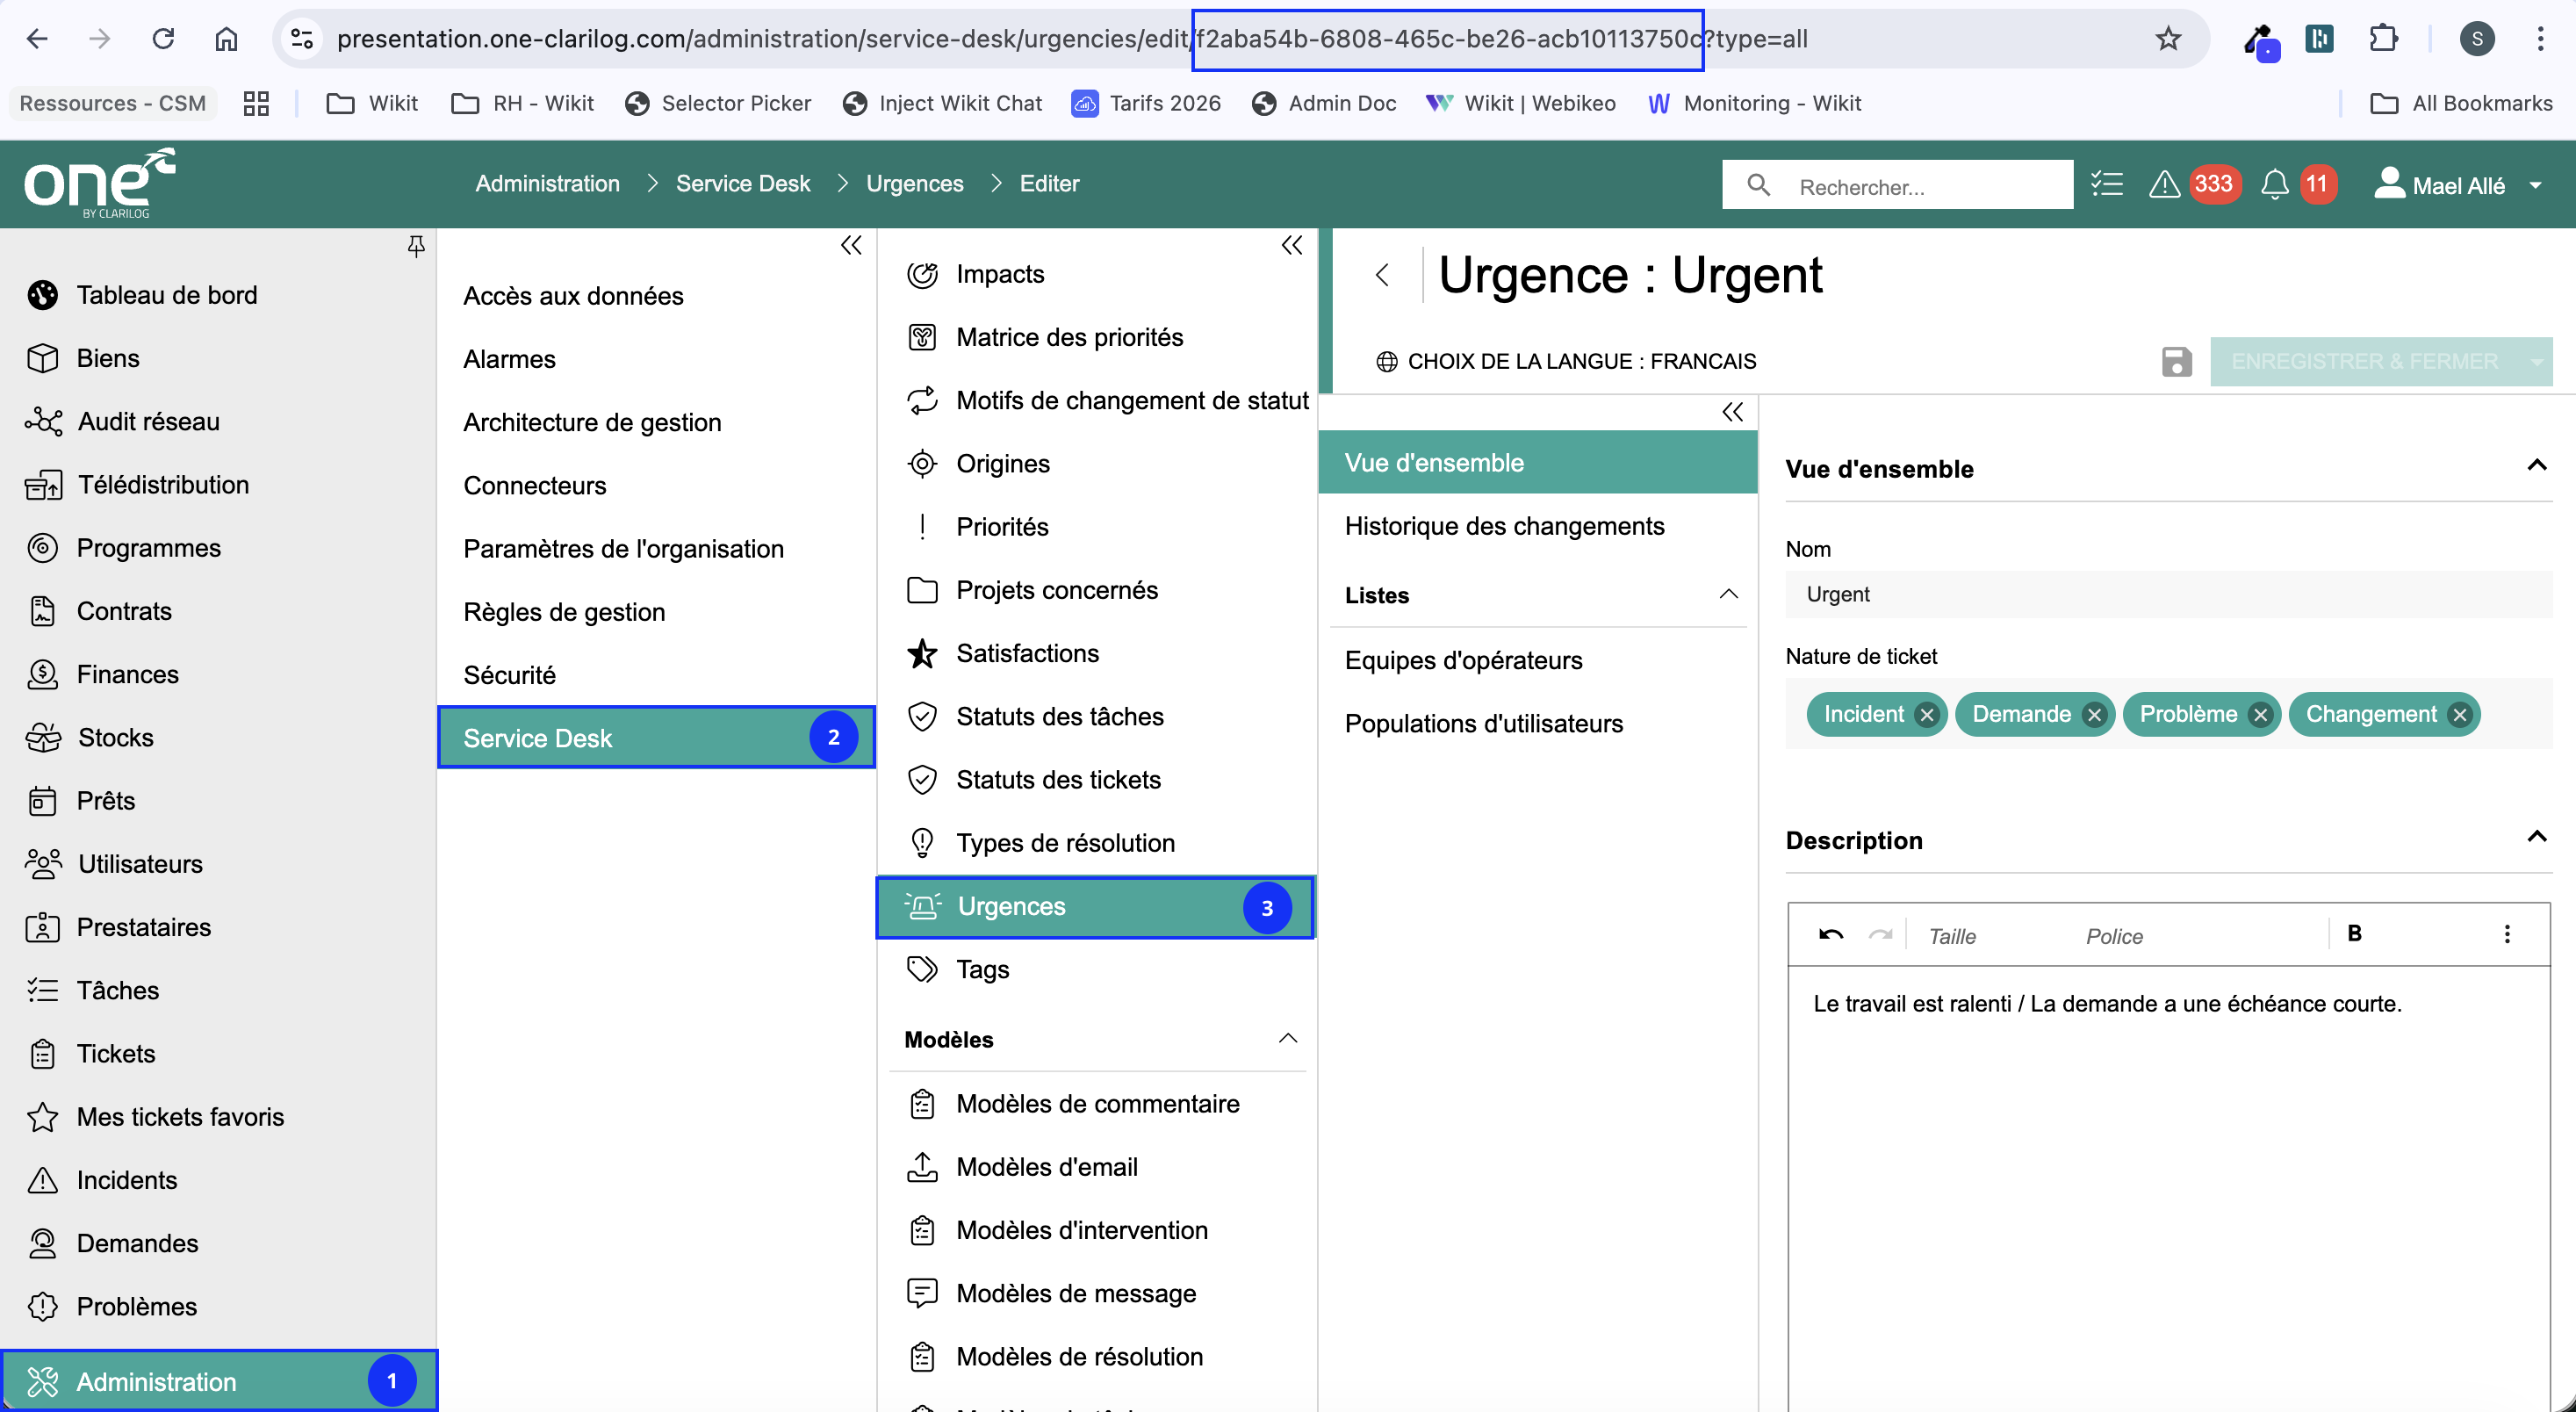
Finding the urgency ID:
To find the urgency ID, simply go to the Administration menu (1) → Service Desk (2) → Urgencies (3). Then select the urgency level of your choice and retrieve the associated identifier available in your browser's URL:
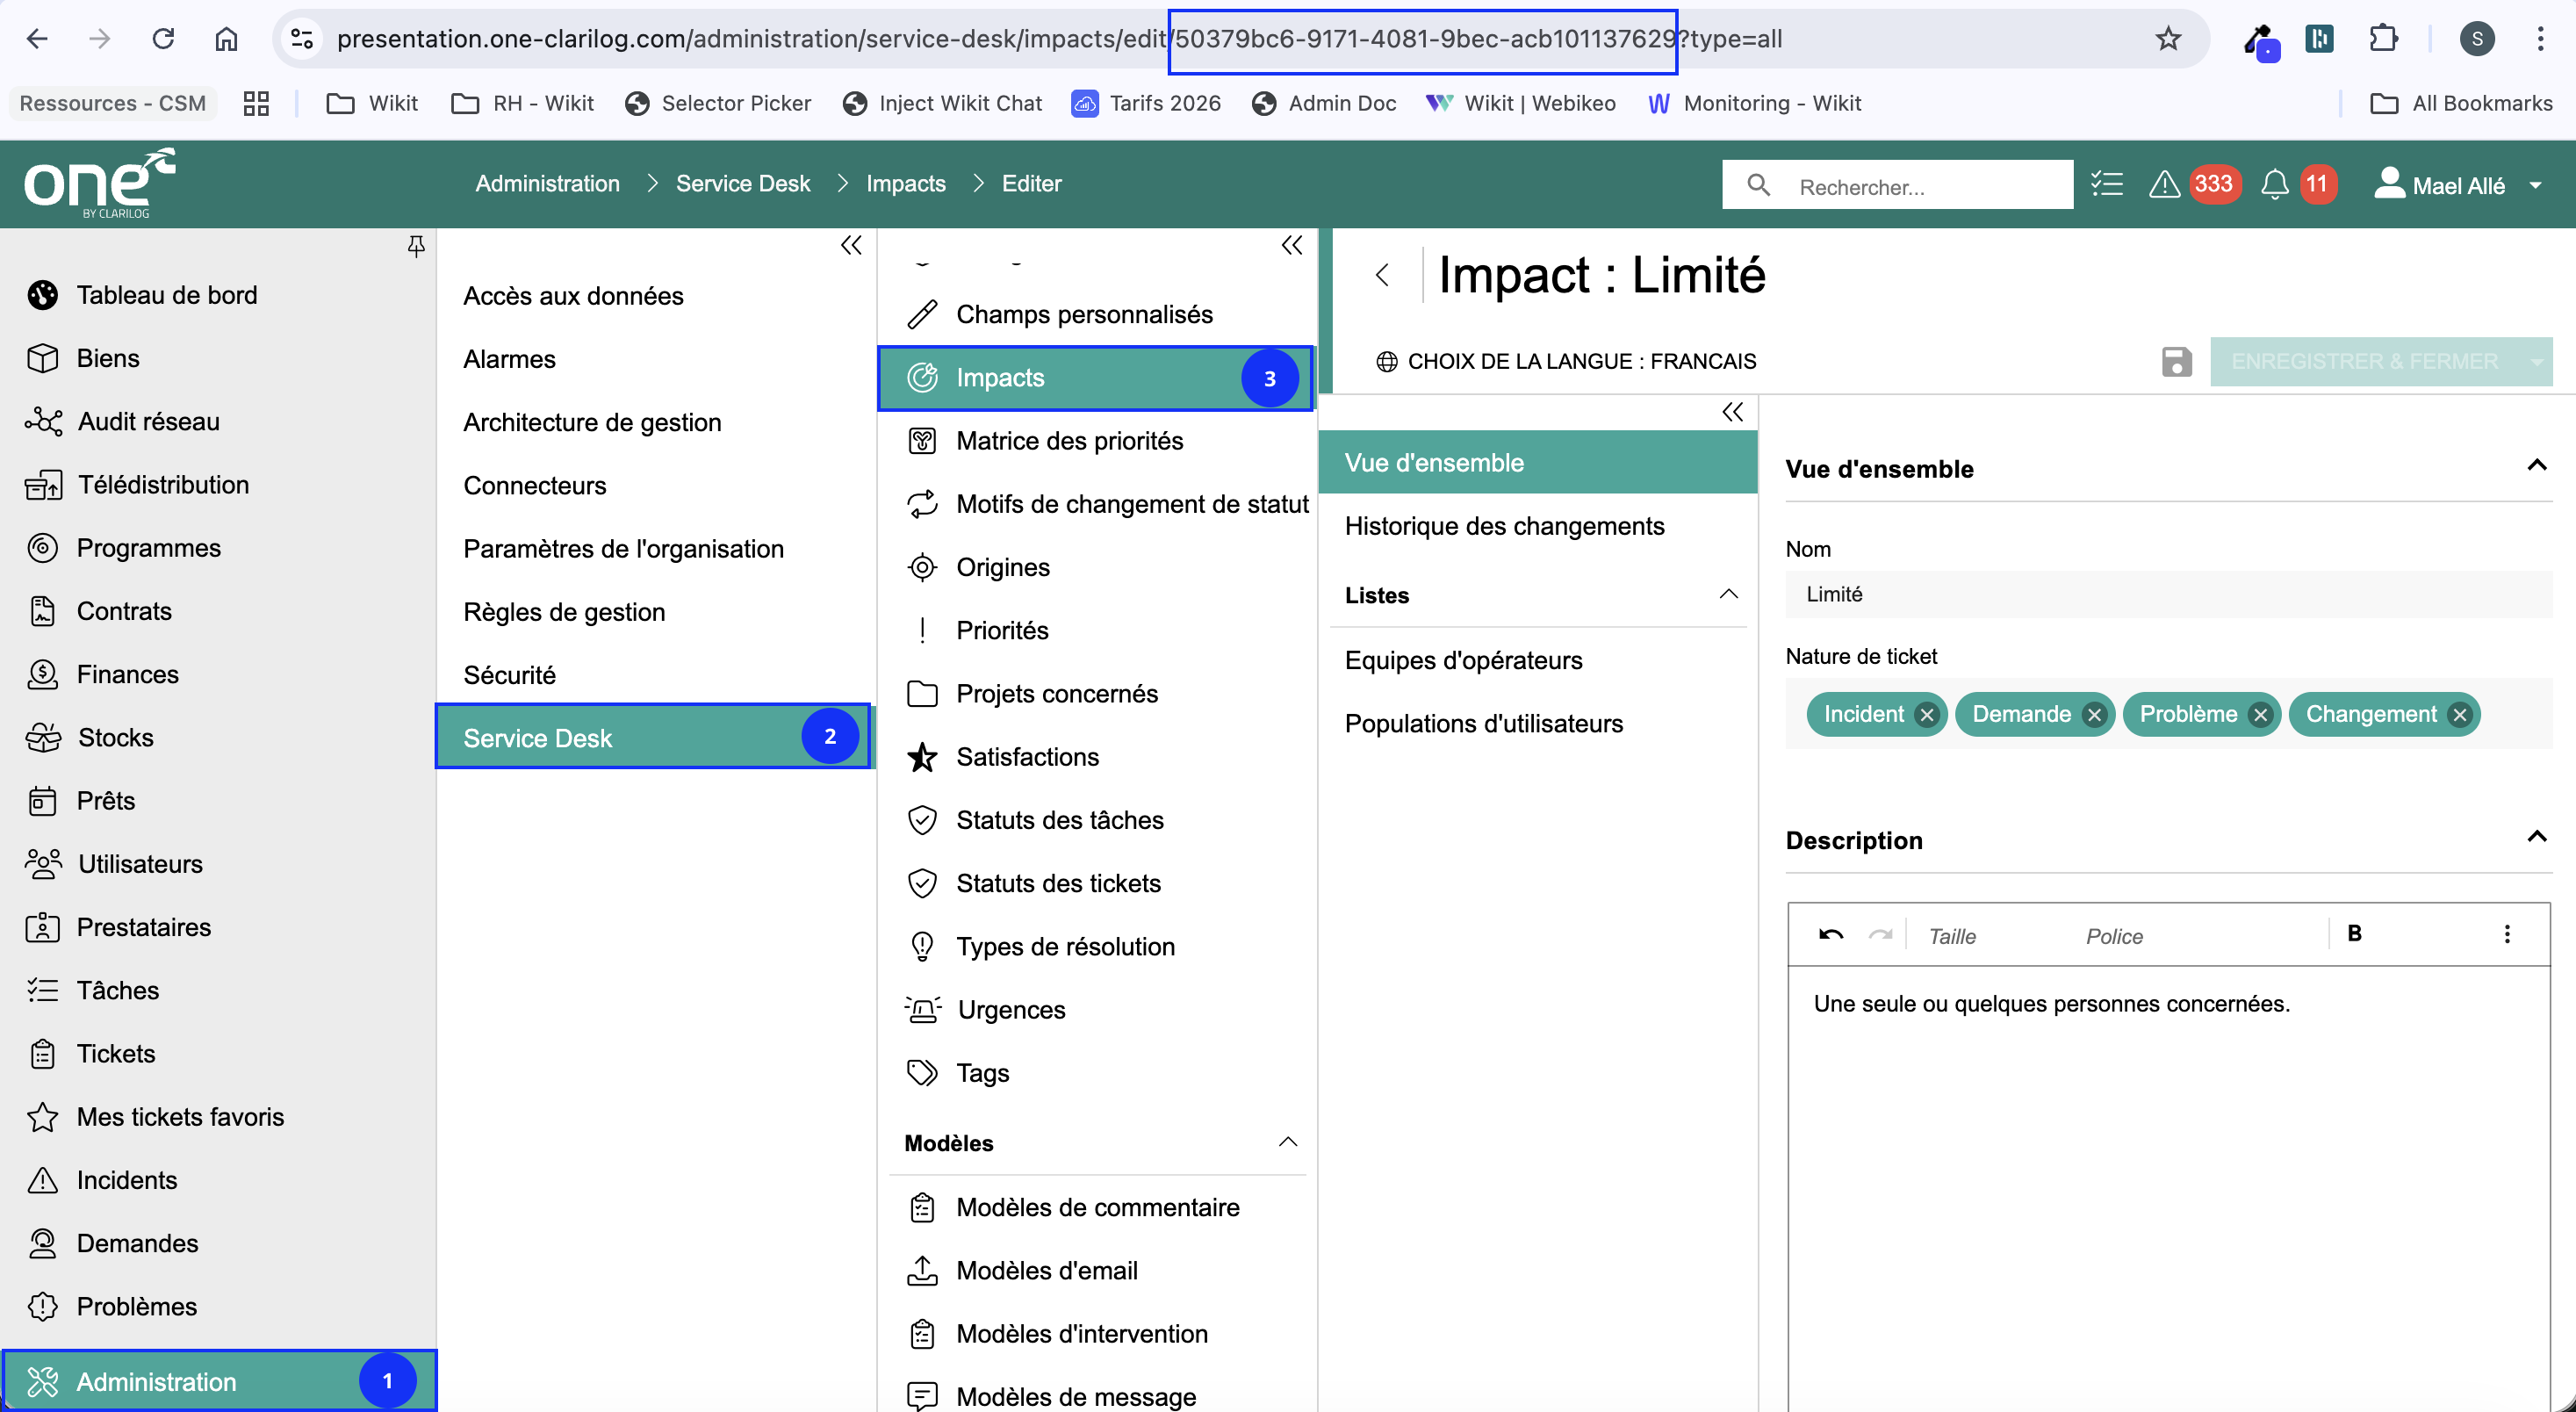
Finding the impact ID:
To find the impact ID, simply go to the Administration menu (1) → Service Desk (2) → Impacts (3). Then select the impact level of your choice and retrieve the associated identifier available in your browser's URL:
Once all of these steps have been completed, you have all the information required to configure the Clarilog ITSM connector ✅
How the Connector Works
Ticket Creation
From the Wikit Semantics chat, users can create a Clarilog ticket of the configured type (Type of tickets to create). The ticket is created via the Clarilog API using the reception channel, category, impact, and urgency configured in the connector's required information.